Most people think lace patterns come from hand drawings. Sketch something, send it to a factory, done.
That’s not how chemical lace works.
Every floral motif you see on guipure trim started as a digital file, built stitch by stitch in specialized software. The design process is full of invisible rules that determine whether a pattern survives manufacturing—or falls apart in the dissolving bath.
I’ve been designing chemical lace for years. Let me show you what actually happens from concept to finished trim.
Why Lace Design Is Different From Regular Textile Design
The “No Background” Problem
Regular embroidery sits on fabric. Thin areas or weak connections? The base fabric holds everything together.
Chemical lace has no safety net. The base dissolves away. Whatever you’ve designed must hold together entirely on its own.
Structural Requirements
Every motif needs connection points. Isolated elements don’t work—they’d literally fall off when the base dissolves.
Think of it like building a bridge. No floating sections allowed. Every decorative element must link back through thread bars or bridges.
| Design Element | Regular Embroidery | Chemical Lace |
|---|---|---|
| Isolated motifs | Works fine | Will fall apart |
| Thin lines | No problem | Must be reinforced |
| Dense fill areas | Optional | Often required for stability |
| Connection bars | Decorative choice | Structural necessity |
Density Matters More Than Beauty
A design can look stunning on screen and fail in production.
Areas too sparse won’t survive dissolving. Areas too dense create stiff trim that won’t drape.
Finding the balance takes experience.
The Lace Design Process: Step by Step
Step 1: Concept Development
Every design starts with inspiration. Market trends, customer requests, historical patterns, or original concepts.
But professional lace design thinks in constraints from the beginning. Before sketching, I consider:
What width will this trim be?
Single edge or double edge design?
How will the motifs connect?
What’s the target price point?
Where does inspiration come from?
Bridal trends shift every season. Art Deco geometrics one year, romantic florals the next.
We track runway shows and Pinterest boards. But more importantly, we listen to buyers. When multiple customers ask for “something like this but with larger flowers,” that’s a clear signal.
Historical lace archives matter too. Many best-sellers are modern interpretations of Victorian designs.
Step 2: Hand Sketching
Some designers still start with paper. A quick sketch helps visualize flow and proportions.
But increasingly, we skip straight to digital. Hand drawings need complete reinterpretation for production anyway.
What makes a good sketch?
Capture three things: overall repeat shape, relationship between major motifs, and edge treatment.
Don’t worry about individual petals. Those get designed in software. Focus on: “Does this composition flow when tiled across a full roll?”
I’ve seen gorgeous detailed sketches fail as lace because the artist never considered how the pattern would repeat.
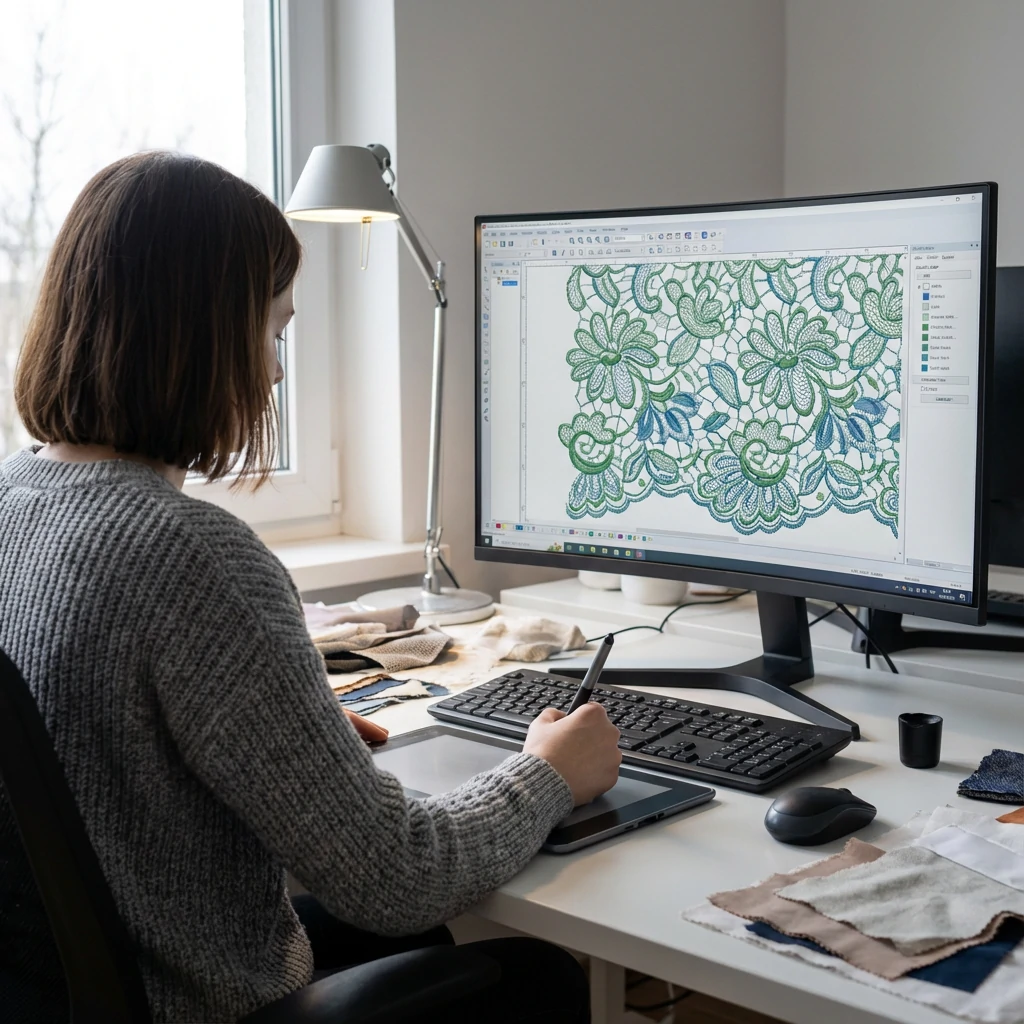
Step 3: CAD Digitization
This is where the real work happens.
We use specialized embroidery software—Wilcom, Pulse, or similar. These aren’t general design tools like Illustrator. They’re built specifically for stitch patterns.
The digitization workflow:
First, import the sketch as a background layer. Then build the pattern element by element:
Outlining: Define boundaries of each motif. Flowers, leaves, shapes—each gets its own outline using polyline tools.
Fill programming: Specify how each area gets stitched.
| Fill Type | Appearance | Best For |
|---|---|---|
| Satin | Smooth, shiny | Petals, outlines, small areas |
| Tatami | Textured, matte | Large fill areas |
| Motif fill | Patterned | Decorative texture effects |
Connection bars: Add bridges linking motifs together. Typically 2-3mm wide with dense satin stitching. Strong enough to hold, subtle enough not to dominate.
Stitch density: Adjust thread coverage throughout. Dense for structural areas, lighter for decorative details. Standard: 4-5 lines per millimeter for satin fills.
How long does digitization take?
Simple geometric border: 2-3 hours. Complex allover floral: 2-3 days.
Speed isn’t the goal. Precision is. One misplaced connection bar can ruin an entire production run.
Step 4: Technical Review
Before any thread touches fabric, the design file gets reviewed.
We check for:
Weak points: Areas where connections might fail
Jump stitches: Long thread jumps that could snag
Density consistency: Avoiding thickness changes that cause puckering
Repeat alignment: Pattern tiles correctly across full width
The review process:
Our senior digitizer reviews every new design. They’ve seen thousands of patterns succeed and fail.
Common issues they catch: Connection bars that look fine but are actually too thin. Fill areas where stitch direction creates stress points. Repeat boundaries that don’t quite match.
This catches most problems. But some issues only appear in actual production.
Step 5: Sample Production
The design file goes to a Schiffli machine for sampling.
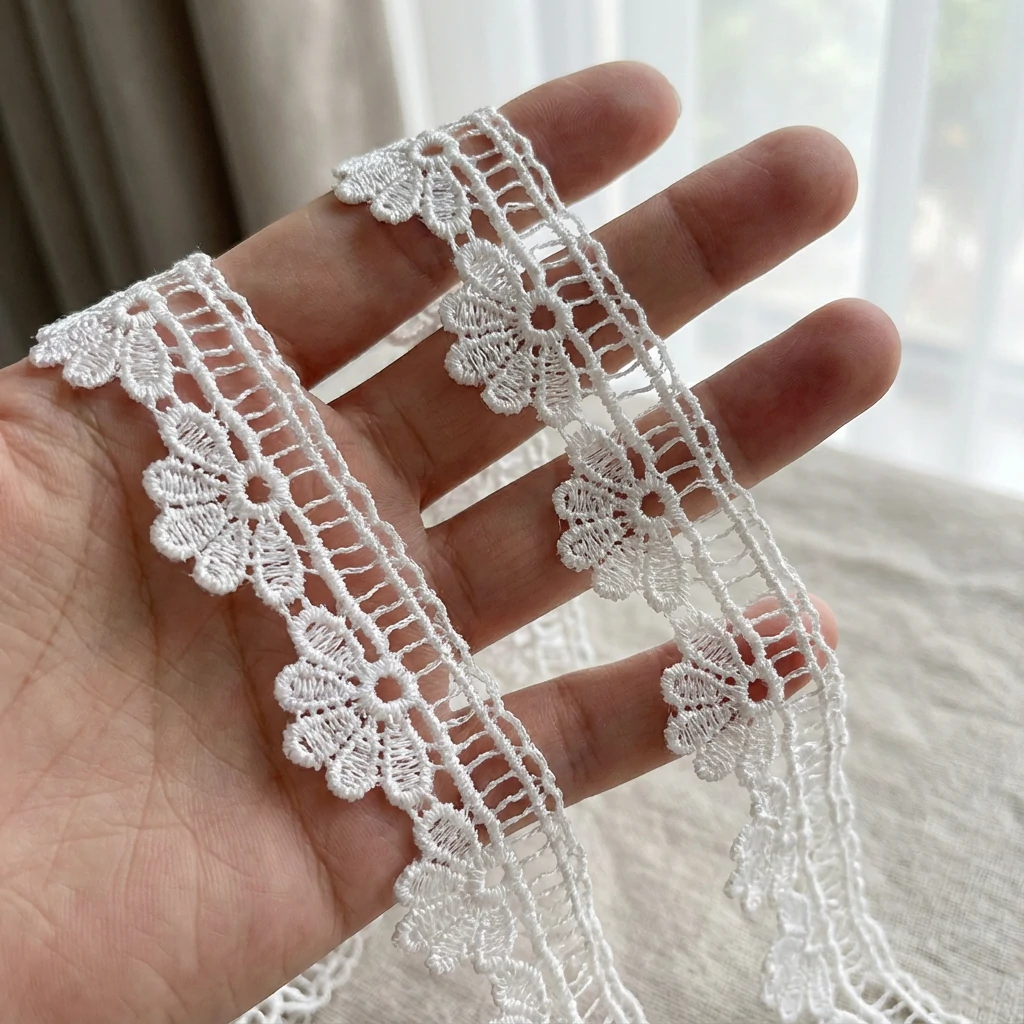
We run half a meter on actual water-soluble fabric. Then dissolve it and evaluate.
The dissolving test:
We submerge the sample in hot water—around 80°C. The PVA base dissolves over 15-20 minutes.
What remains is the bare truth about your design. Weak connections reveal themselves immediately. Areas that looked fine on screen suddenly sag or distort.
What we’re looking for:
Does the pattern hold together after dissolving?
How does it feel in hand?
Are proportions right at actual size?
Does it meet target weight and drape?
Nine out of ten designs need adjustments after the first sample.
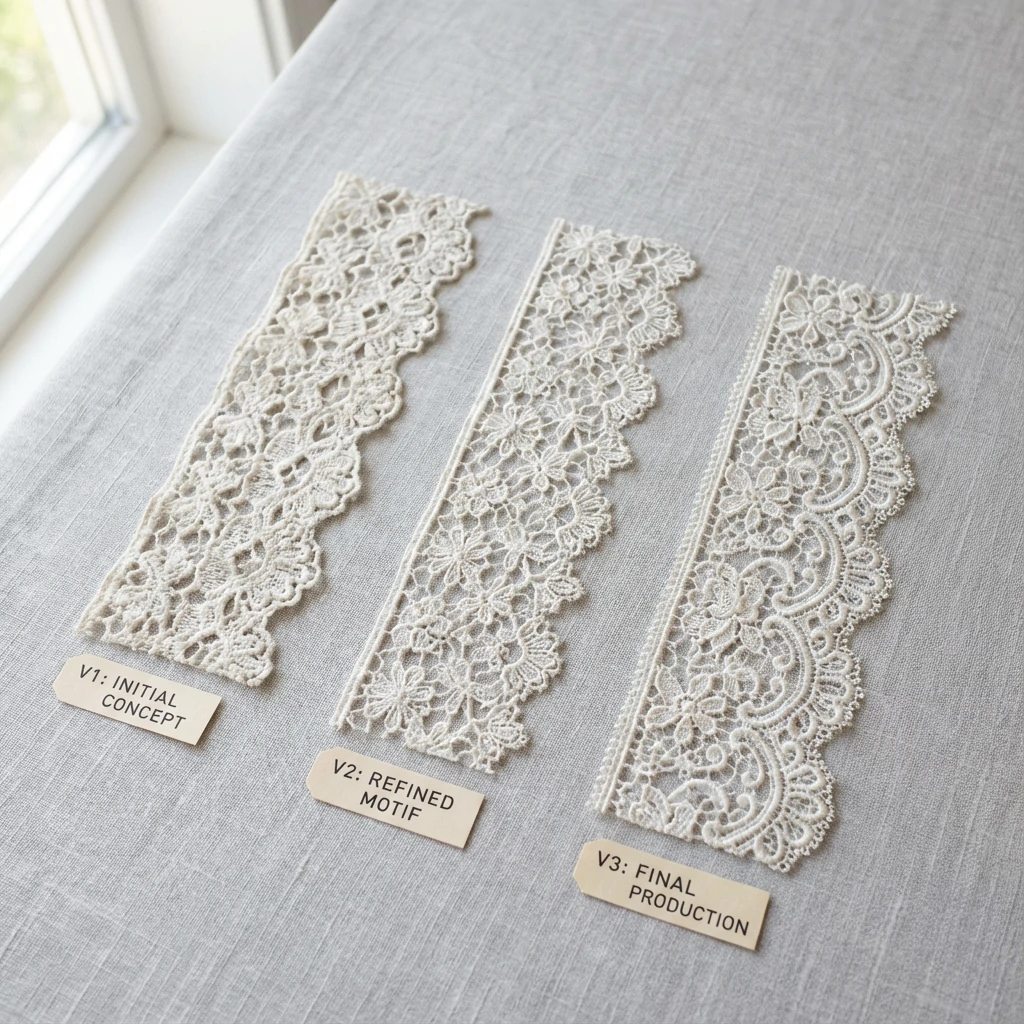
Step 6: Iteration and Refinement
Based on the sample, we modify in software. Maybe connection bars need reinforcing. Maybe a fill area needs more density. Maybe the whole design needs to scale.
New sample. Evaluate. Modify. Repeat.
| Design Complexity | Average Iterations | Timeline |
|---|---|---|
| Simple border | 2-3 rounds | 1 week |
| Medium allover | 3-4 rounds | 2 weeks |
| Complex multi-element | 5-6 rounds | 3-4 weeks |
When is it ready?
The design passes three tests: structural integrity (holds together), hand feel (drapes naturally), and visual consistency (looks even across full width).
What Makes a Successful Lace Design
A pattern that looks beautiful on screen means nothing if it fails in production—or sits unsold in your warehouse.
Successful commercial lace design balances four factors.
Visual Appeal
The pattern needs to look good. But “good” varies by market.
Bridal buyers want romantic, flowing florals. African fashion demands bold geometric motifs. Lingerie requires delicate, small-scale patterns that flatter the skin.
Know your target market before you design. Every decision flows from there.
Structural Integrity
Beauty means nothing if the lace falls apart.
The pattern must survive the dissolving bath, post-processing washing, shipping and handling, and cutting and sewing by your end customer.
Designs that look delicate but hold together—that’s the real skill. Anyone can make sturdy lace that looks heavy. Making it look fragile while remaining strong takes experience.
Production Efficiency
Can the pattern be manufactured at reasonable cost?
Designs with excessive stitch counts take longer to produce. Complicated color changes require machine stops and manual intervention. Both drive up price.
The best commercial designs achieve maximum visual impact with optimized stitch paths. More beauty per stitch, not more stitches per meter.
Versatility
Patterns that work across multiple widths, colors, and applications get more use.
A floral motif that works equally well on 5cm trim and 12cm trim has obvious commercial advantages. So does a design that looks good in ivory, black, and blush without modification.
Versatile designs spread development costs across more SKUs.
FAQs
How are lace patterns designed?
Modern lace patterns are designed using specialized CAD software like Wilcom or Pulse. Designers create digital files specifying every stitch—pattern outlines, fill areas, and connection points. For chemical lace, all motifs must connect structurally since the base fabric dissolves away during production.
What software is used for lace design?
Professional manufacturers use embroidery digitization software: Wilcom, Pulse, or Tajima. These programs specify stitch types, density, directions, and sequence, then generate machine-readable files. They’re different from general graphic design software.
How long does it take to design a lace pattern?
From concept to production-ready file: 1-4 weeks depending on complexity. This includes concept development, CAD digitization, technical review, sample production, and several rounds of refinement.
Can I create my own lace design for manufacturing?