Eyelet lace trim is one of the easiest ways to give a simple garment a professional, boutique-style finish. Don’t be intimidated by the intricate details—mastering this technique is actually much simpler than it looks. Below, we walk you through the essential tools, trim types, and step-by-step instructions to help you achieve a polished result on your very first try.
What Is Eyelet Lace Trim?
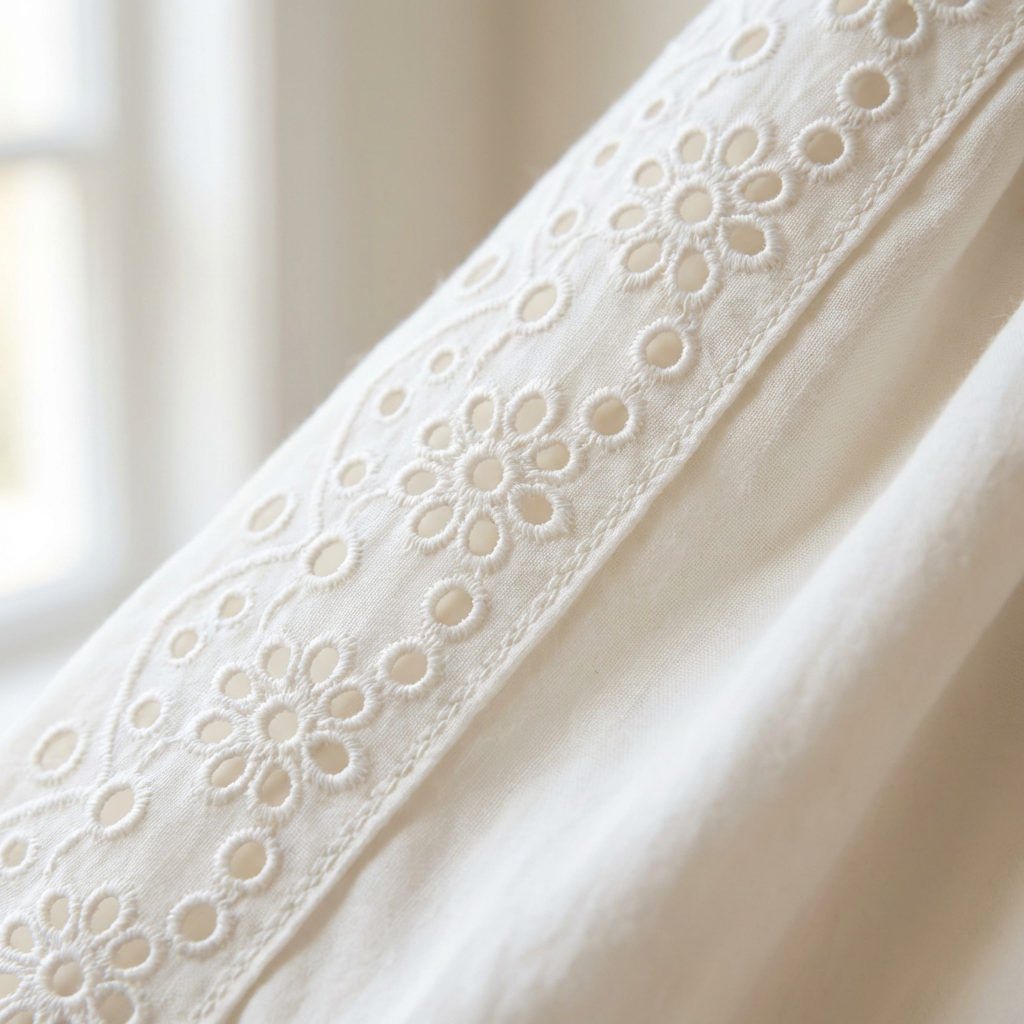
Eyelet lace trim is a decorative border defined by a pattern of small, punched-out holes surrounded by embroidery on a fabric base. Unlike traditional lace made solely of thread, this woven foundation gives the trim structure and a clean edge while remaining lightweight. Its breathable, airy quality makes it an ideal finish for hems, sleeves, and necklines, adding texture without looking overdone.
Types of Eyelet Lace Trim
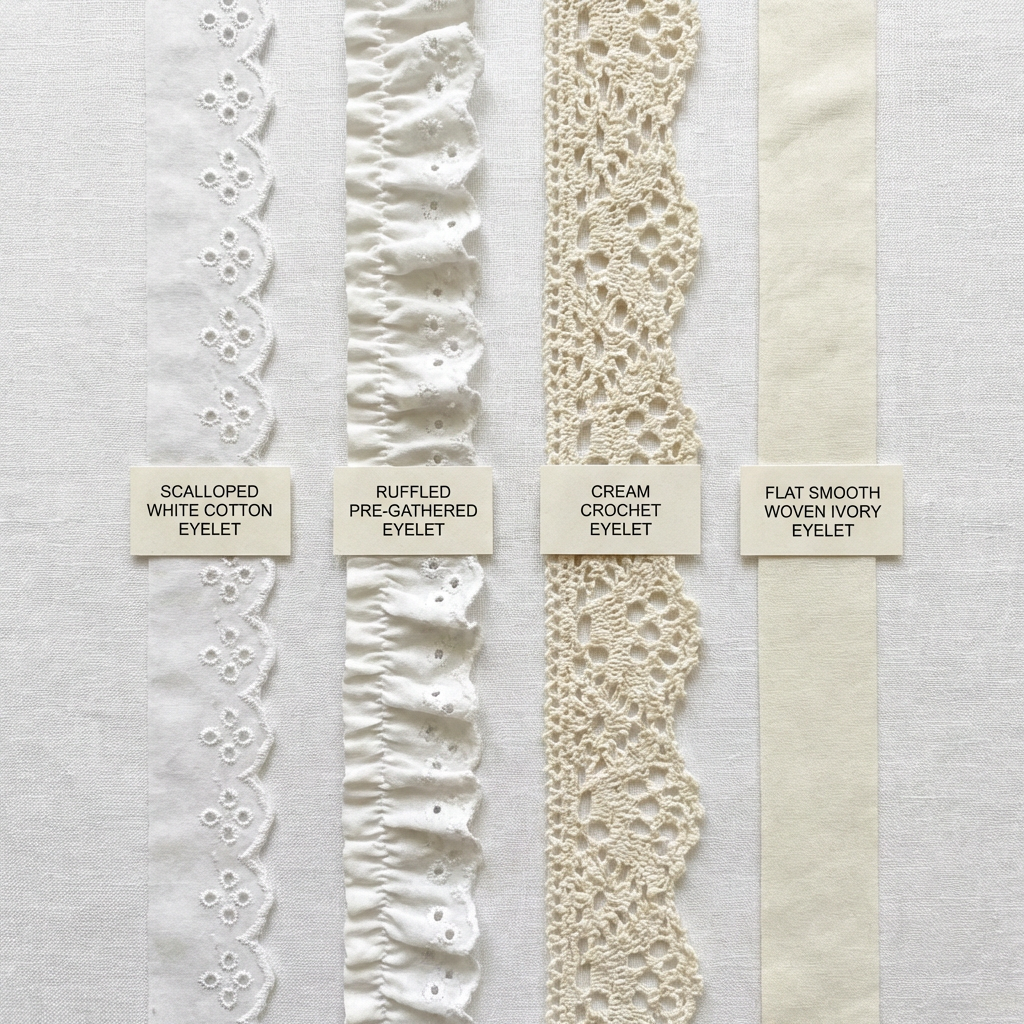
Not all eyelet trim is the same. Picking the right type for your project makes a significant difference in how the finished piece looks and how easy it is to work with.
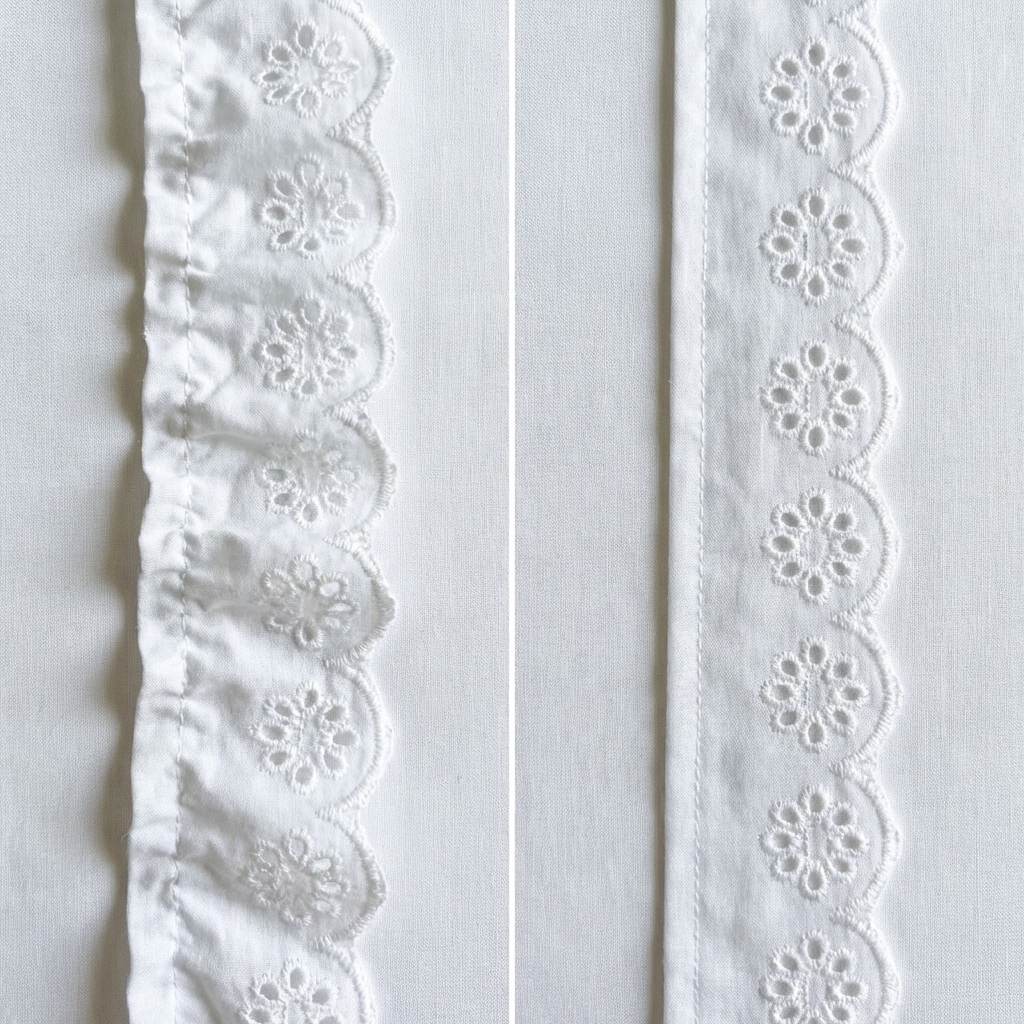
Scalloped Eyelet Lace Trim
Scalloped eyelet trim has a curved, wave-like edge along one or both sides. It’s one of the most popular styles for hemlines and sleeve edges, because the scallop shape adds natural movement without requiring any additional finishing from you — the edge is already decorative on its own. I’d recommend this for blouses and skirts where you want a soft, romantic finish without a lot of extra work.
Ruffled Eyelet Lace Trim
Ruffled eyelet trim comes pre-gathered, meaning the volume and fullness are already built in before you ever touch a sewing machine. You don’t need to gather it yourself — just position, pin, and sew. It’s an excellent choice for children’s clothing, decorative pillow edges, and any project where you want the trim to make a clear visual statement.
Crochet Eyelet Lace Trim
Crochet eyelet trim has a more handcrafted, bohemian character. The holes are organic rather than perfectly uniform, and the texture sits slightly heavier than woven eyelet. It pairs beautifully with denim, canvas, and natural linen — anywhere you want a relaxed, artisanal finish rather than something polished and refined.
Flat vs. Gathered Eyelet Trim
Flat eyelet trim lies completely smooth against your fabric, which makes it ideal for precise, structured applications like cuffs, collar edges, or decorative surface details. Gathered trim adds fullness and dimension wherever it’s applied. Knowing which one your project calls for before you buy saves a lot of confusion at the cutting table.
Picking the Right Sewing Pattern to Complement Eyelet Trim
Selecting the right pattern is just as important as the trim itself. Ensure your garment choice complements the weight and structure of the eyelet lace.
- Stick to straight hemlines: Patterns with straight edges, such as A-line skirts or boxy tops, are the most forgiving. They allow you to attach the trim in one continuous run without complex maneuvering.
- Approach curves with technique: Curved hems require clipping the trim’s seam allowance to ensure it lies flat without puckering. While achievable, this adds mechanical difficulty compared to straight lines.
- Match fabric weight and scale: Balance is key. Pair lightweight trim with airy fabrics like voile or linen, and use sturdier trim for heavier bases. Visually, opt for simple trim on busy prints, saving wider, elaborate designs for solid colors.
What You’ll Need Before You Start
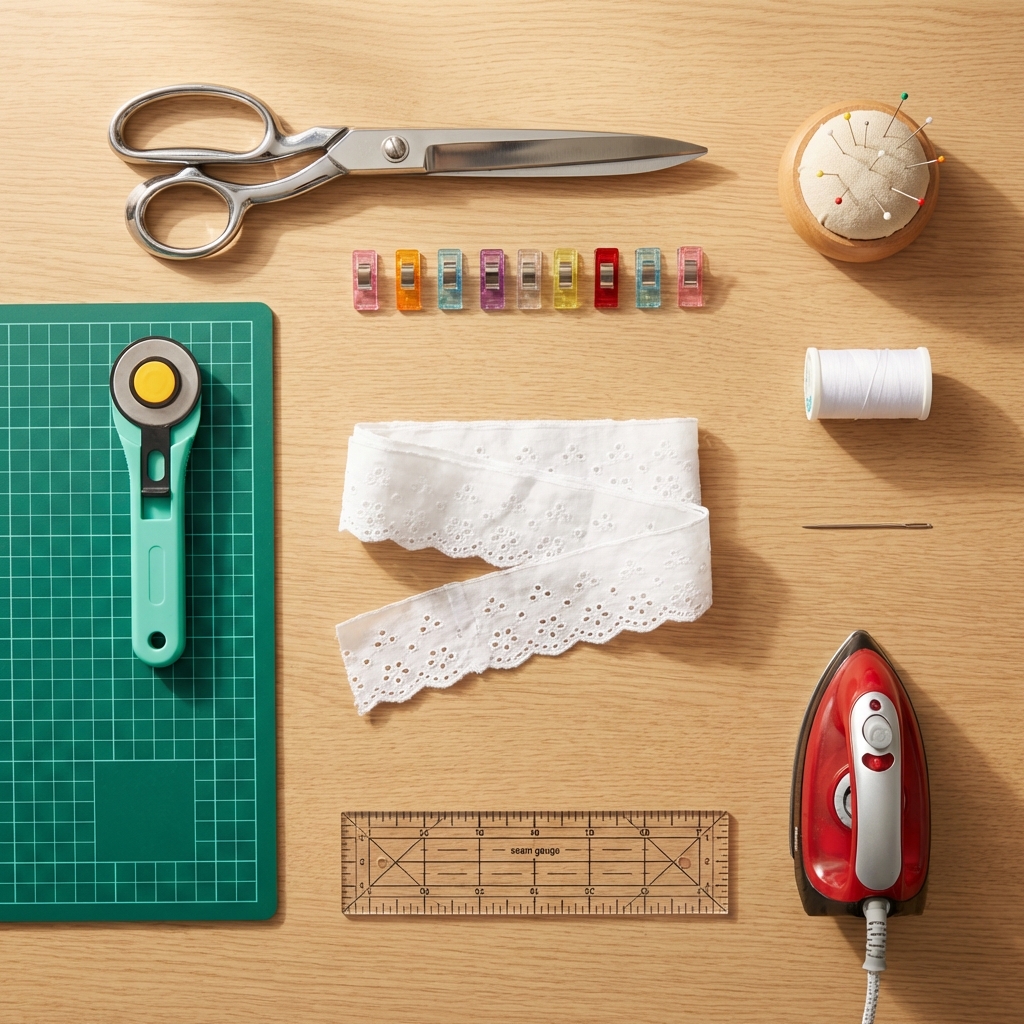
| Item | Specification & Purpose |
|---|---|
| Eyelet Lace Trim | Purchase the finished edge length plus 10% for overlaps and joins. Tip: Choose quality trim with consistent spacing and stable headers to avoid fraying. |
| Cutting Tools | Sharp fabric scissors or a rotary cutter and mat for clean edges. |
| Securing Tools | Straight pins or wonder clips to hold trim in place. |
| Sewing Machine | Standard presser foot required; a walking foot is recommended for even feeding. |
| Hand Sewing | Needle and matching thread for delicate finishing or tacking. |
| Pressing | Iron and pressing cloth. |
| Measuring | Seam gauge or clear ruler for precise alignment. |
| Edge Sealing | Fray check or clear nail polish to seal cut ends. |
How to Sew Eyelet Lace Trim — Step-by-Step
Follow these steps in sequence to ensure a professional finish. Do not skip the final pressing, as it is crucial for setting the seam.
Step 1 — Measure and Cut
Measure the garment edge and add at least 1 inch (2.5 cm) for overlap or joins. Cut cleanly with sharp scissors to avoid chewing the fabric. Immediately apply fray check or clear nail polish to the cut ends, as eyelet trim unravels quickly if left raw.
Step 2 — Pin and Baste
Lay the garment flat and pin the trim every 2 to 3 inches, keeping it relaxed rather than taut to prevent puckering. Securing the trim with a long basting stitch (3.5–4mm) is highly recommended. This prevents shifting under the presser foot and ensures the final line is perfectly straight.
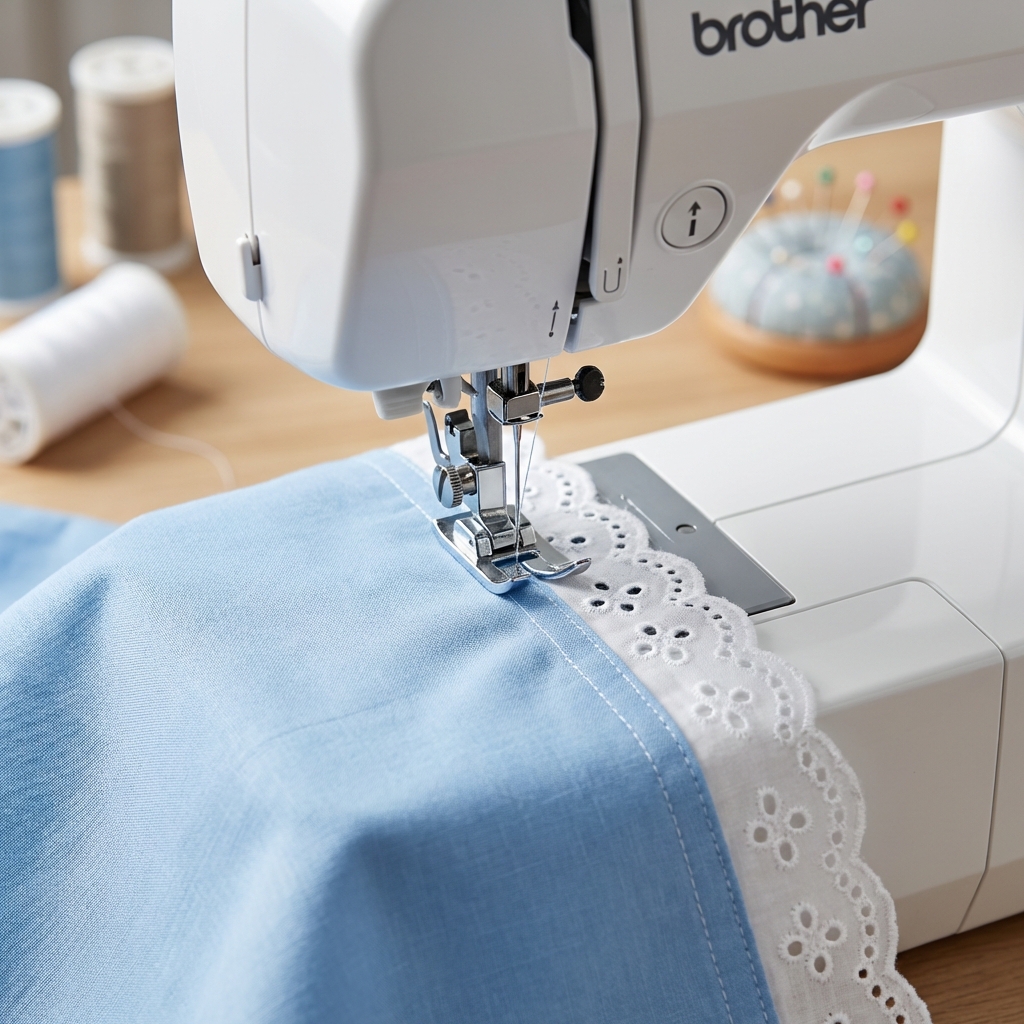
Step 3 — Sew by Machine
Set your machine to a straight stitch (2.5mm length) using a universal needle (70/10 or 75/11). Sew along the top edge; for corners, stop with the needle down to pivot. If sewing curves, clip the trim’s seam allowance beforehand so it lies flat without bunching.
Step 4 — Sew by Hand (For Delicate Fabrics)
For fine materials like silk or organza, machine needles can cause visible damage, making hand sewing essential. Use a single strand of matching thread with a slip stitch or whip stitch, spaced about ⅛ inch apart. This method takes longer but creates a virtually invisible finish on the right side.
Step 5 — Press and Set
Remove any basting stitches and press the seam using a pressing cloth to protect the trim’s texture. Use a “lift and press” motion rather than dragging the iron. This final step sets the thread into the fabric and gives the hem a crisp, professional appearance.
The Best Ways to Finish Your Edges
The right finish ensures your garment withstands wear and washing. Choose the method that best fits your fabric weight and garment style.
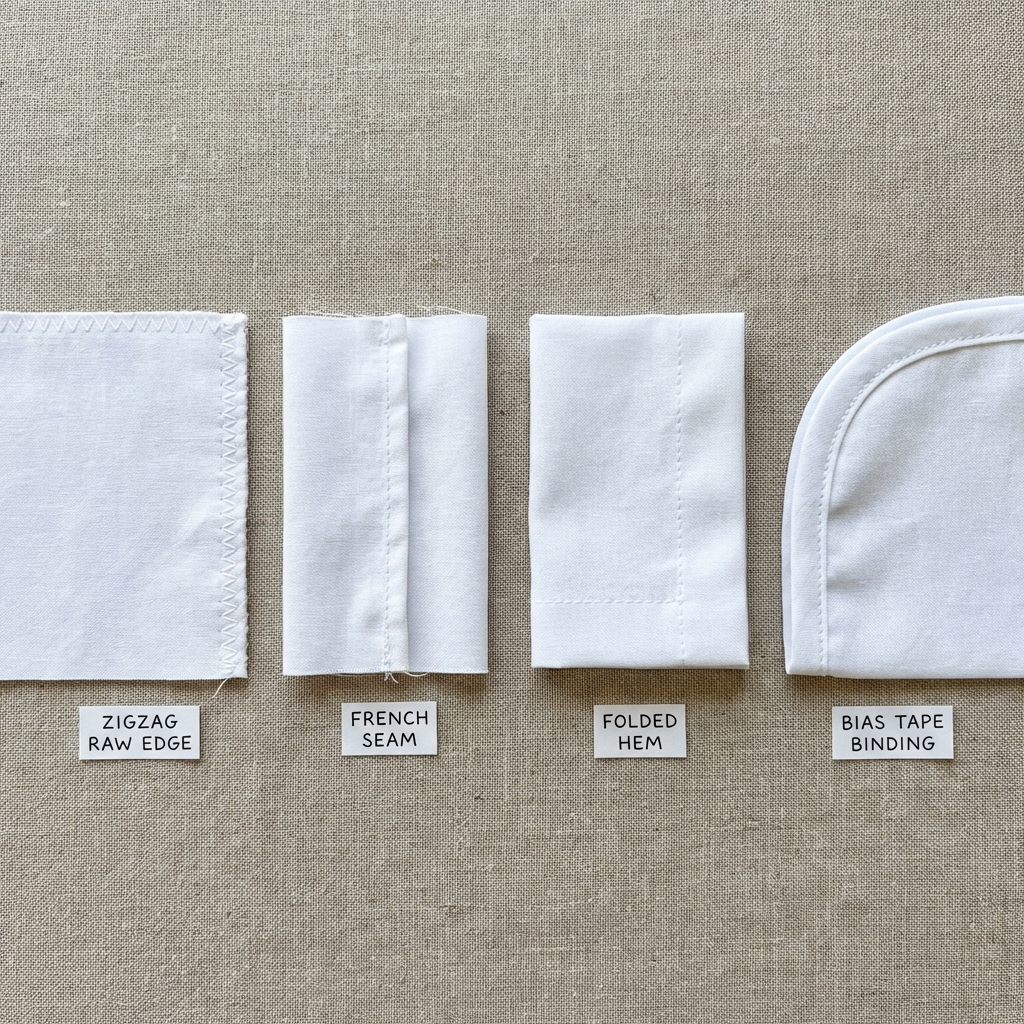
Zigzag Stitch Finish
The most accessible method for beginners. Simply run a zigzag stitch along the raw seam allowance to wrap the threads and prevent unraveling. While not the most refined look internally, it is fast, effective, and works perfectly for casual garments.
French Seam
The best choice for sheer or lightweight fabrics where seams might show through. This technique completely encloses raw edges inside a double fold.
- How to: Sew wrong sides together at ¼ inch, trim closely, then fold right sides together and sew again at ⅜ inch. The raw edge is trapped inside, leaving a clean finish on both sides.
Folded Hem Method
Ideal for attaching trim to an already-finished edge or as a decorative surface layer (like on a pocket or yoke). Fold the raw edge of the trim under by ¼ inch, press flat, and topstitch directly onto the fabric. This creates a neat, flat finish without an exposed seam allowance.
Seam Binding (Bias Tape)
Essential for curved edges or heavier fabrics. Because bias tape cuts across the grain, it stretches around curves without puckering. Encase the raw edge inside the tape and sew in one pass. This adds structural durability, making it excellent for garments that are washed frequently.
Troubleshooting & Pro Tips
Eyelet trim is forgiving if you follow the rules. Here are the common issues and how to fix them quickly.
Common Problems & Solutions
| Issue | Cause & Fix |
|---|---|
| Trim Puckers or Waves | Cause: Stretching the trim during pinning or high thread tension. Fix: Steam press to relax the fibers. If severe, unpick and re-sew, keeping the trim relaxed. Lower machine tension slightly. |
| Skipped Stitches | Cause: Dull or wrong-sized needle. Fix: Switch to a fresh 70/10 or 75/11 universal needle. Ensure the trim lies flat under the foot without bunching. |
| Trim Shifts While Sewing | Cause: Uneven feeding between trim and fabric. Fix: Use a walking foot to feed both layers evenly. Alternatively, hand-baste the trim securely before machine sewing. |
| Ends Fray Quickly | Cause: Raw woven edges unravel fast. Fix: Apply fray check or clear nail polish immediately after cutting. To join ends, fold one side under by ½ inch, overlap, and sew through both layers. |
3 Rules for a Professional Finish
- Press at Every Step: Press the fabric before pinning, press the basted line, and press the final seam. This single habit separates homemade looking items from professional ones.
- Test on Scraps: Always sew a test strip using your actual fabric and trim. This reveals tension or needle issues before you damage the garment.
- Match Thread in Daylight: Eyelet trim reveals mismatched thread easily. Check your thread color against the trim in natural light to ensure invisible stitching.
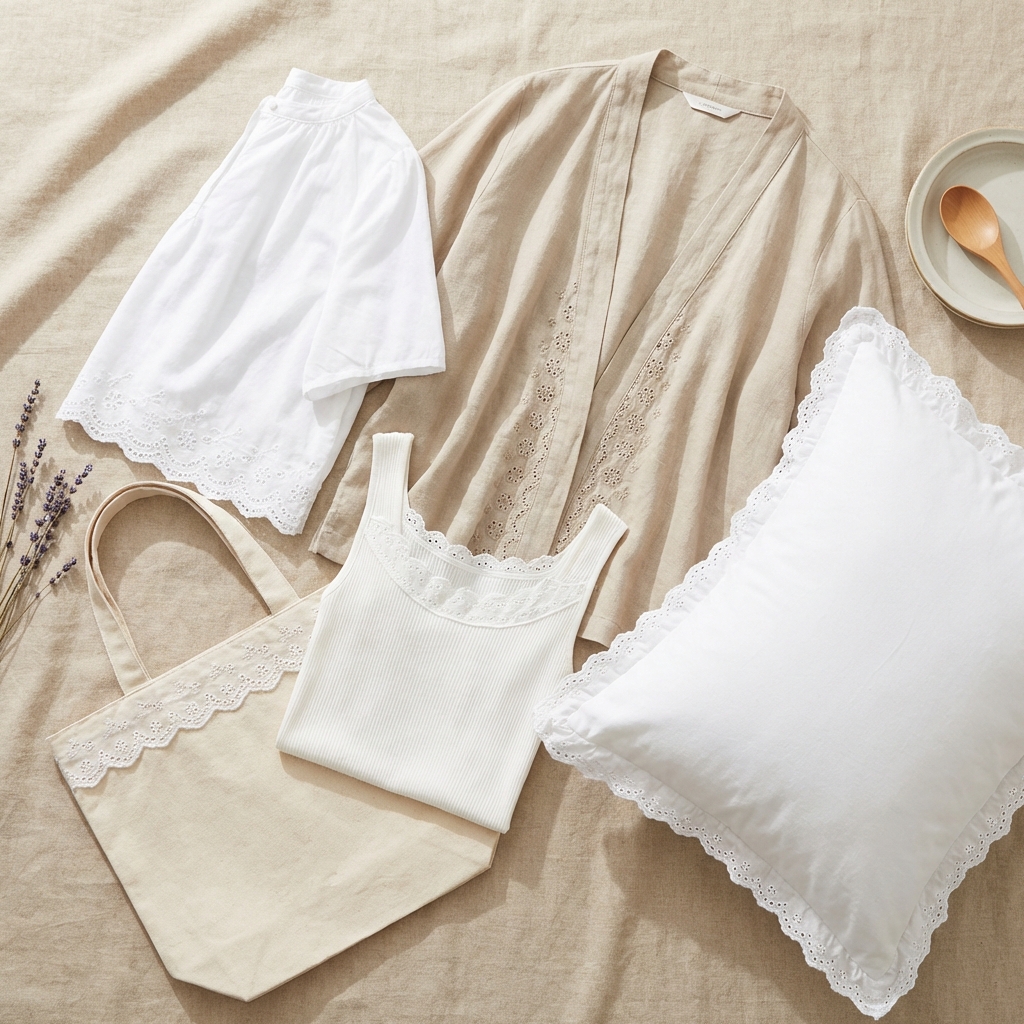
Eyelet Lace Trim Applications
Eyelet trim is best suited for warm-weather fashion due to its breathability and light visual weight.
- Summer Garments (Best Fit):
- Blouses: Attach to the hemline so the border hangs freely. For side slits, finish edges separately before attaching.
- Cardigans: Sew along the front opening or cuffs. Start pinning from the center back to ensure symmetry.
- Tanks & Shorts: Apply to hems. Tip: When sewing on stretch jersey, keep the fabric flat and relaxed to prevent bunching.
- Accessories: Works well on tote bags and sun hats. Use heavier trim with a sturdy header tape for better shape retention.
- Home Textiles: Ideal for pillow covers and curtains. Ruffled or scalloped styles add necessary volume. Scale the trim width to the item (e.g., 2–3 inch trim for curtains).
FAQs
How to sew eyelet lace trim?
Pin and baste the trim to the garment edge, then sew a straight stitch along the top. Finish the raw edges with a zigzag stitch, French seam, or bias tape for durability.
How do you sew ruffled eyelet trim?
Since it is pre-gathered, simply align the flat header tape with your sewing line and stitch. The ruffles will fall naturally below the seam without extra work.
Can I sew eyelet lace trim by hand?
Yes. For delicate fabrics (silk, organza), hand sewing is preferred. Use a slip stitch or whip stitch with matching thread for an invisible finish.
What fabric works best with eyelet lace trim?
Lightweight cottons (poplin, voile, lawn) and linen are the classic choices.