
Introduction
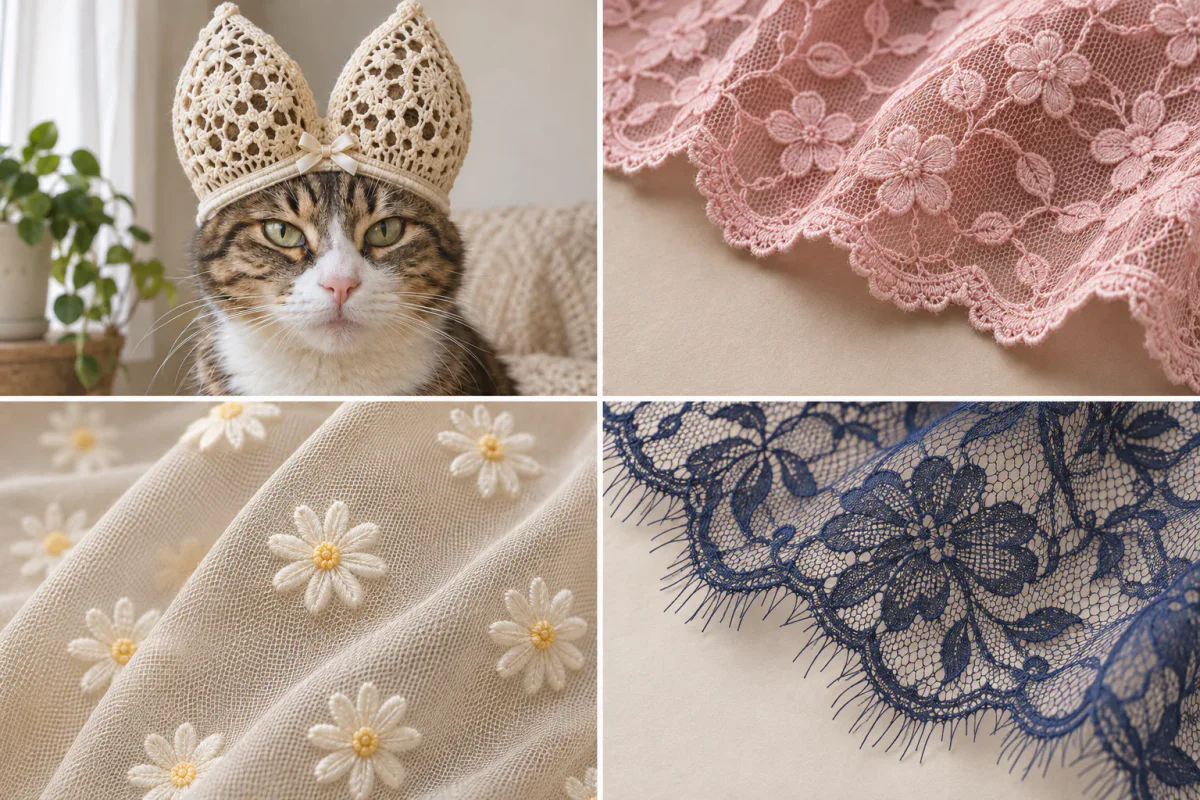
A cat with two lace bra cups perched above its forehead is an unlikely place to start a fabric conversation. The cups look like elaborate rabbit ears. Look past the joke, though, and the interesting part is the lace: a thick loop, a tiny flower or a wispy edge can give the same outline a very different character.
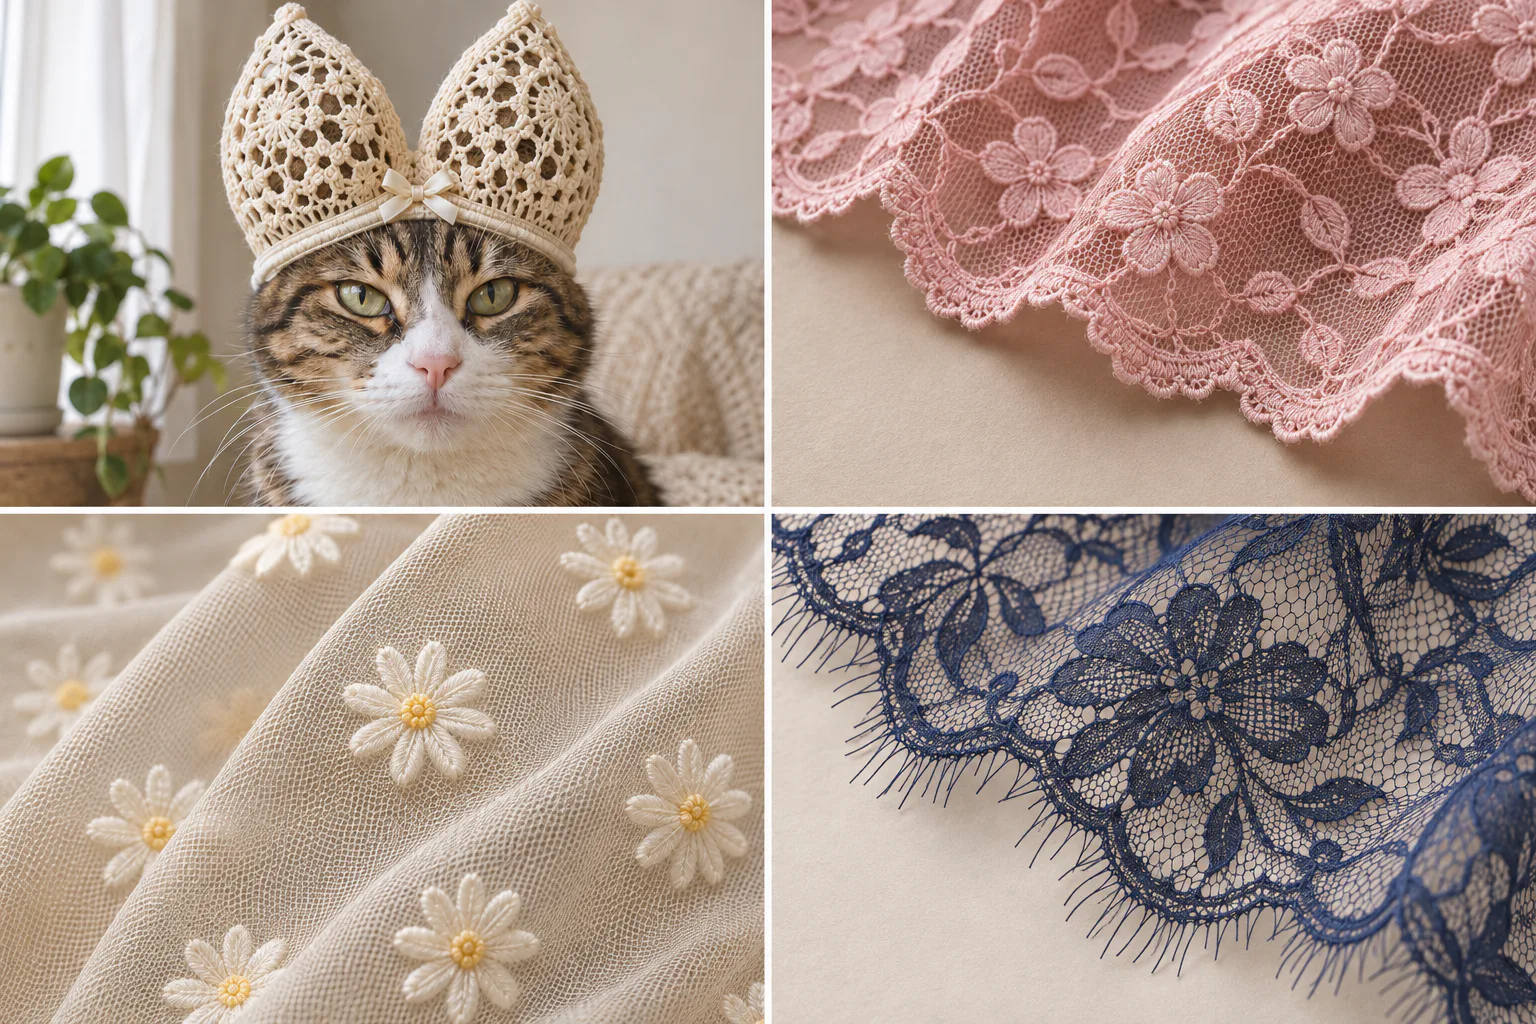
The effect comes from several choices working together. The motif gives us something to recognise; its size and spacing control how busy the surface looks. The ground holds or connects that pattern, while the edge finishes its outline. Yarn and backing change how all of this catches the light. Separating these choices makes it easier to understand why two laces with the same flower can look so different.
Flower size and spacing do different jobs
Small flowers can repeat several times within a narrow visible strip. Their rhythm remains readable even when the design only shows a little lace. A large flower asks for more room: show it whole and it becomes a focal point; cut through its centre and the result may look like disconnected petals. Compare the motif with the area that will remain visible after sewing, rather than judging it only on a full-width swatch.
Size does not tell us density. Small flowers packed close together can make a continuous, busy surface; larger flowers with generous gaps can look much more open. The spaces let a lining colour, skin tone or garment fabric join the pattern. A filled-in petal reads as a solid shape, while an outlined petal lets more of the ground show through. Both the flower and the space around it belong to the design.
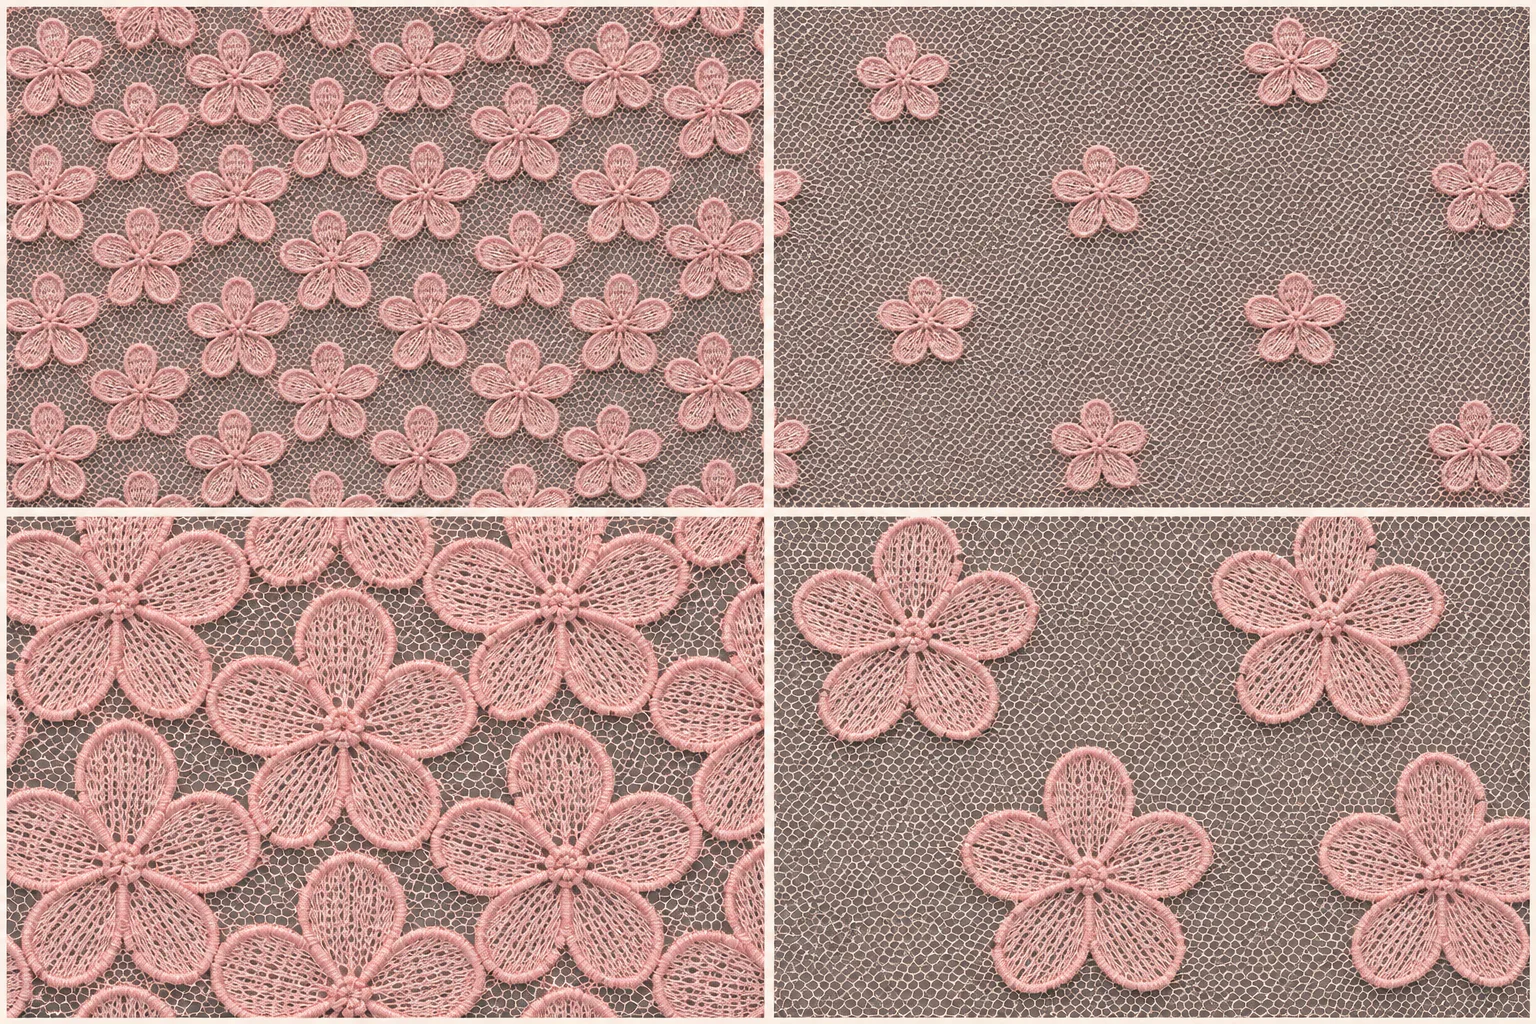
Then follow one flower along the strip until the arrangement starts again. That recurring unit is the pattern repeat. A trailing stem gives the repeat a direction, so turning a piece end for end may change how its flowers face. For paired panels, lay both pieces side by side before cutting: two pieces of the same width are not automatically a balanced pair. For a border, look at where each repeat reaches the scalloped edge, because that becomes the line the eye follows.
Cotton crochet makes the yarn structure visible
In a crochet-style design, the yarn path is often more noticeable than a separate flower laid over a fine net. Rounded loops frame the openings, creating a pronounced outline and a textured surface. A floral version can suggest little rosettes, but geometry works just as well: repeating chevrons give the eye a clear direction without adding a botanical motif.
The YT-127 Chevron Wave cotton crochet trim shows that geometric approach. It is listed as 100% cotton, 4.5 cm wide, with a chevron openwork centre and small picot loops along both edges. The central zigzag supplies the rhythm; the small edge loops keep the border from becoming a plain straight line. Its natural colour and visible yarn texture give this particular design a quiet, handcrafted appearance.
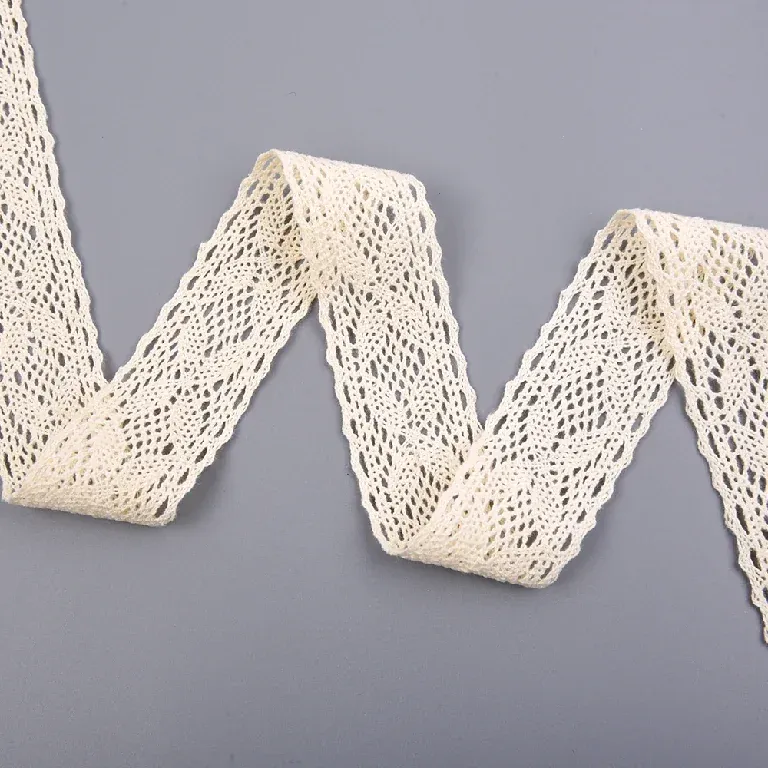
For a blouse cuff, a cotton dress inset or a decorative seam, that continuous geometry can complement a plain main fabric without competing with another floral print. The 4.5 cm strip is an edging or inset reference, not a whole cup panel. Cotton is the fibre description; the visible loops, yarn thickness and finish explain the look. A cotton label alone does not tell us how a finished edge will feel against skin or behave after washing.
Connected flowers and scallops create a continuous border
A fine floral lace shifts attention from individual yarn loops to the motif drawn across the surface. Rounded petals can soften a border, while a more angular leaf or pointed scallop gives it a sharper outline. The important relationship is between the flower and the edge: a scallop that follows the petals makes the flower appear to finish the fabric naturally. A cut straight through the motif creates a different, more abrupt effect.
In YT-335 Pansy Bloom stretch lace trim, the rounded blooms join along a narrow band, with open mesh between them and scallops on both sides. The listed width is 4 cm and the composition is 92% nylon and 8% spandex. Nylon names the main fibre, spandex identifies the elastic fibre, and the flower-and-mesh construction creates the visible pattern.
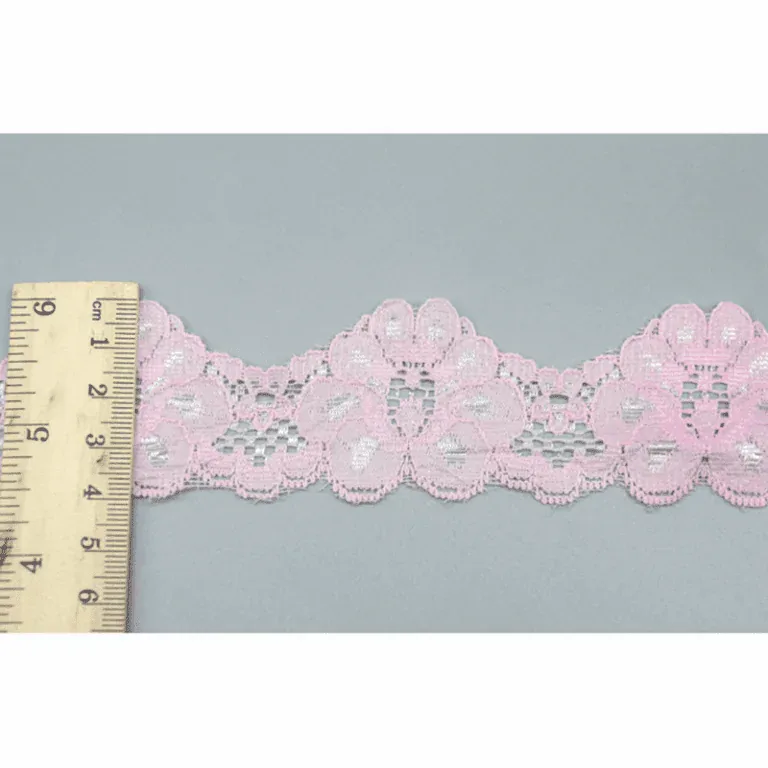
On a camisole neckline or a bra edge, the design question is how much of that flower remains visible above the attachment seam. Burying half a 4 cm strip under the main fabric gives a different result from showing nearly all of it. If the edge is intended to stretch in wear, also look at the flower while the sample is extended in the intended direction: the petals and openings may change proportion. The 8% figure does not supply an extension limit or recovery result.
Mesh embroidery separates the flower from its ground
With embroidery on mesh, there are two visible layers to read. The mesh is the continuous ground; denser stitched areas draw the flowers over it. Filling a petal gives it more visual weight, while a thin outline lets the ground remain prominent. Wide gaps between flowers can make the ground almost as noticeable as the motif itself. A neat floral drawing therefore depends on the mesh colour and openness as well as the embroidery.
The YT-251225-1 Daisy Garden mesh embroidery trim is listed as 100% polyester and 6.5 cm wide. Its floral border runs along one side. A broad plain mesh area sits above the floral band; the listed 6.5 cm includes both. That arrangement suggests a garment edge where the flowers are meant to remain exposed and the attachment position can be planned in the mesh area. Turn the strip around and the floral edge moves to the other side; it is not the same layout as a trim with matching borders on both sides.
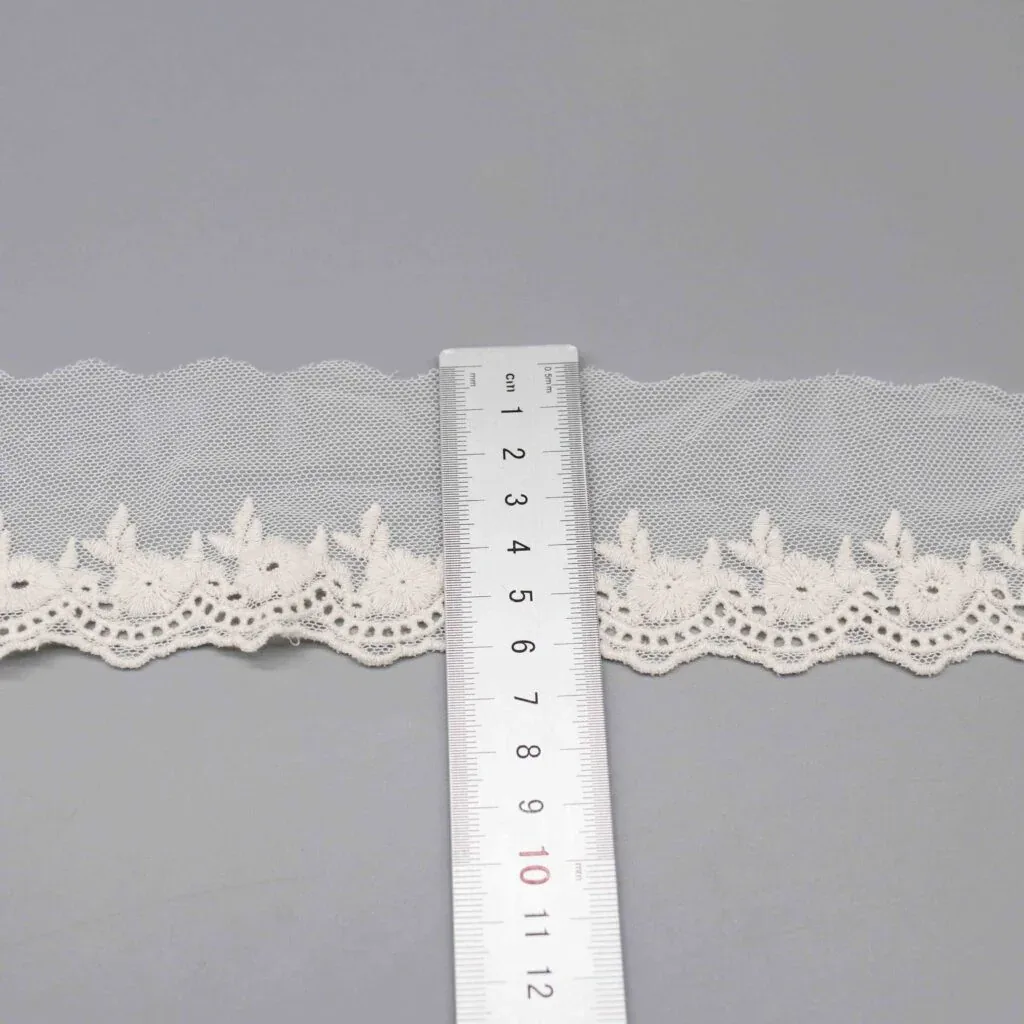
For a blouse yoke, sleeve edge or decorative lingerie panel, decide whether the viewer should notice separate flowers or a continuous floral band. More visible ground encourages separation; flowers that meet along the edge create a border. The polyester composition does not tell us whether the finish will be matte or lustrous, or whether the ground will stretch. Inspect the actual thread, mesh and finish to see the resulting appearance.
Eyelash lace adds a second outline beyond the flowers
An eyelash edge combines a defined scalloped border with fine threads projecting beyond it. The scallop gives the edge its main shape; the threads soften that shape against what is behind it. Fine floral outlines inside the lace and a delicate fringe outside it create two scales of detail. This is why the edge matters even when most of the floral surface is hidden under another fabric.
YT-8779 Chantilly Floral eyelash lace trim combines a fine floral pattern with two eyelash edges. It is listed at 19.5 cm wide, in 90% nylon and 10% spandex, with the catalogue colour recorded as white/off-white. Here, Chantilly describes the design inspiration; it does not establish where the lace was made. The two decorated sides offer more edge-placement possibilities than a one-sided floral border.
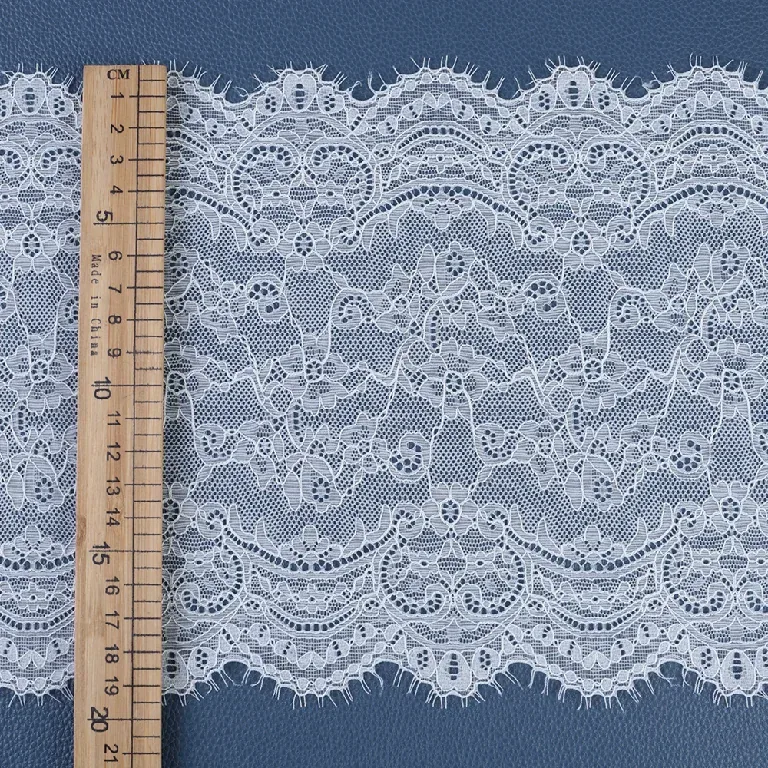
A neckline can show just the scallop and fringe; a wider insert can reveal the flowers as well. For either effect, plan the visible line before trimming away an edge or covering it with a seam. The 19.5 cm catalogue width is not automatically the width that remains visible in the garment. Nor does 10% spandex make this lace predictably stretchier than the 8% example: yarn arrangement, structure and finishing also matter.
Backing changes which part of the lace you notice
Place ivory lace over a similar ivory backing and the colour difference is small, so the whole surface reads softly. Put a comparable lace over navy and the openings turn dark, making the pale petals and stems easier to pick out. Dusty rose adds a different colour through those openings without the same dark contrast. This is a design choice about what comes forward: the overall shape, the individual flowers or the colour underneath.
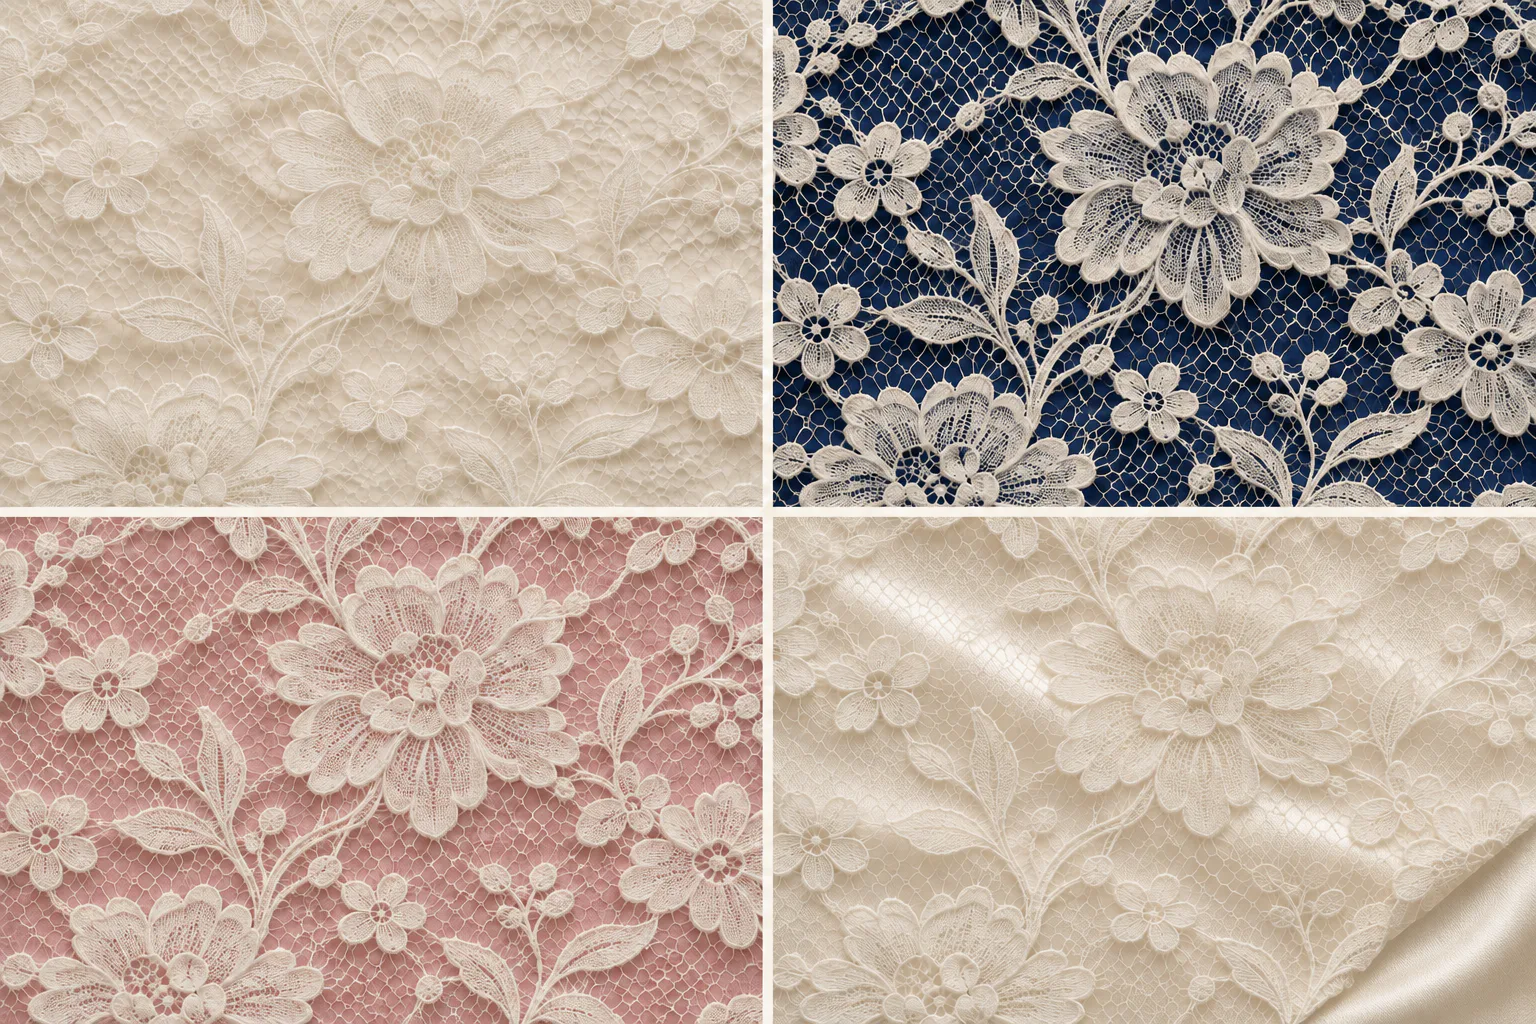
Colour is only half the effect. A matte backing lets the lace texture remain the main source of detail. Satin can catch a band of light beneath the openings, adding a changing highlight as the piece moves. Compare the whole combination, not a lace swatch and a lining swatch held separately. Keep the outer lace distinct from the construction underneath: a lining may change coverage and appearance, but cup shape and support depend on the complete design.
Put the motif inside the space it will actually occupy
Consider an ivory camisole that needs a quiet finish around the neckline. A small repeating floral border with a matching backing is one possible direction: several whole flowers can remain visible along the narrow edge. If the intention changes to a decorative panel on the front, a larger motif may be more useful, provided there is enough space to show its centre and leaves. These are different design tasks, even if both are described as “adding lace.”
A paper window makes the difference easy to see. Cut an opening that matches the planned visible area and slide it over the sample. Mark where a flower is cut, where a scallop sits and where a seam will hide the pattern. Then put the intended backing underneath. For example, if a proposed 4 cm strip leaves only 2 cm exposed, choose by what remains in that 2 cm window, not by the attractive full strip. Those dimensions describe an illustrative layout, not a sewing specification.
From the paper window to a sewn edge
For that camisole, settle one decision before sewing: do you want a continuous lace border or separate flowers placed on the main fabric? A ready-made trim already has its repeat. Moving it along the neckline changes the flower at the centre, but does not change the gaps between its flowers. To change those gaps, choose a different pattern, develop a new motif layout, or use separate appliqués made for individual attachment.
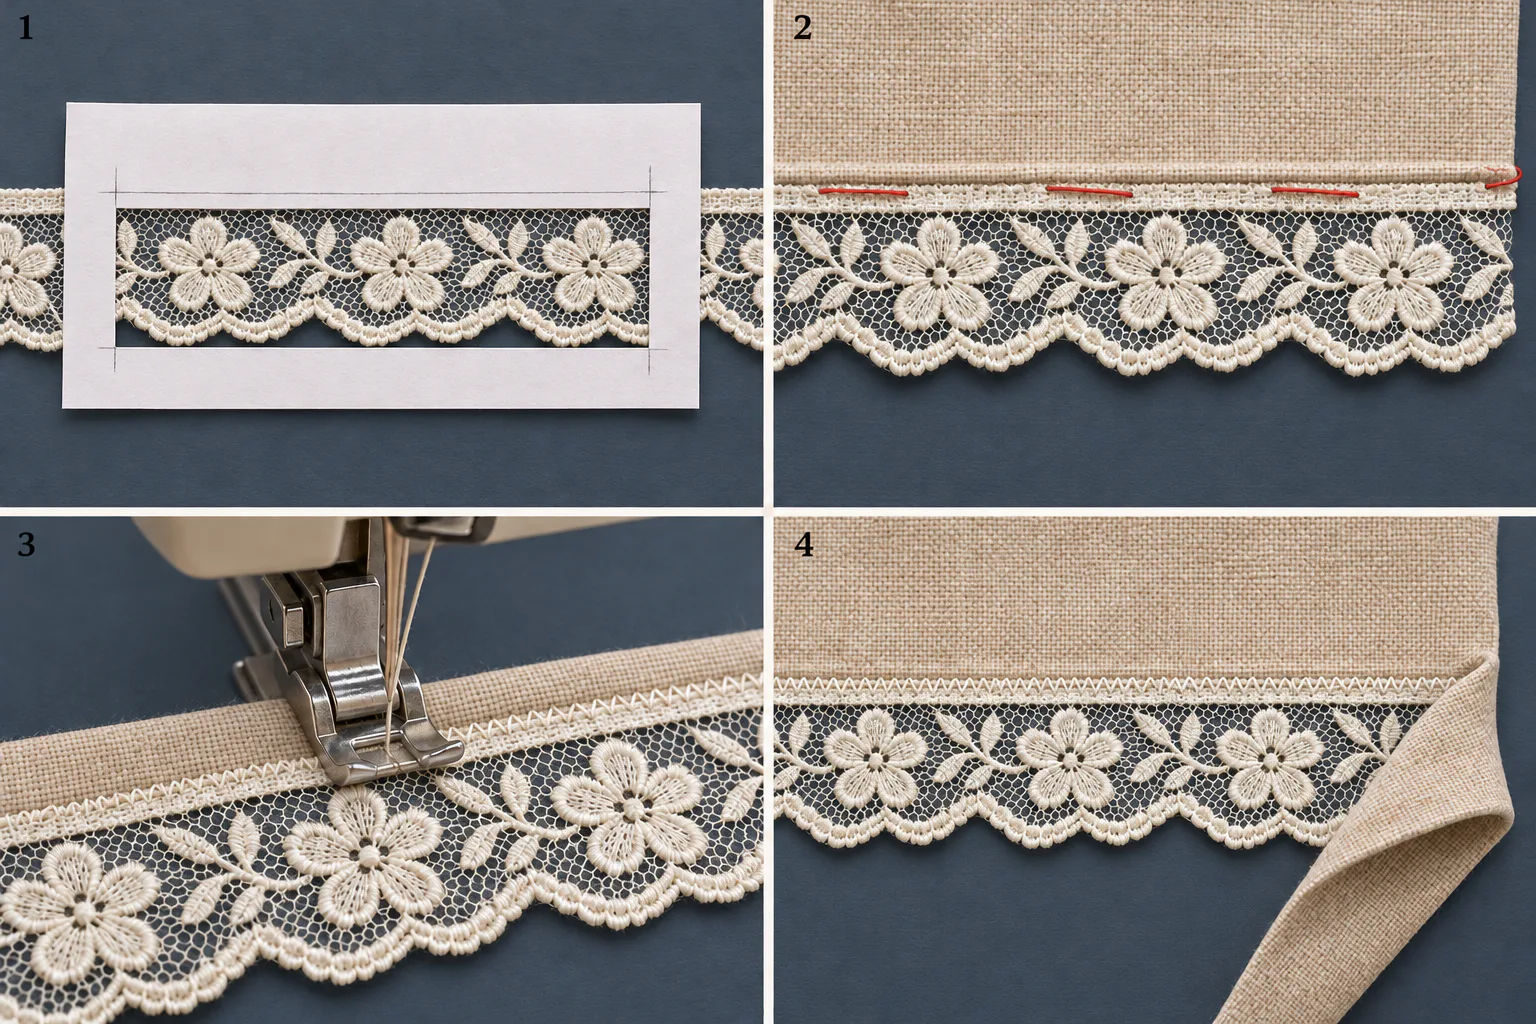
Mark the garment centre, the ends of the decoration and the finished fabric edge on the pattern. Place the lace so the intended flowers and scallops remain outside the seam, with enough of its mounting band over the main fabric for both layers to be caught. For a flat, non-gathered woven sample, let both layers rest naturally while basting. Pulling a stretch trim to make it reach the end can change the shape once it is released.
Try a short seam in the actual combination of lace, main fabric and backing. A narrow zigzag is one possible attachment stitch; its width must catch the mounting band and the main fabric without wandering into the decorative fringe. For an edge intended to stretch, check that the sewn join allows the required movement. Needle type, stitch length, tension and any stabilizer belong to this sample trial, not to a universal recipe based on fibre percentages.
Choose the gap before choosing the stitch
Separate appliqués offer another route: the main fabric stays underneath and each complete flower is attached to it. Start with matching motifs laid in the same direction. Here, dense, regular and open describe the space between flowers, not the distance between stitches. “Regular” is simply the middle option in this comparison, not an industry standard. Do not obtain separate motifs by cutting through the connecting mesh of an unsuitable continuous lace.
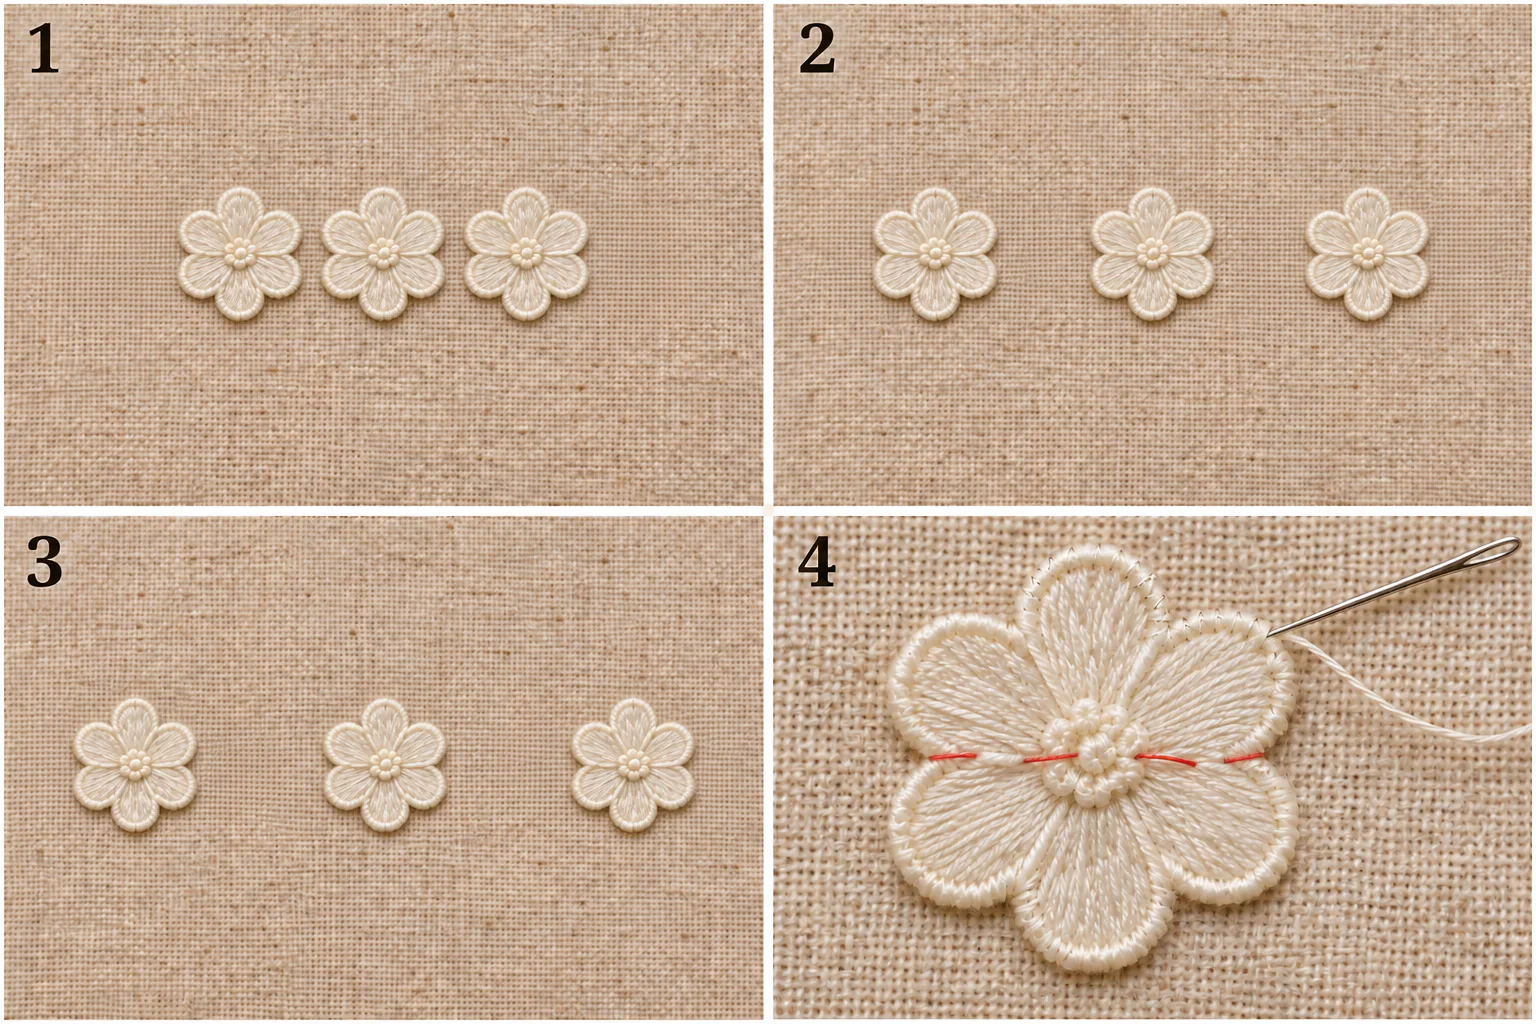
For a simple straight-row exercise, assume each flower is 20 mm wide along the row and the flowers do not overlap. Measure the clear gap from one flower’s edge to the next, then mark the centres: centre spacing equals flower width plus clear gap. The example below uses gaps of 5, 10 and 20 mm, giving centre spacings of 25, 30 and 40 mm. These are teaching dimensions, not measurements of the catalogue trims or standard density grades.
Layout and example gap | Best suited to | Reconsider when |
|---|---|---|
Dense — 5 mm clear / 25 mm centres | A concentrated floral band on plain fabric; several whole motifs fit inside the visible area. | You want much of the backing visible; motifs overlap and become bulky; the narrow area cuts through the flowers. |
Regular — 10 mm clear / 30 mm centres | A repeated neckline or cuff detail where each flower should remain distinct. Use as the first comparison sample. | A tight curve distorts the gaps; end flowers are cut by a seam; left and right motifs point in conflicting directions. |
Open — 20 mm clear / 40 mm centres | Separate accents, room for large leaves, or a backing colour meant to show between flowers. | You need the motifs themselves to provide coverage; the base cannot carry them; from normal viewing distance the row loses the intended continuity. |
Set the available area before multiplying a repeat. On a symmetrical front, mark the centre and try equal placements towards both ends, then check whether the last flowers remain whole. For irregular leaves, inspect the nearest edges as well as the centre marks. Around a curve, mark along the intended placement line and check the inner and outer gaps separately; a straight-row spacing cannot simply be carried around a tight bend.
Once the arrangement works, baste the flowers in place. Small hand stitches can catch a supported part of the outline and the base, as shown in panel 4. For machine attachment, a narrow zigzag is another option to test on a suitable finished edge. Check that the fixing stitches catch both the motif and the base, rather than landing only in an open area of the lace. Keep the base flat and check the reverse. If petals lift, the cloth puckers or stitches miss the motif edge, correct the attachment before repeating it across the garment.
Let the sample decide which layout stays
For the quiet camisole neckline in this example, begin with the middle spacing on a stable woven sample. If it looks too broken from normal viewing distance, compare the dense version; if the floral band dominates the garment, try the open version or a smaller motif. Keep only the layout that shows the intended flowers, ends neatly, lies flat and still behaves as the garment needs after the planned care trial. A layout that looks attractive flat but pulls the neckline out of shape needs revision, not just more stitches.
A useful lace description says more than “floral” or “soft.” It identifies a small or large motif, close or open spacing, the visible ground, the edge treatment and the fibre composition. Add the planned backing and visible area, and the design becomes much easier to picture. That is the detail worth carrying away from an amusing photograph: how the flower, the material and the space around them work together.
Discuss a real requirement
Turn the reading into a practical next step.
Send a short note, product reference, photograph, swatch or tech pack. Technical feasibility, sampling, documentation and production terms are confirmed after review.
Start an inquiry