
Introduction
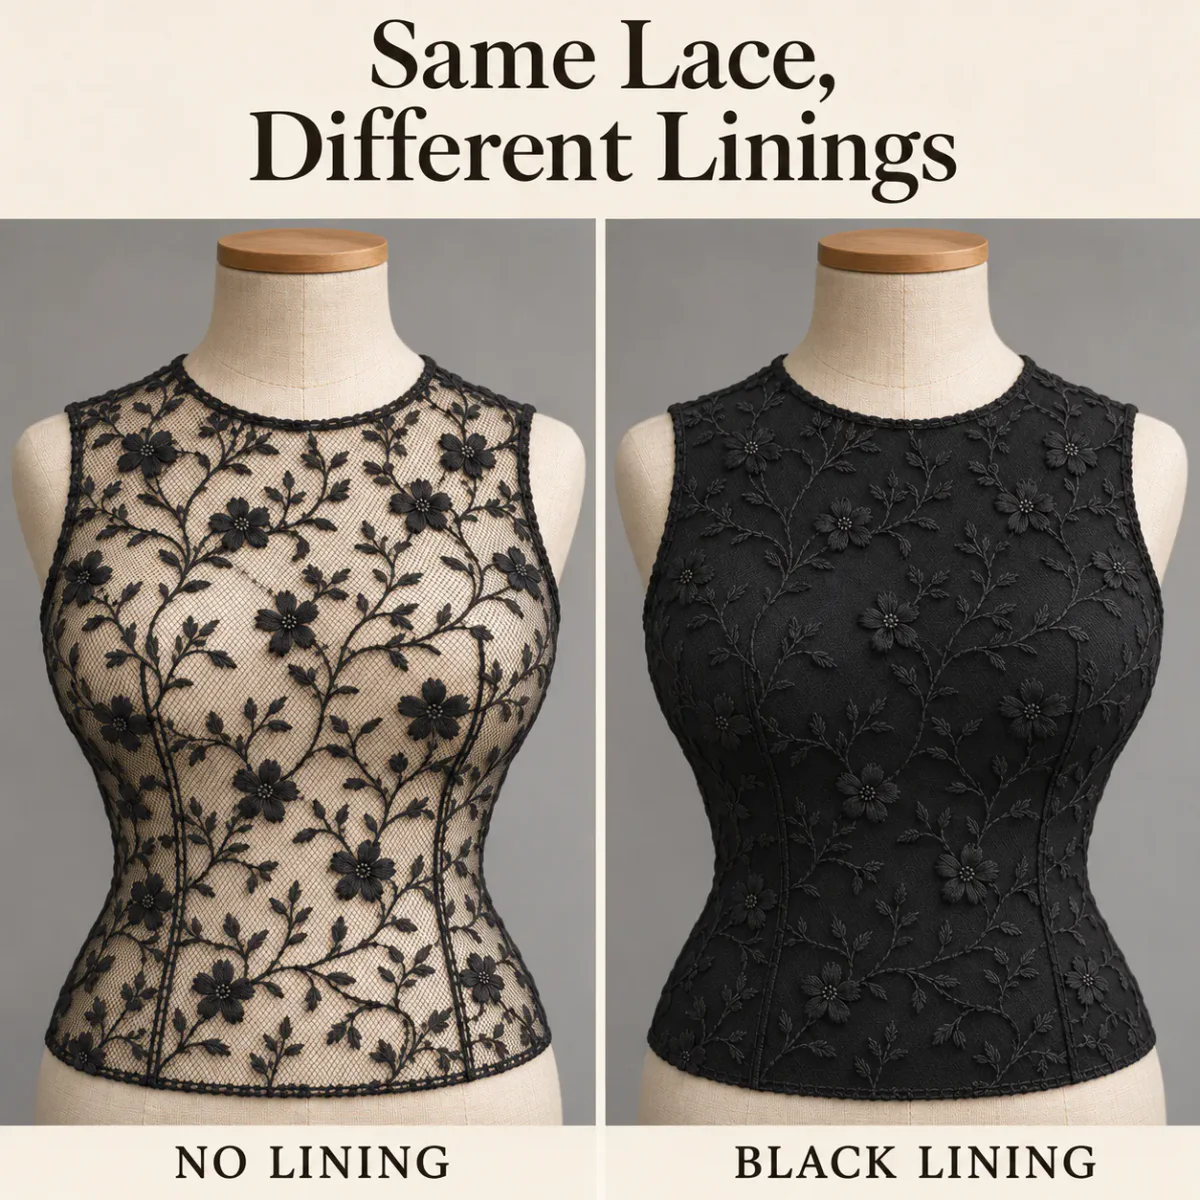
A black lace panel can reveal its floral pattern clearly on the cutting table, then look almost solid once it is lined. Another may seem well covered until it is stretched across a curved area. Before choosing a prettier flower, decide what the finished piece should reveal—and what it must cover.
Three decisions work together: how much space the flowers occupy, what sits behind the lace, and where the seams and panel boundaries fall. We will look at two lingerie designs, then work through a blouse-inset example. The same questions help with a neckline, a sleeve window or a decorative dress panel; the required stretch and support will differ.
Two garments, two useful design lessons
Aubade Hidden Treasure 7BF12 brings floral embroidery together with a more graphic mesh in an underwired triangle shape. Look at the spaces around the flowers: they let the branches remain readable. For a material buyer, the useful question is whether the proposed panel has enough room to show both the motif and its surrounding ground.
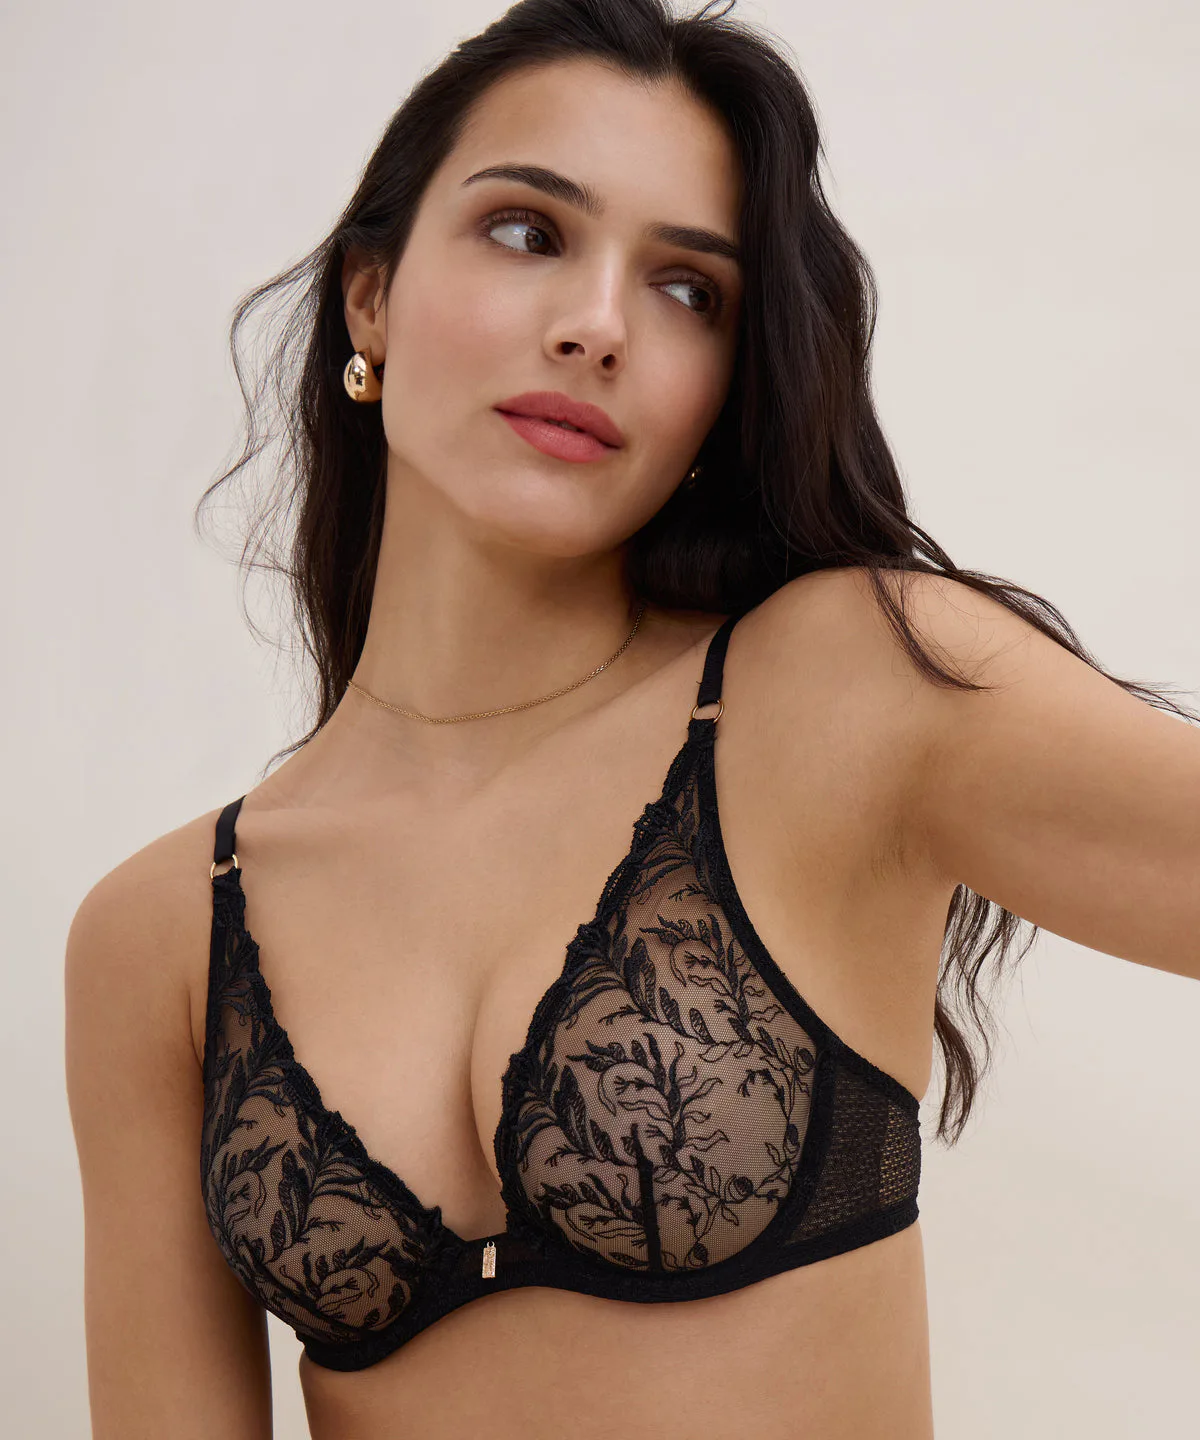
Empreinte Cassiopée offers a different lesson. The brand describes an opaque front insert alongside see-through lace. In the front photograph, the solid centre and more open side areas are easy to distinguish. Instead of asking one lace to provide both complete coverage and transparency everywhere, the design gives different areas different jobs.
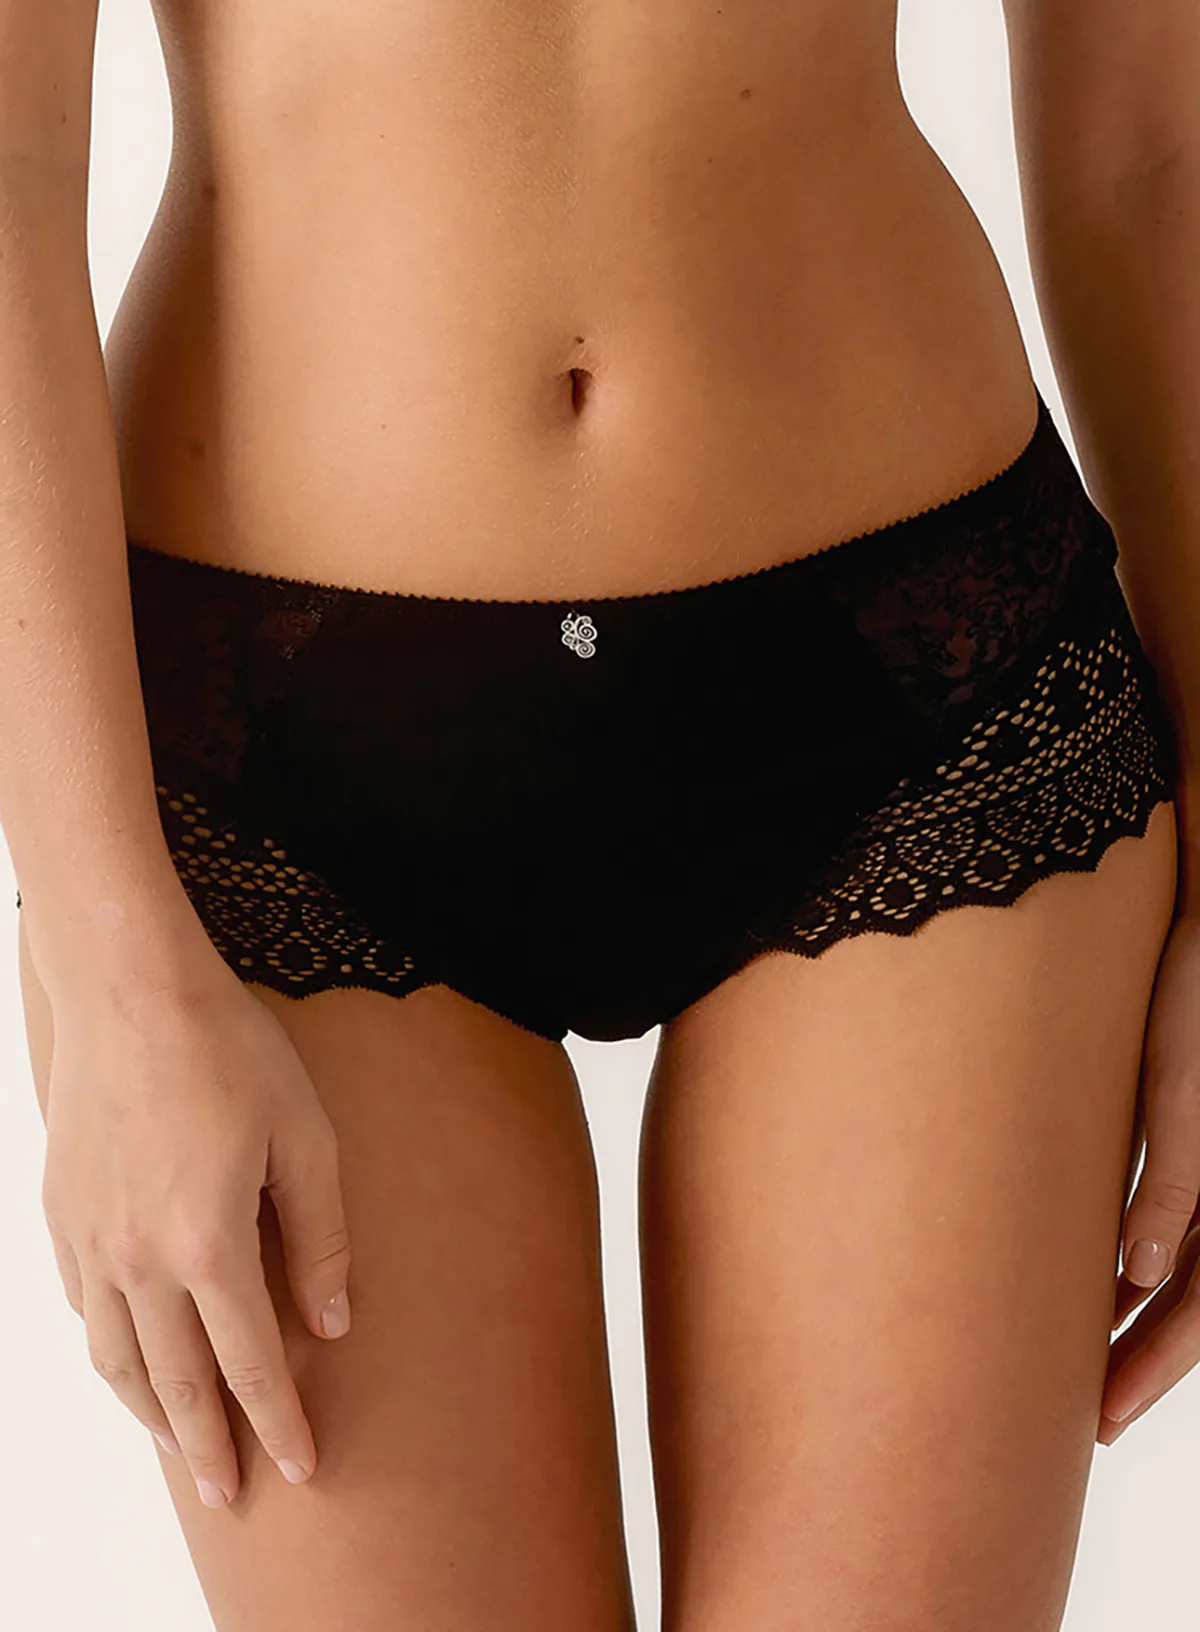
Read composition by component where it is available. Aubade lists embroidery, lace and lining separately: 53% polyester/47% polyamide, 78% polyamide/22% elastane, and 100% polyamide respectively. Empreinte gives an overall composition of 66% polyamide, 23% elastane, 6% cotton and 5% polyester. These are different kinds of information: an overall percentage cannot identify every panel, and elastane content is not a measured stretch percentage.
Describe the result before choosing the lace
What the design needs | A useful starting point | What could make it unsuitable |
|---|---|---|
A clearly sheer window | Open motifs with no backing, or a suitably sheer backing | Unsuitable if that area must conceal the layer underneath. |
Visible flowers with a quieter background | Compare a fine backing in the intended colour | A light backing may change the black colour; extra layers may dull fine details. |
Reliable coverage in one area | A suitable opaque panel or local backing | The backing edge may show, restrict movement or pull the outer layer. |
An edge that moves with the garment | Lace, backing and seam developed as one moving assembly | A stretch outer layer over a rigid backing cannot keep the same movement. |
Use the actual colour underneath when comparing samples. Put them over the intended lining or garment fabric, then look against a contrasting background as well. Check relaxed and in the shape and movement expected in use. Agree on lighting and the viewing situation before approving appearance; a flat photograph against white is only one view.
Sparse, regular and dense describe flower placement
Here, density means how much of the surface the motifs occupy. It does not mean the number of embroidery stitches inside a petal, or stitches per centimetre in a seam. Those are separate production settings. The four arrangements below use a similar floral language so the change in spacing is easy to see; they are design studies, not graded laboratory samples.
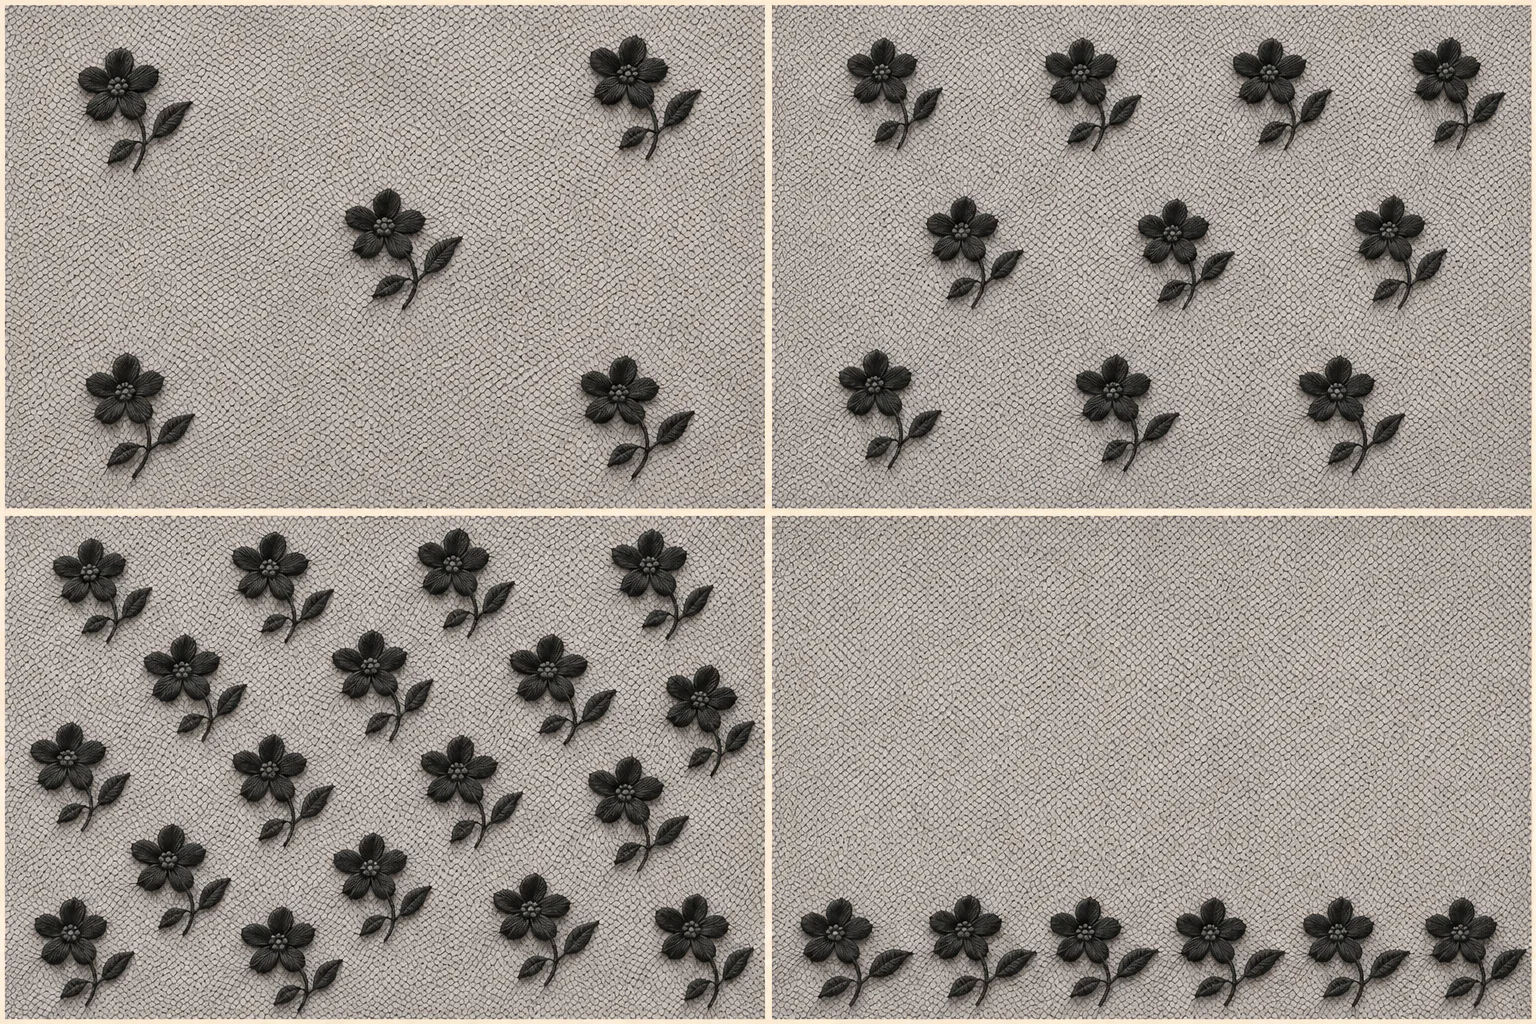
Arrangement | Useful when… | Watch out when… |
|---|---|---|
Sparse | The window is large enough to include a complete motif and open ground. | A small cut piece may contain mostly net, or a single cropped flower. |
Regular | Several pieces need a repeatable balance of motif and background. | The finished width catches only an awkward fraction of the repeat. |
Dense | The brief calls for a strong floral surface. | You still need open windows, low bulk or a defined coverage result; density alone proves none of these. |
Concentrated along an edge | A hem or neckline should finish on a decorative border. | The attachment seam would hide the border, or the curve distorts the flowers. |
Once a continuous lace repeat has been made, stretching it is not a way to redesign its spacing: the net and flowers distort together. If the open spaces fall in the wrong places, choose another repeat, change the panel layout, or develop a new pattern. Separate appliqués allow individual placement, but introduce their own attachment work and possible bulk.
Changing the backing can change the entire design
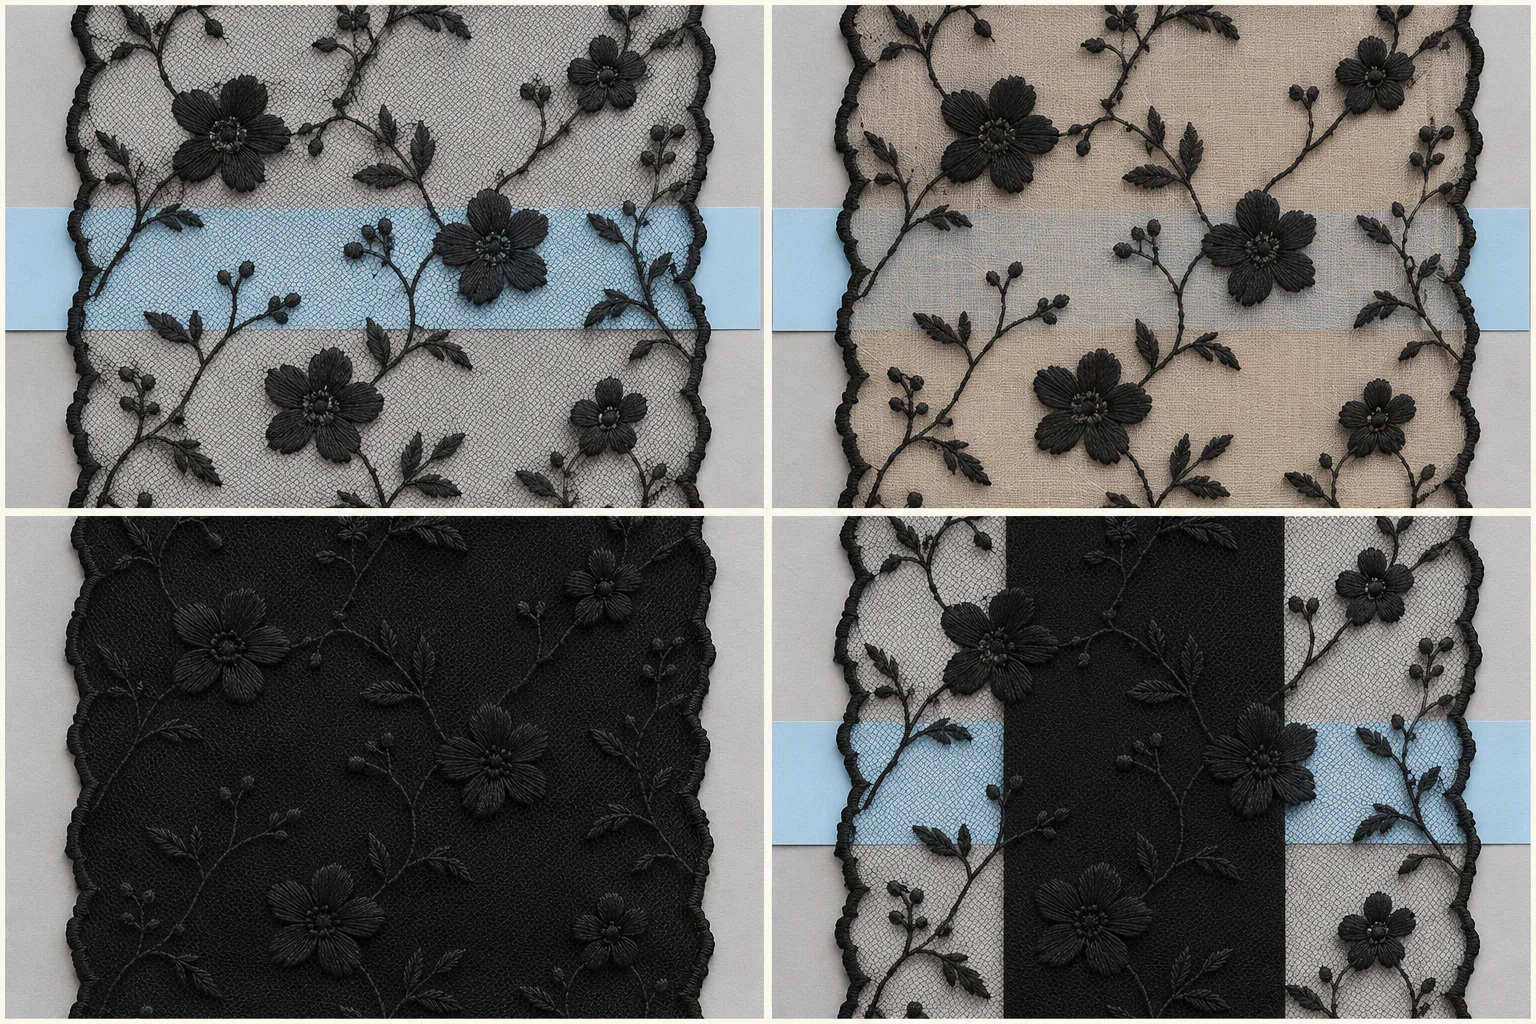
A light backing can make black floral outlines easier to read, but the light areas become part of the colour scheme. A sheer backing may soften the view through the mesh without hiding it. An opaque black backing can close the window while reducing the contrast between black flowers and their background. “Skin tone” describes a colour choice, not a promise of coverage or invisibility.
For local backing, draw the edge before cutting. If it stops halfway through a large flower, a straight shadow line may become the most noticeable part of the panel. Try moving the boundary into a planned seam or following a suitable motif contour, then compare how easily that edge can be secured without a ridge. Curving a backing edge around every petal may improve one photograph while making production slow and inconsistent.
Place the finished window on the repeat before cutting
Mark three things on a transparent template: the finished visible outline, the seam line, and any backing boundary. Add the cutting line and seam allowance separately. Move the template across an actual sample until the main flower sits where it should. A ruler tells you the available width; the template tells you what survives after sewing.
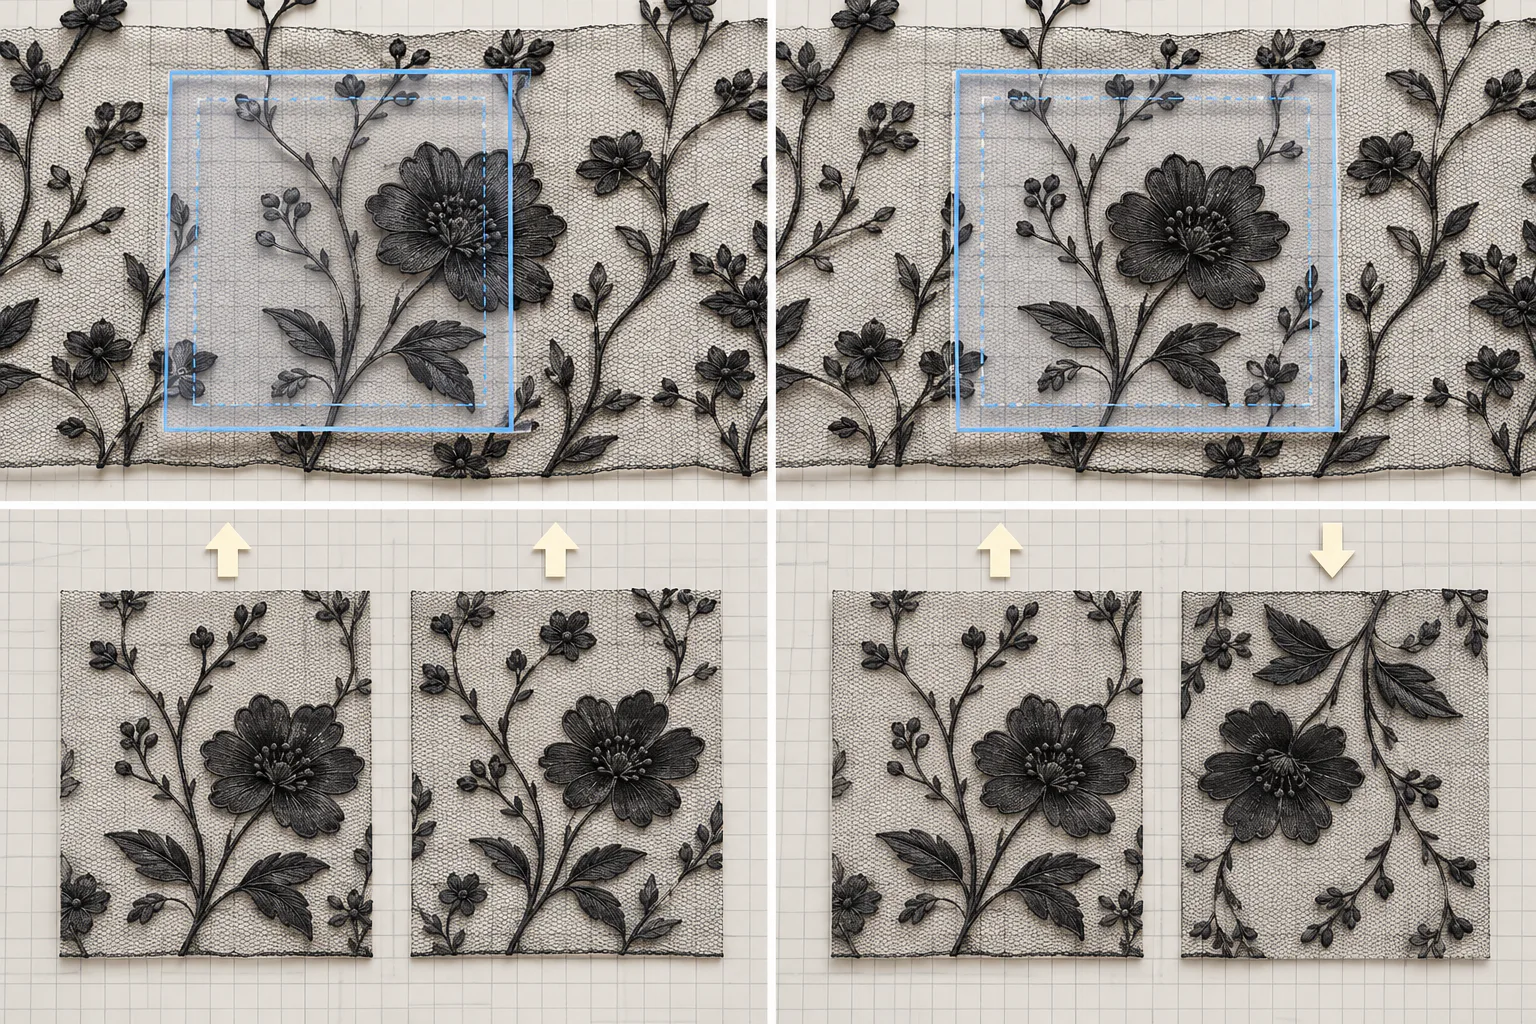
For a left and right pair, check whether you need a true mirror image or simply two flowers facing the same way. Turning a piece over may put the reverse of the lace on the outside. Instead, look for a suitable paired repeat or place both templates face up. Record the extra length needed for placement in the cutting trial; a generic waste percentage cannot explain where those flowers will come from.
Two catalogue examples: embroidery and knitted lace
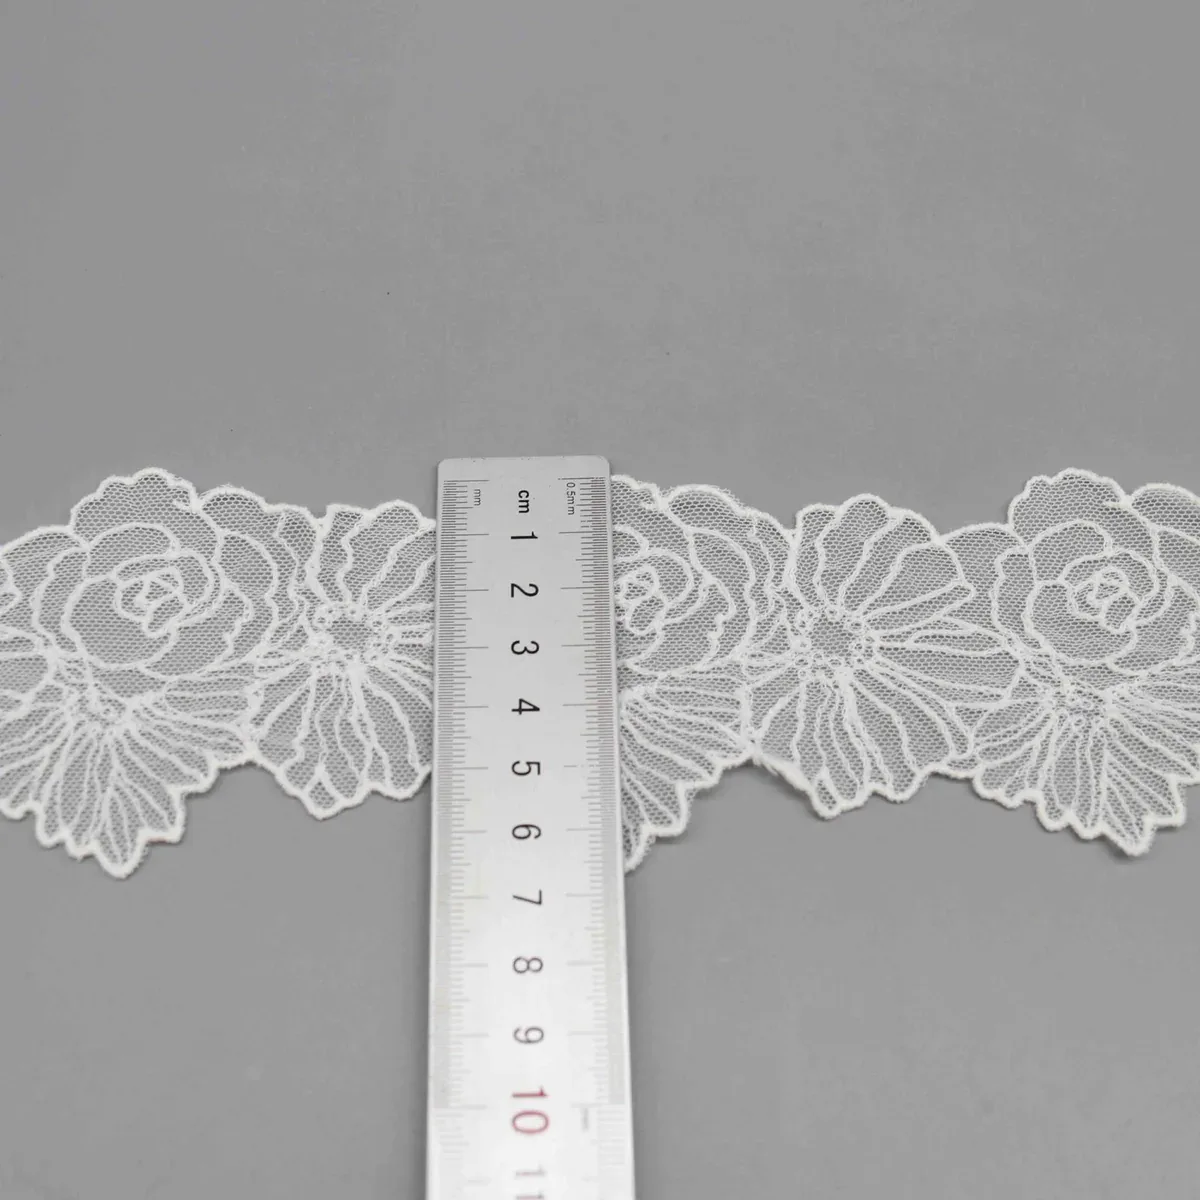
YiTuo yrh361 is listed as cotton-thread embroidery on nylon mesh, 7 cm wide. The thread outlines the flowers while the fine ground remains visible. This is a useful reminder that “cotton embroidery” need not mean an all-cotton fabric. For a rectangular inset, check the narrowest usable area between the shaped edges, not just the overall catalogue width.
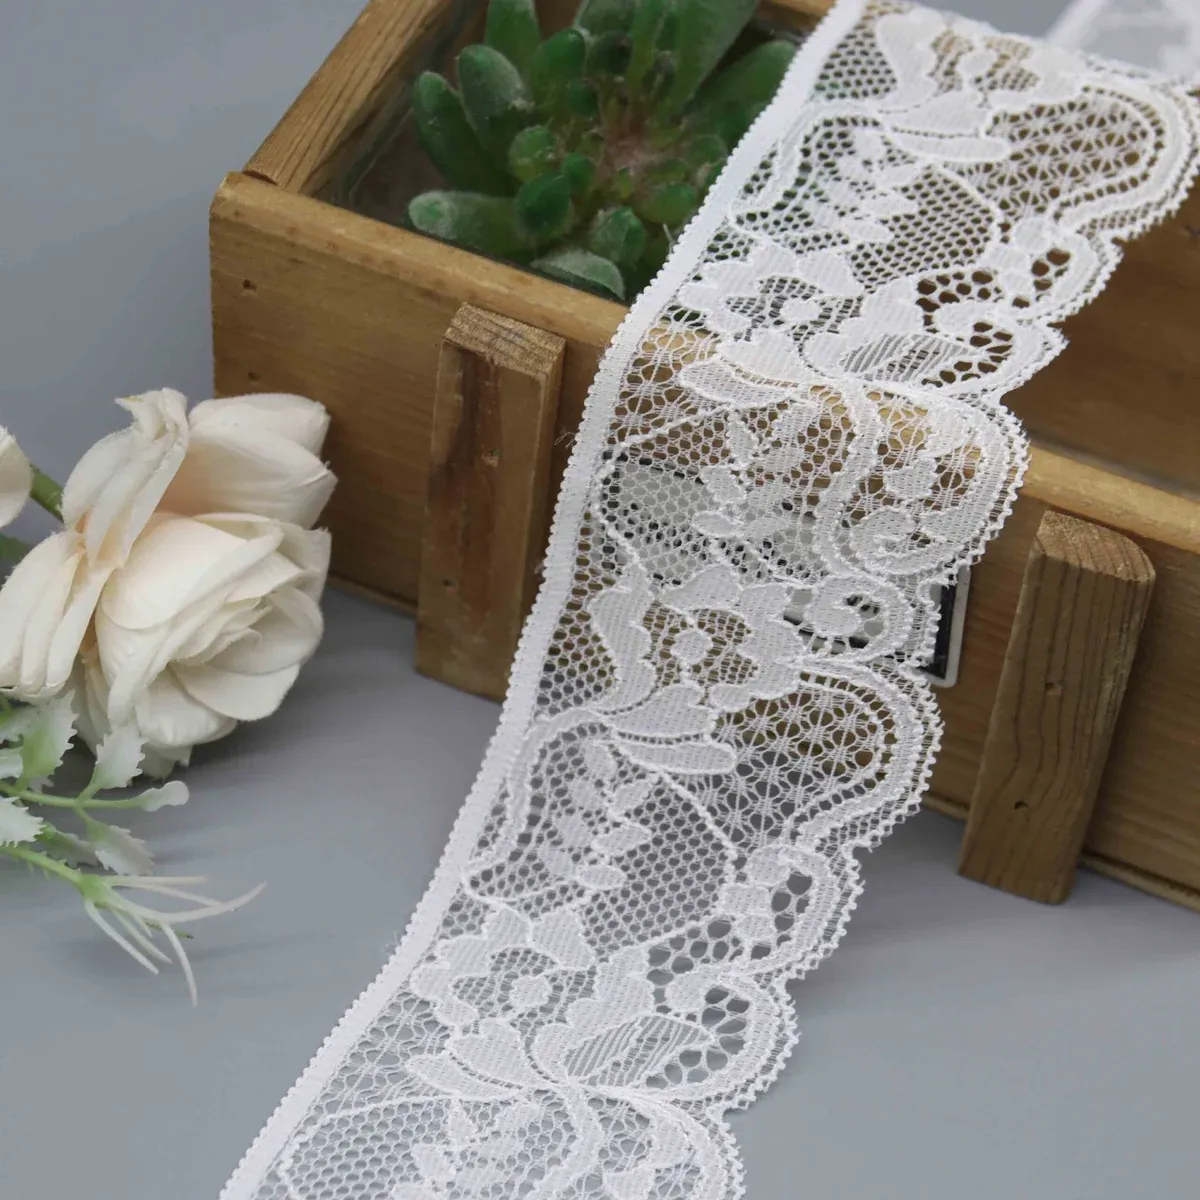
HDL-1194 is a different construction: nylon/spandex Raschel lace, listed at 5.2 cm wide. Its comparatively straight edge and scalloped edge suggest different roles for attachment and display. Use it to consider a decorative border; its width does not make it a candidate for every whole panel. A floral appearance alone also does not make a knitted lace an embroidery.
A worked example: keep the sides sheer, cover the centre
Consider a proposed decorative inset in a woven blouse. The finished visible window is 160 mm wide and 60 mm high. The designer wants an 80 mm opaque centre and two 40 mm sheer sides: 40 + 80 + 40 = 160 mm. These are illustrative finished-area dimensions, not cutting dimensions or a tested garment specification. The sample maker must add and trial the construction allowances.
Start with a lace field wide enough for that rectangle and its allowances. The 5.2 cm HDL-1194 trim cannot supply a 6 cm visible height as one piece, even before adding allowances. The 7 cm yrh361 width leaves only 1 cm beyond that height in total before considering its shaped edges, so it cannot be approved from the number alone. A wider white catalogue sample such as 23 cm YT-150 illustrates the extra layout space. For the black design, confirm the intended colour and current sample separately, then check stretch and motif placement against the woven assembly.
Proposal | What it changes | Decision for this brief |
|---|---|---|
A. Light sheer backing across the whole panel | Softens the view through all three zones; adds a light ground. | Do not choose it solely to achieve an opaque centre. |
B. Opaque black backing across the whole panel | Closes the side windows as well as the centre. | Set aside: it removes the requested sheer sides. |
C. Opaque black backing in the centre only | Keeps the two side windows; creates two backing boundaries. | Take forward to sampling; check coverage and both boundaries. |
Proposal C best fits the planned zones, so it is the next sample—not an automatic production approval. If the backing edge becomes a visible ridge, try moving it to a deliberate joining line or change the backing and edge treatment. If a main flower is cut in half by the boundary, adjust the repeat position. If the panel pulls the blouse out of shape, revisit the material combination before spending time on decorative refinements.
How to trial the join without losing the pattern
For this woven-blouse example, make a small join using the selected lace, blouse fabric and backing before sewing the complete window. Keep the same layer count and orientation as the proposed garment. The four views below illustrate the outer join between the lace inset and blouse fabric. They do not show every layer or the centre-backing operation. That backing is positioned and secured beneath the continuous lace field; the lace centre is not cut away. Neither branded garment’s construction is being reproduced here.
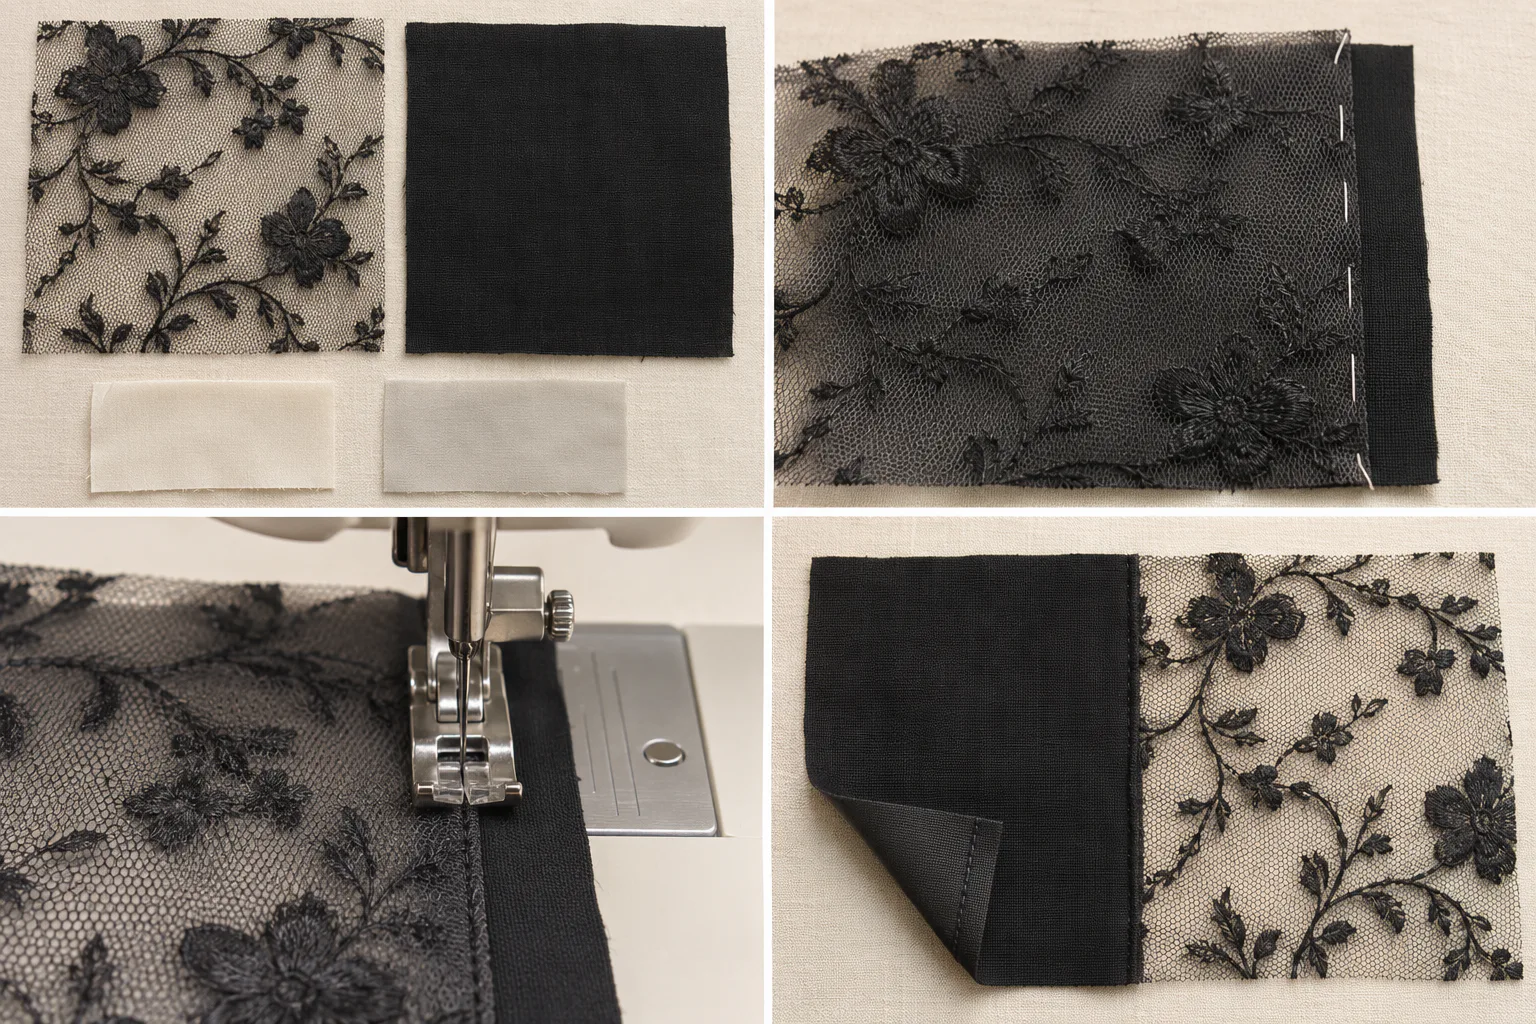
First, settle the flower position. Mark the sewing line on a removable guide and keep the main motif out of an unintended fold. Then hold the layers without stretching one against another. Basting lets you check placement before committing to the machine seam. Remove the guide and temporary stitches as appropriate after the permanent join is secure.
Third, choose the seam for the job. A suitable non-stretch woven join and a seam that must extend on lingerie are different trials. Match needle, thread, stitch type, feed and tension to the actual assembly. Fourth, inspect the inside as well as the face. A broad dark allowance may show through an open window; an overlocked edge may add an unwanted line, while a folded finish may add bulk. Compare finishes instead of assuming one is always neatest.
When the seam puckers, do not begin by adding more stitches or pulling harder. Coats’ seam-puckering guidance separates tension, structural, feeding and dimensional-change causes. AMANN’s guidance for fine materials also explains why needle, thread and stitch density need to be matched. Change one relevant setting or material at a time and keep the labelled sample, so the improvement can be repeated.
What would make the sample ready to approve?
Check on the actual assembly | Keep the proposal when… | Revise when… |
|---|---|---|
Coverage and open windows | The agreed centre stays covered and both side windows remain visible in the intended viewing conditions. | The centre reveals the contrasting layer, or backing closes the windows. |
Flowers and boundaries | Main motifs are readable; backing edges and allowances sit where planned. | A flower is unintentionally cut, a backing edge dominates, or pairs have the wrong direction. |
Movement and shape | The assembly permits the movement required for that position without pulling the adjacent fabric out of shape. | The outer layer stretches while the backing or seam holds it, or the panel ripples. |
Care and repeatability | After the agreed care trial, appearance remains acceptable and the sample maker can repeat the recorded method. | Layers change size differently, edges lift, or the result depends on unrecorded hand stretching. |
Keep the selected material references, face and direction marks, finished dimensions, backing outline and seam trial together. Add the accepted appearance sample and care conditions. This gives a lace supplier and the sewing team the same target; “make it denser and less transparent” leaves several very different changes open.
For the blouse inset, the decision is now specific: keep local centre backing as the next sample, exclude the 5.2 cm edging as a one-piece field, and check wider materials with the actual template. The final choice will come from whether that assembly preserves the flowers, coverage and movement together. A denser flower or a higher elastane percentage cannot make that decision on its own.
Discuss a real requirement
Turn the reading into a practical next step.
Send a short note, product reference, photograph, swatch or tech pack. Technical feasibility, sampling, documentation and production terms are confirmed after review.
Related products: 7cm Cotton-Thread Embroidery on Nylon Mesh Lace Trim for Garment Edging & Lingerie · Wholesale 5.2cm Nylon Spandex Floral Scalloped Stretch Lace for Lingerie Bands and Apparel Hems
Start an inquiry