
Introduction
Picture a dress with a sprig running from elbow to shoulder on each sleeve. On the cutting table, one paper pattern fits neatly into a gap if you turn it around. On the finished dress, that small saving would leave one sprig pointing down the arm. Before you ask how many sleeves a metre will make, place the two paper pieces side by side, just as the wearer will see them.
Ask for a full-width length that will take both sleeve inserts, with enough pattern repeat to move the flowers into place. Sew one insert to the intended backing. Once the sample room agrees on movement, motif position and usable width, count complete left-and-right pairs in one cutting layout. That count gives purchasing a starting quantity.
What to request with the floral swatch
YiTuo lists its white SY935 floral stretch lace fabric at 150 cm wide, with 90% nylon and 10% spandex. The close-up shows why the backing matters. A contrasting colour will show through the open spaces between the denser petals. If that is the look you want, send the supplier the sleeve outline and the position of the flower before they cut the sample. SY935 fabric details
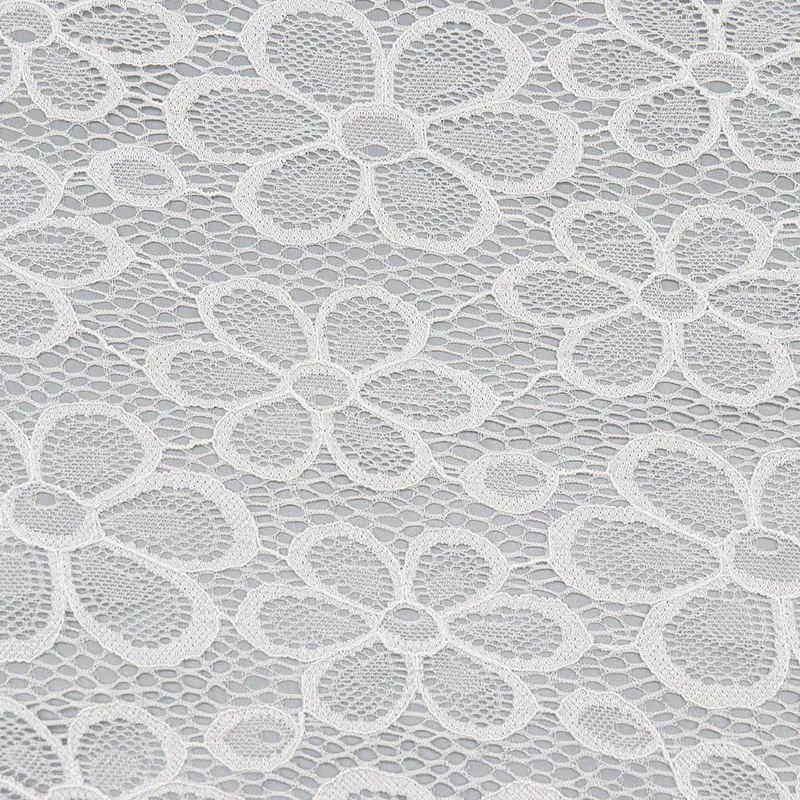
SY935 catalogue photograph. Trace one whole flower, then look at how much open ground separates it from the next.
A sales cutting can help you choose a flower and colour. For a cutting trial, ask for both fabric edges on the same piece, the face and roll direction marked, and enough continuous length for the left and right paper patterns with their seam allowances. Send the largest outlines you want to try. A sample cut to the length of one sleeve can leave no choice about where its top flower lands.
Sew the curve on the chosen backing
Lay the lace on the actual sleeve fabric. If the finished sleeve will be lined, put that lining beneath it too. Baste or sew a curved section using the proposed construction, then set it down without smoothing it. Can you still see the flower the designer picked? Does the edge lie flat beside it? A seam that looks smooth while someone holds the ends may gather as soon as the sample is released.
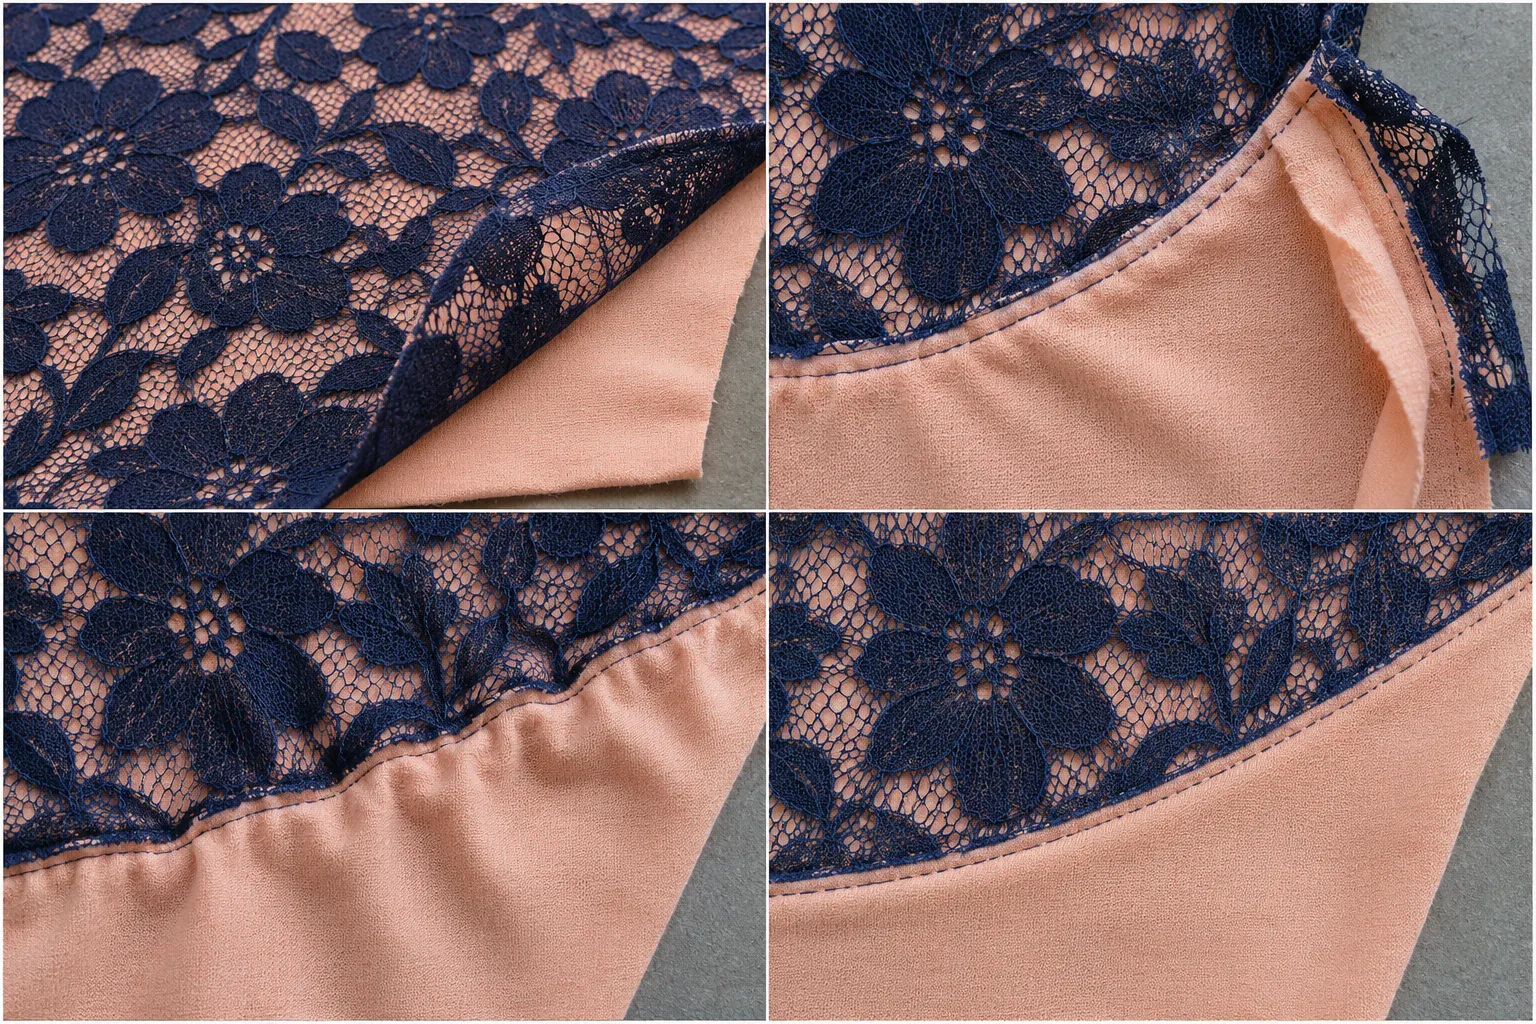
The peach backing bunches beside the stitching in the lower left view. If you see that on your sample, mark matching points on both layers. Try the same seam again with the same materials and stitch, taking care to feed the two marks together. Keep both trials so the sample maker can compare the curve after release.
Which way should the sleeve give?
In this dress, the sleeve needs room around the upper arm. Mark that direction across the paper pattern. On the lace, mark the direction the roll unwinds and note whether the flower has a top and a bottom. Try the permitted orientations with the backing and seam. Have the sample maker check the sleeve through the intended arm movement and record which orientation worked for that assembly.
Turning a paper piece a quarter-turn swaps the lengthwise and crosswise directions. Turning it end for end keeps those axes but reverses an upright sprig. Turning over a cut left piece exposes the reverse. Keep the fabric face up and give the cutter separate left and right outlines whenever both outer faces must match.
Give the cutter a flower to aim for
Mark one place a cutter can find again, such as the centre of the flower just below the shoulder seam. Put the same mark on both paper patterns, measured from the finished seam line. Slide each pattern separately until the marks fall on matching flowers. Check what the seam allowance will cover. Agree whether both sleeve backs need that same precision or whether flowers can fall freely there.
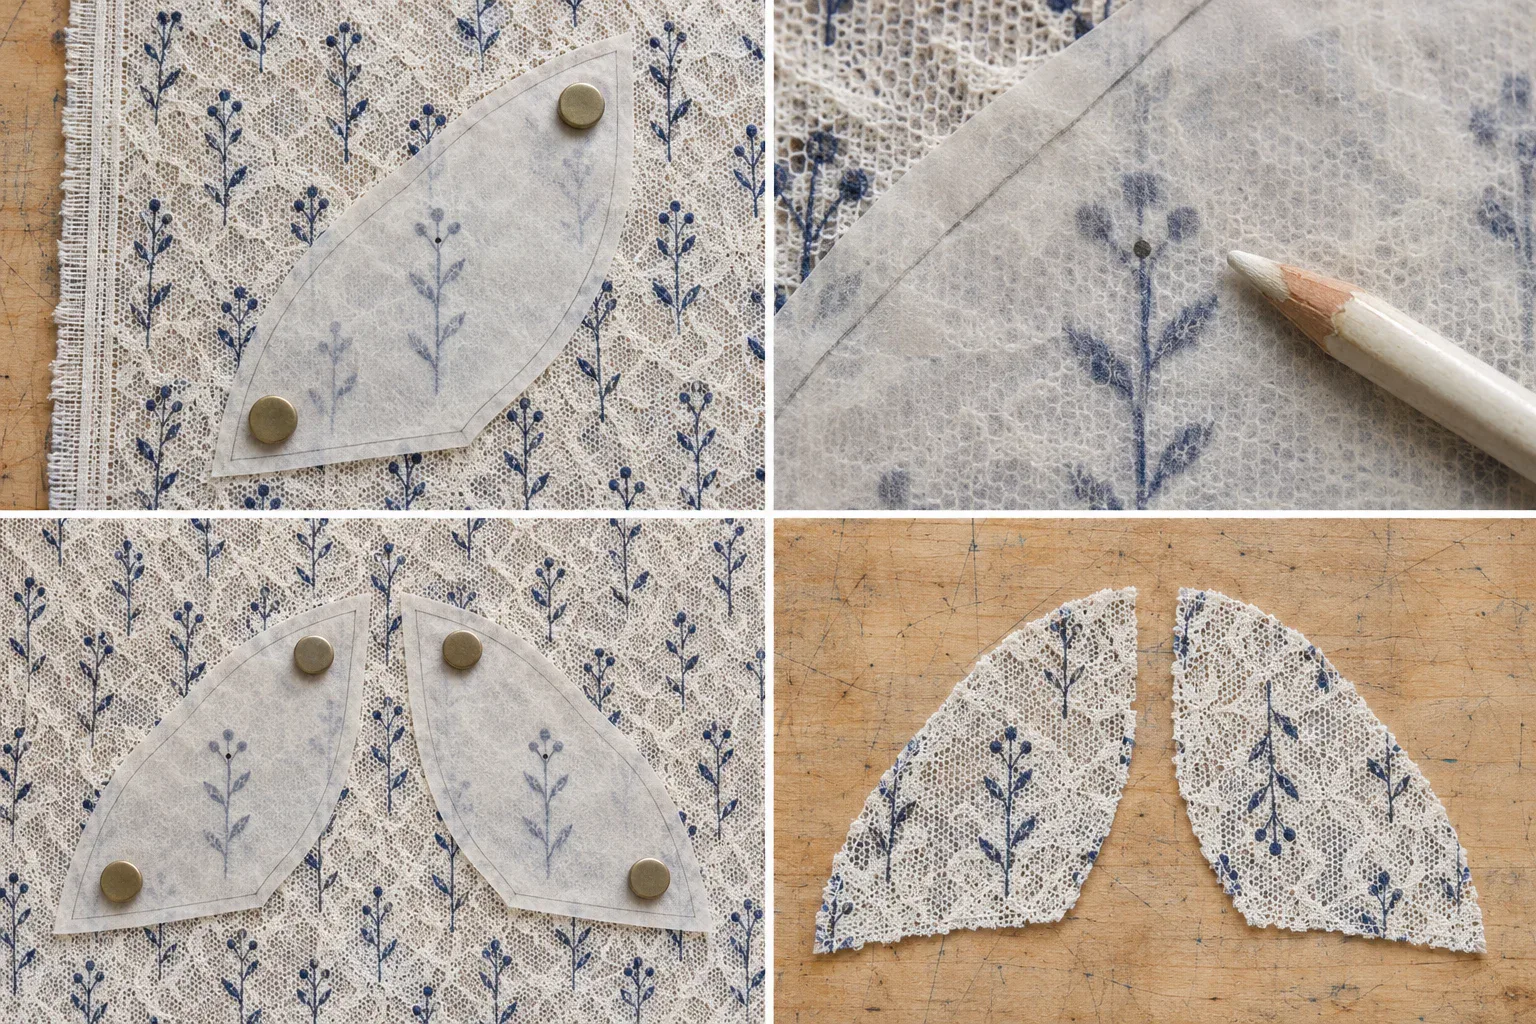
The dot on the tracing paper picks a flower. Compare the branches in the lower row. The two paper patterns on the left are mirror shapes, but on the cut pieces at right one branch is upside down.
Measure the width that can actually carry the design
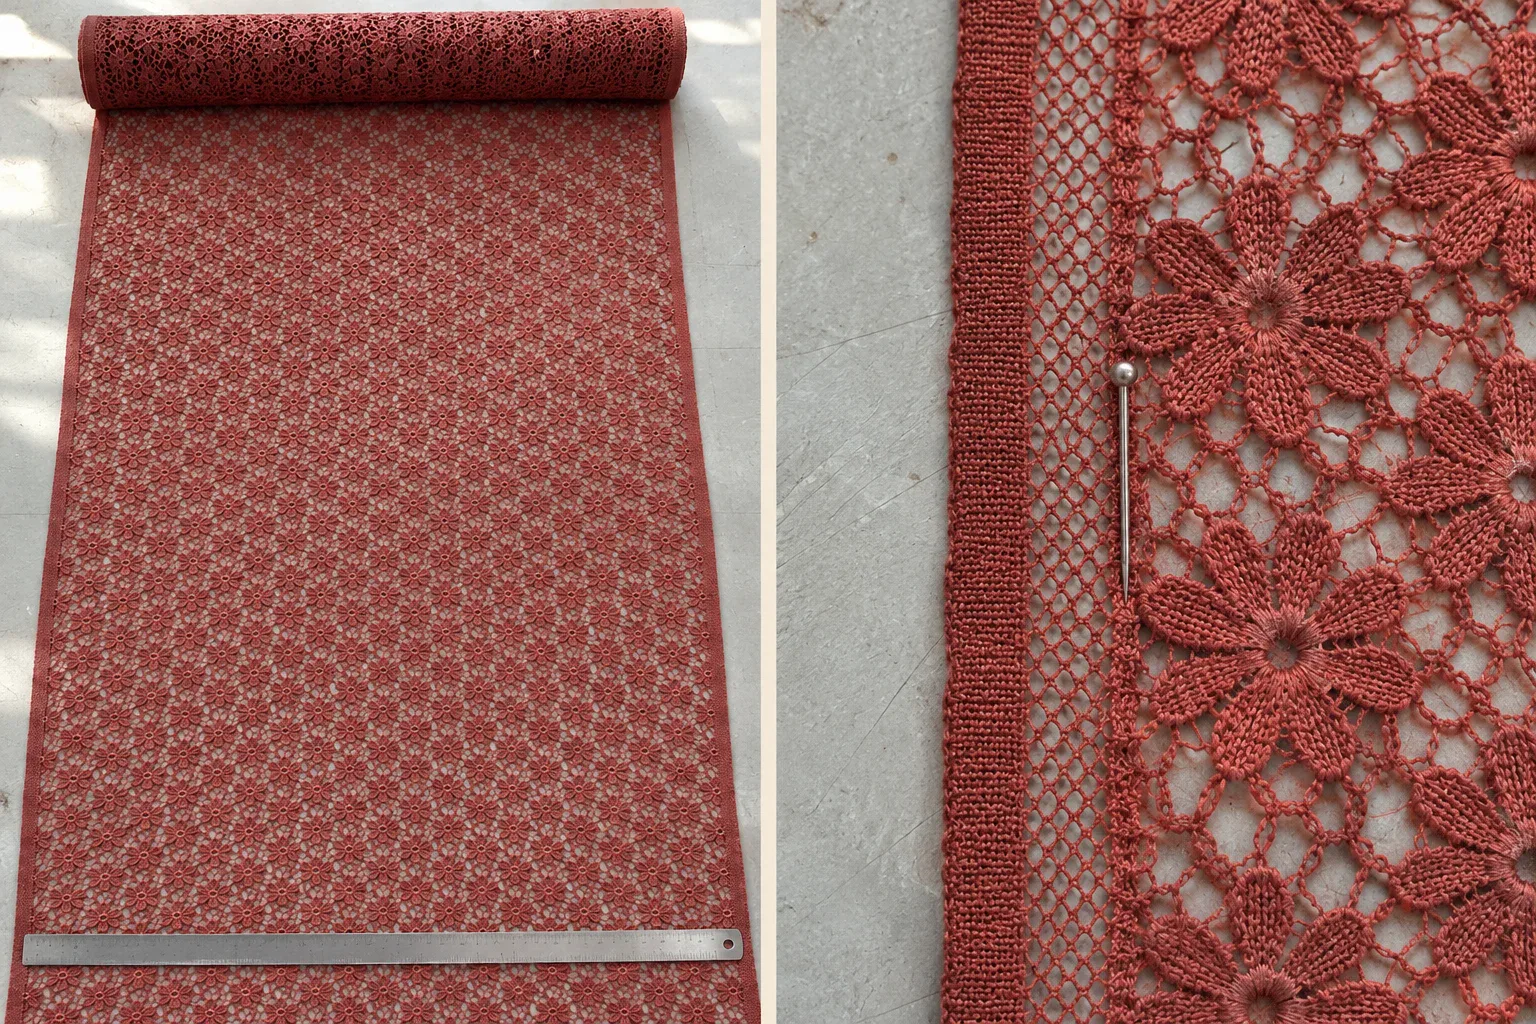
Width study. The metal pin sits near the first patterned column. If a plain mesh strip would show on the finished sleeve, start the usable width further in. Check this at both edges.
Let the sample lie flat and relaxed. Mark the left and right boundaries inside which this sleeve can be cut. A plain strip might work inside a seam allowance even though it would spoil the visible sleeve face. Ask the cutter to verify this with the actual pattern. Write down both the full fabric width and the width available for this layout, then ask what usable width the supplier can confirm for the order.
How many metres for 63 pairs?
Suppose you need 63 pairs of size M dress-sleeve inserts. The rectangle below represents 138 cm of usable width across the roll and 120 cm along it. The sample pattern repeats every 20 cm along the roll. Paper outlines include seam allowances. This is an example layout for sleeve inserts; if you cut a different shape, measure it on your own cloth.
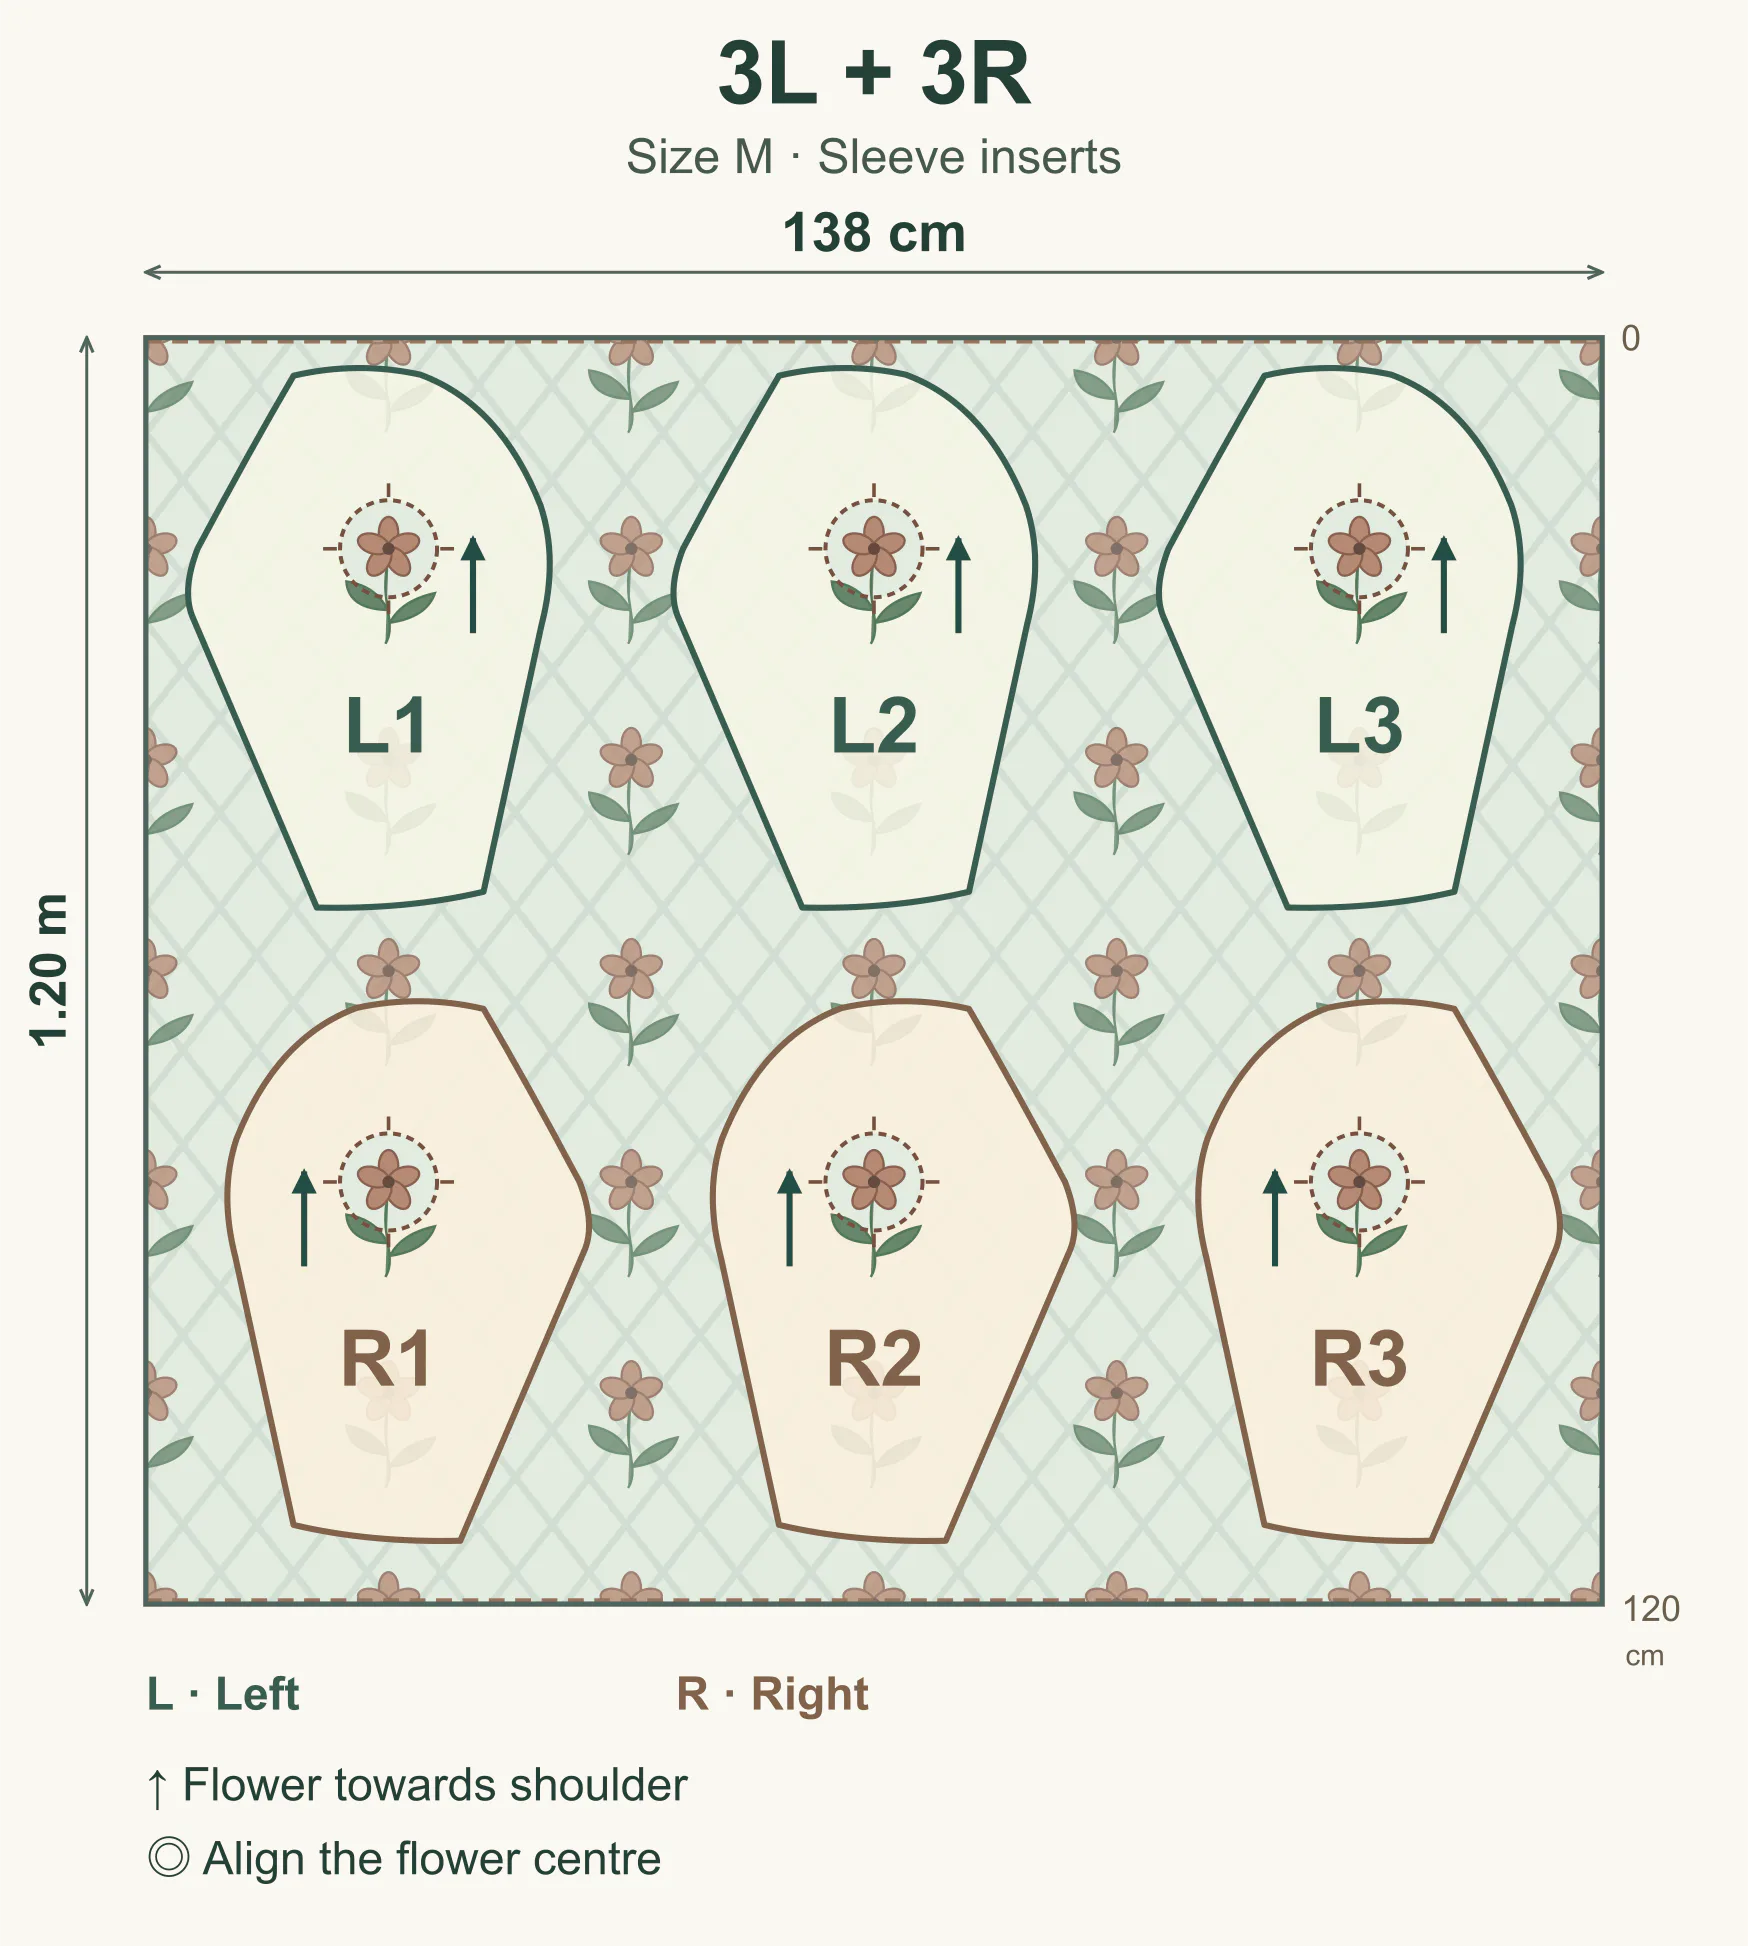
Read the pieces in vertical pairs. L1 and R1 make one garment, L2 and R2 the next. The arrows check which way the flowers point. The rings check that the same flower falls at the chosen spot below each shoulder seam. Six 20 cm repeats bring the bottom boundary back to the flower position at the top.
Cutting-room figure | What it tells the buyer |
|---|---|
3 left + 3 right in 1.20 m | 3 complete pairs per layout |
1.20 ÷ 3 | 0.40 m per pair on average |
63 pairs ÷ 3 | 21 complete layouts |
21 × 1.20 m | 25.20 m of continuous layout length |
The 25.20 m covers the 21 layouts once the first row of flowers is aligned. A new roll or a join breaks that run. Measure how much fabric the cutter needs to advance to find the same starting flowers on each section. Add those lengths and any separate trial or spare pieces before confirming the order. Check the larger sizes on their own paper patterns.
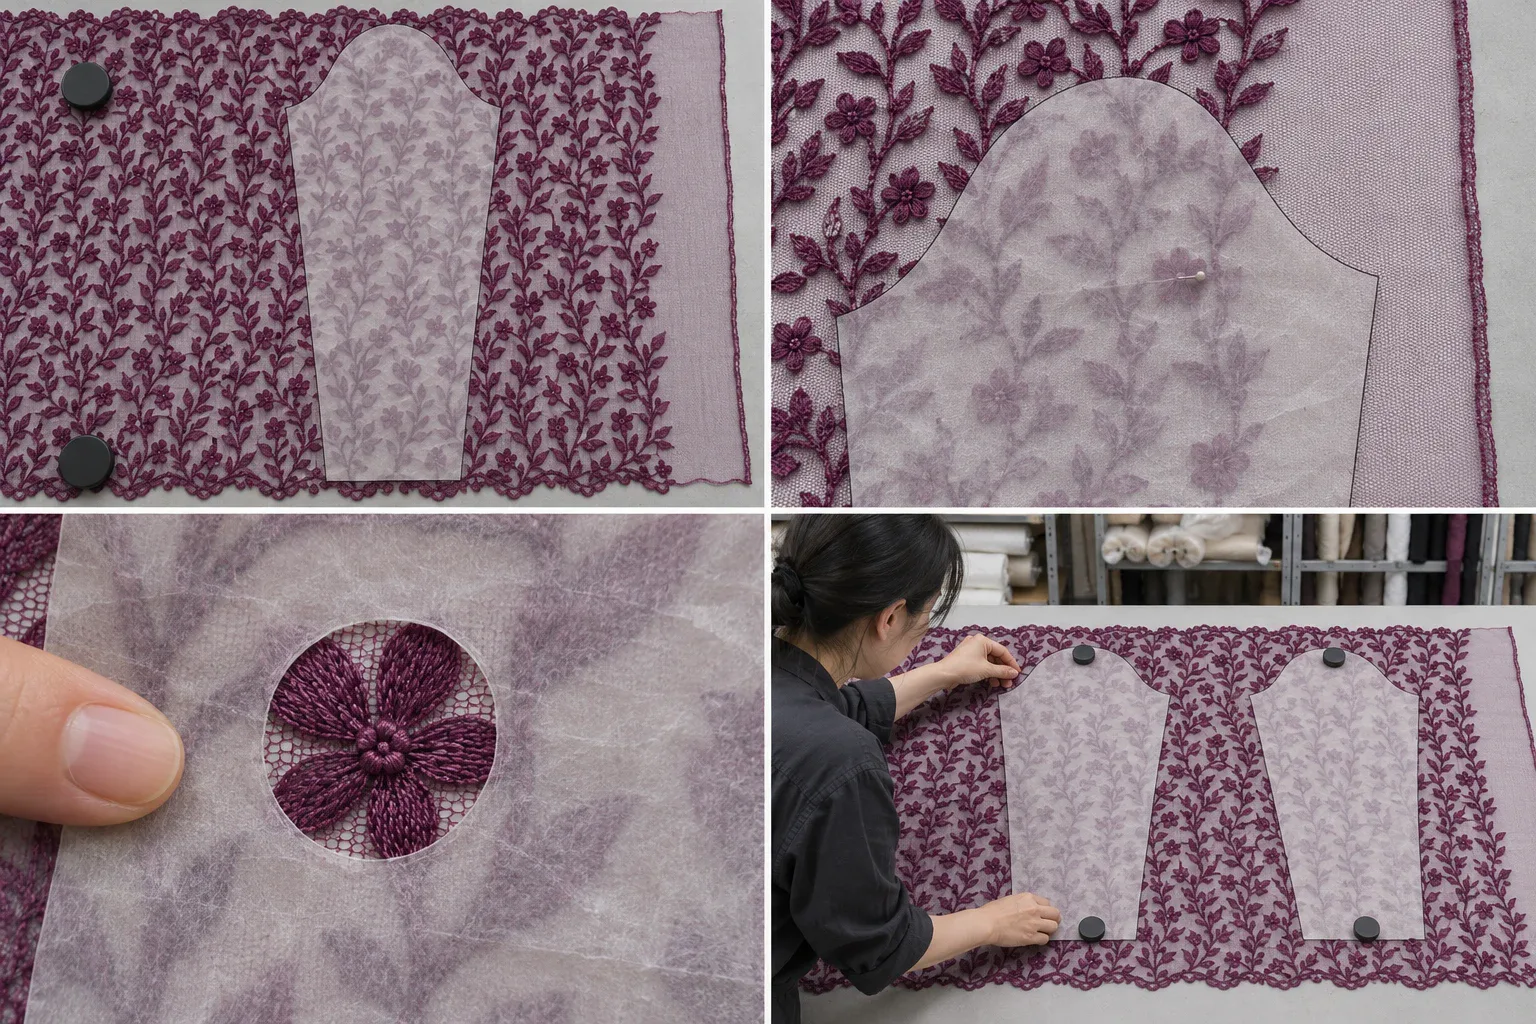
Try the narrower offer. At top right, following the intended flower puts part of the insert over the plain edge. Shift it and check the flower again through the paper window, as at lower left. Once both outlines sit on acceptable ground, count the pairs again.
Can purchasing use the 25.20 m figure?
Layout confirmed. The cutter has placed six pieces on the offered fabric width with the approved flower at every mark, and checked that the layout repeats end to end. Record the sample and pattern versions, usable width, 3 pairs per 1.20 m and 25.20 m net for 63 size M pairs. Then add the measured roll-start, trial and spare quantities.
Width or flower position changed. Keep the six outlines and place them on a full-width swatch of the new offer. If one sleeve crosses into the plain edge, find the next allowed flower and try again. Count complete pairs in the revised layout and measure the length they occupy. Recalculate the metres needed for the order first, then apply the supplier’s price per metre.
Discuss a real requirement
Turn the reading into a practical next step.
Send a short note, product reference, photograph, swatch or tech pack. Technical feasibility, sampling, documentation and production terms are confirmed after review.
Start an inquiry