
Introduction
“Can you send the pale pink lace for the leg opening?” A supplier could answer that request with a few flowers stapled to a sample card. That would give the buyer a colour to match. The sample room, though, needs a continuous length to sew around the leg and see where the last flower meets the first.
Start the request with a sketch of one finished leg opening. Show what holds the edge against the body, which part of the lace the customer will see and where the two ends meet. The supplier can then select the right trim, and the sample maker knows what the buyer wants to see when it comes back sewn.
Take P-21, an example brief with a jersey body, separate leg elastic and a narrow border of pink flowers. Its pattern and cutting figures are for this example. Two catalogue photographs identify YT-335. The sewing views show how to place and join the trim on a leg opening.
Which part holds the leg opening in place?
On P-21, a strip of elastic runs around the fabric edge to draw the opening in. The lace sits on the outside, with the petals showing beyond the jersey. Put the two trims on separate lines in the materials list. Ask the lace supplier for the floral trim and give the sample room the reference for the elastic it will sew underneath.
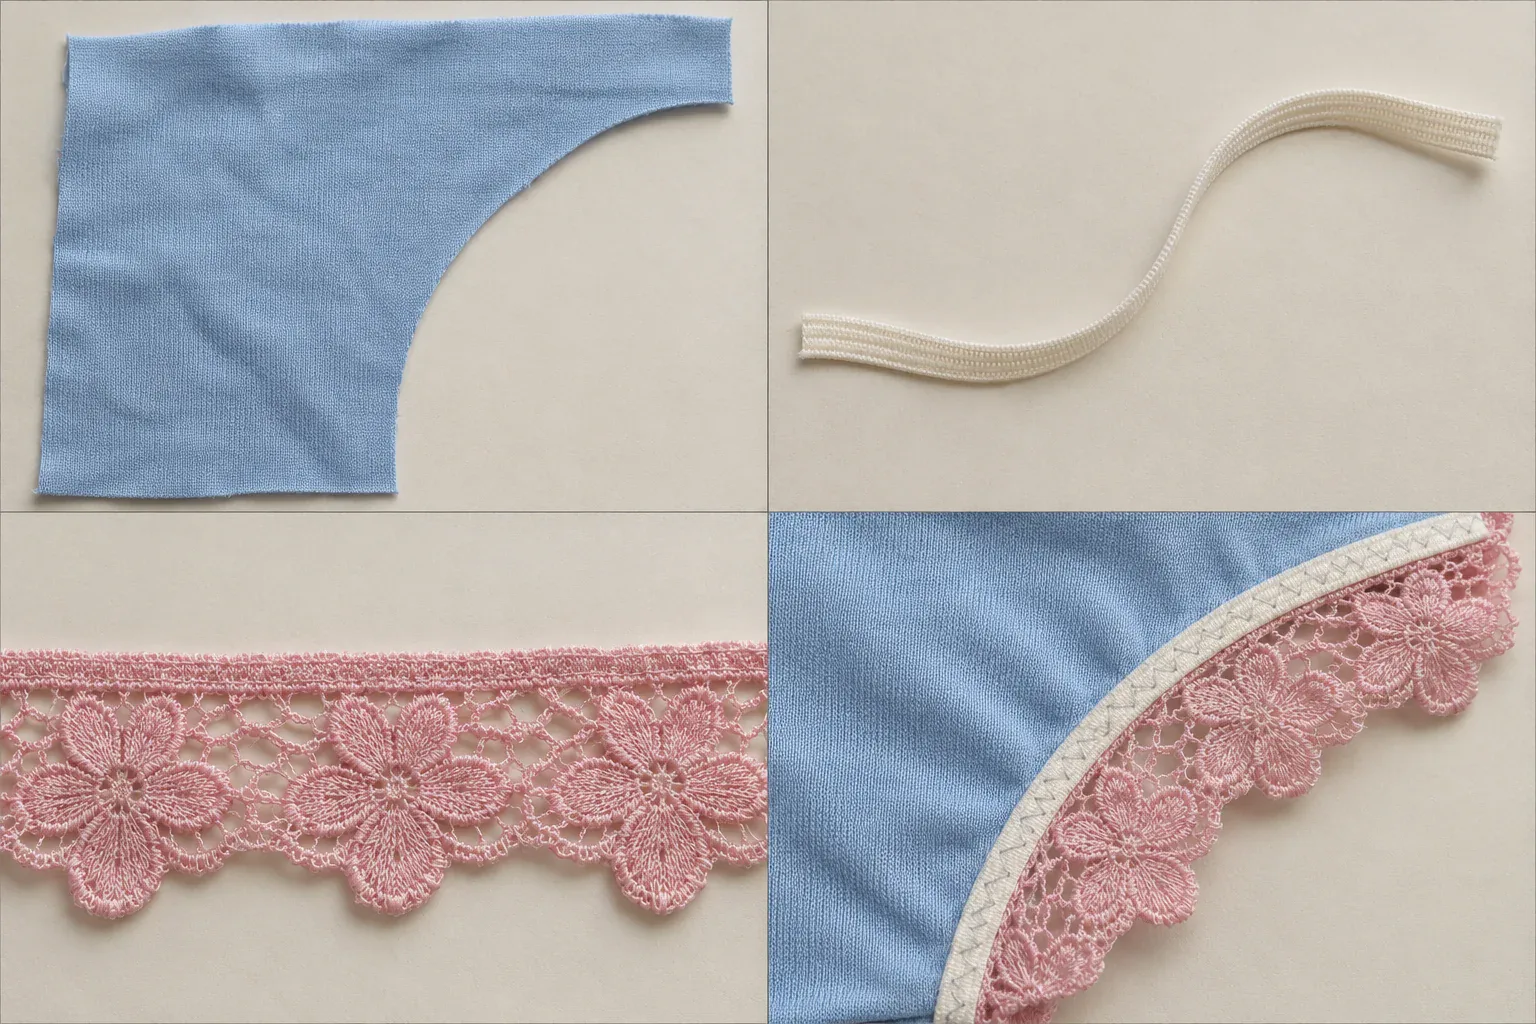
P-21 construction example. The upper panels show the jersey and elastic separately. In the lower right, the ivory band follows the curve of the blue fabric and the pink petals show beyond it.
Mark both joins on the leg-opening sketch and ask for a view from the inside. Pin or baste the lace join over the elastic join on one specimen, then offset them on another using the same materials and sewing setup. Feel both edges and observe them on the agreed fit sample. Let the fitting team decide which arrangement to keep and mark its position on the approved pattern.
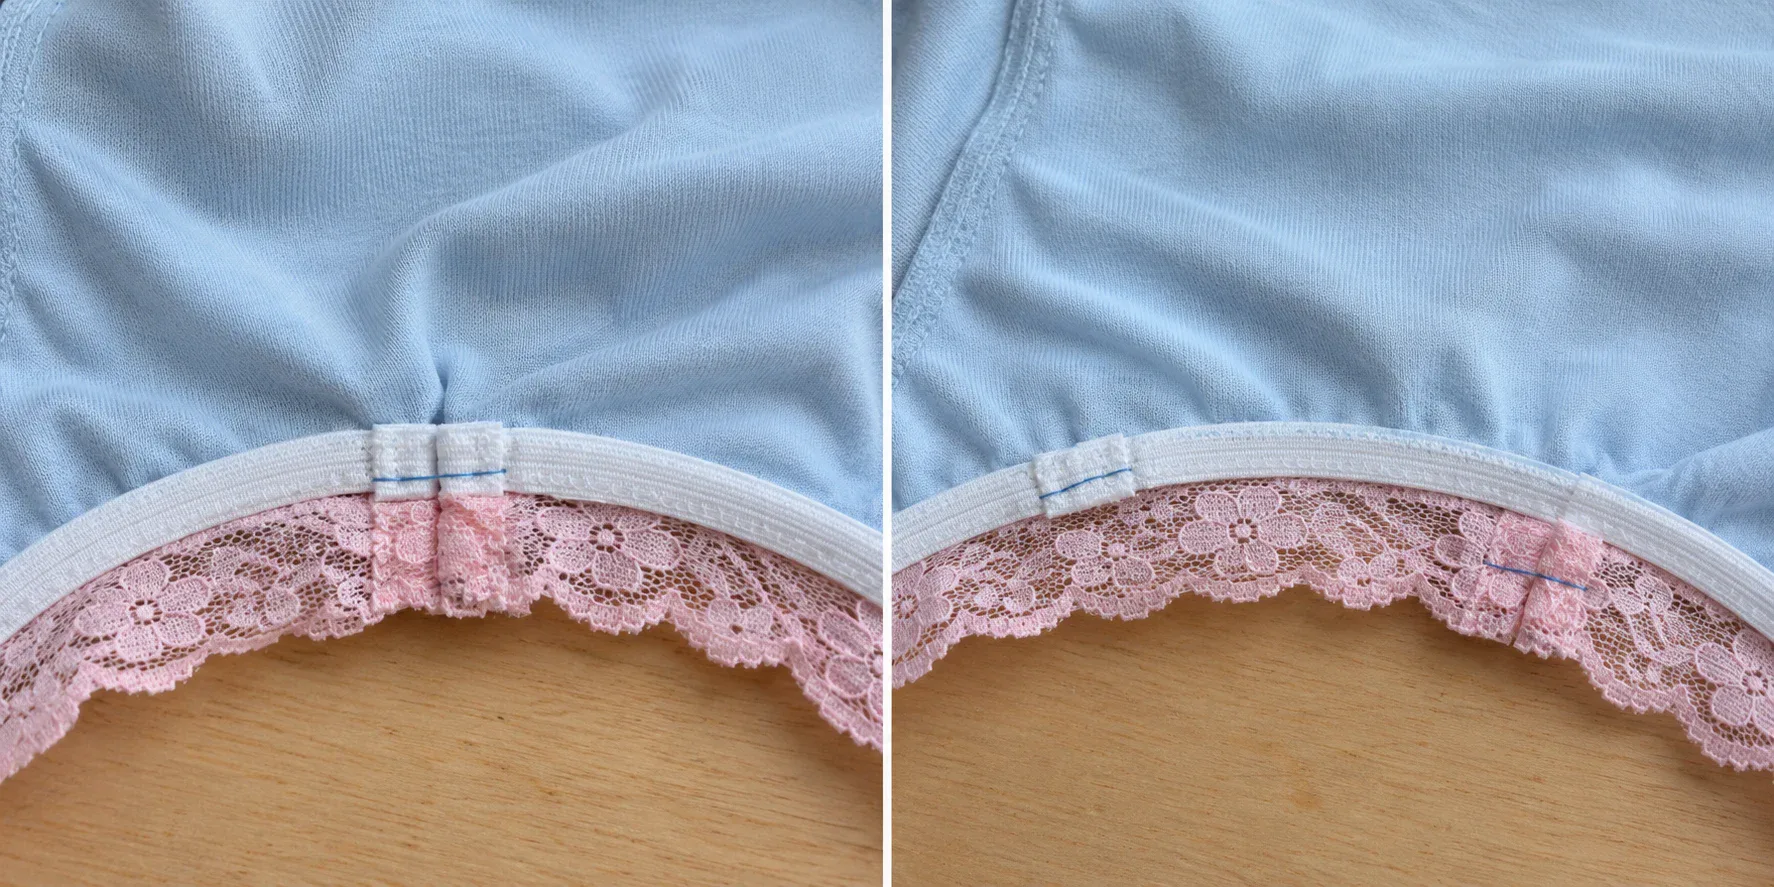
On the left the joins stack at one spot. On the right, follow the blue basting marks to see where each join falls. Compare the layout here, then use the sewn garment to check how the edge feels and behaves in wear.
Ask for the pink you mean
The YiTuo catalogue lists YT-335 Pansy Bloom at 4 cm wide, in 92% nylon and 8% spandex, with scallops along both edges. The photo shows pale pink on the left and a brighter pink on the right. If pale pink is the target, circle the strip on the photo and ask for its colour reference on the sample ticket. YT-335 catalogue entry
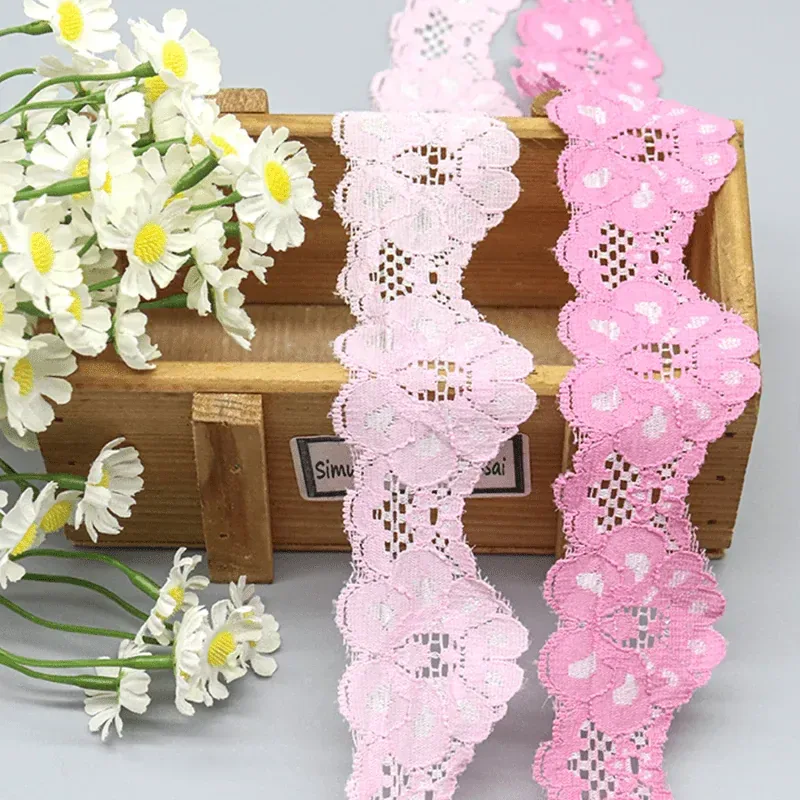
YiTuo catalogue photograph, YT-335. The petals form scallops on both sides of each strip. Use the photo to identify the design and the physical swatch to agree the shade.
Ask the supplier to put a removable mark on the face and an arrow along the roll. On a copy of the sketch, mark which long edge should face the leg and where the front leg curve starts. Keep the marked end with the sample card. The person cutting the second leg can then check its orientation against the first before cutting into the roll.
How much length goes into the join?
The pattern maker measures the line where the lace will be attached, following the curve of one leg on the specified pattern. The cutter needs a different figure, the length of one relaxed strip from cut end to cut end. Label them “pattern attachment line” and “relaxed lace cut length” on the cutting sheet. The elastic also needs its own cut length.
Suppose the lace strip is cut at 520 mm and its ends overlap by 10 mm. At the join, the two 10 mm ends cover the same section of the loop. Its nominal circumference is 510 mm (520 − 10). To check the sewn loop, let it relax and measure once along the middle of the band, starting and finishing at the join. Record that reading separately from the finished garment opening.
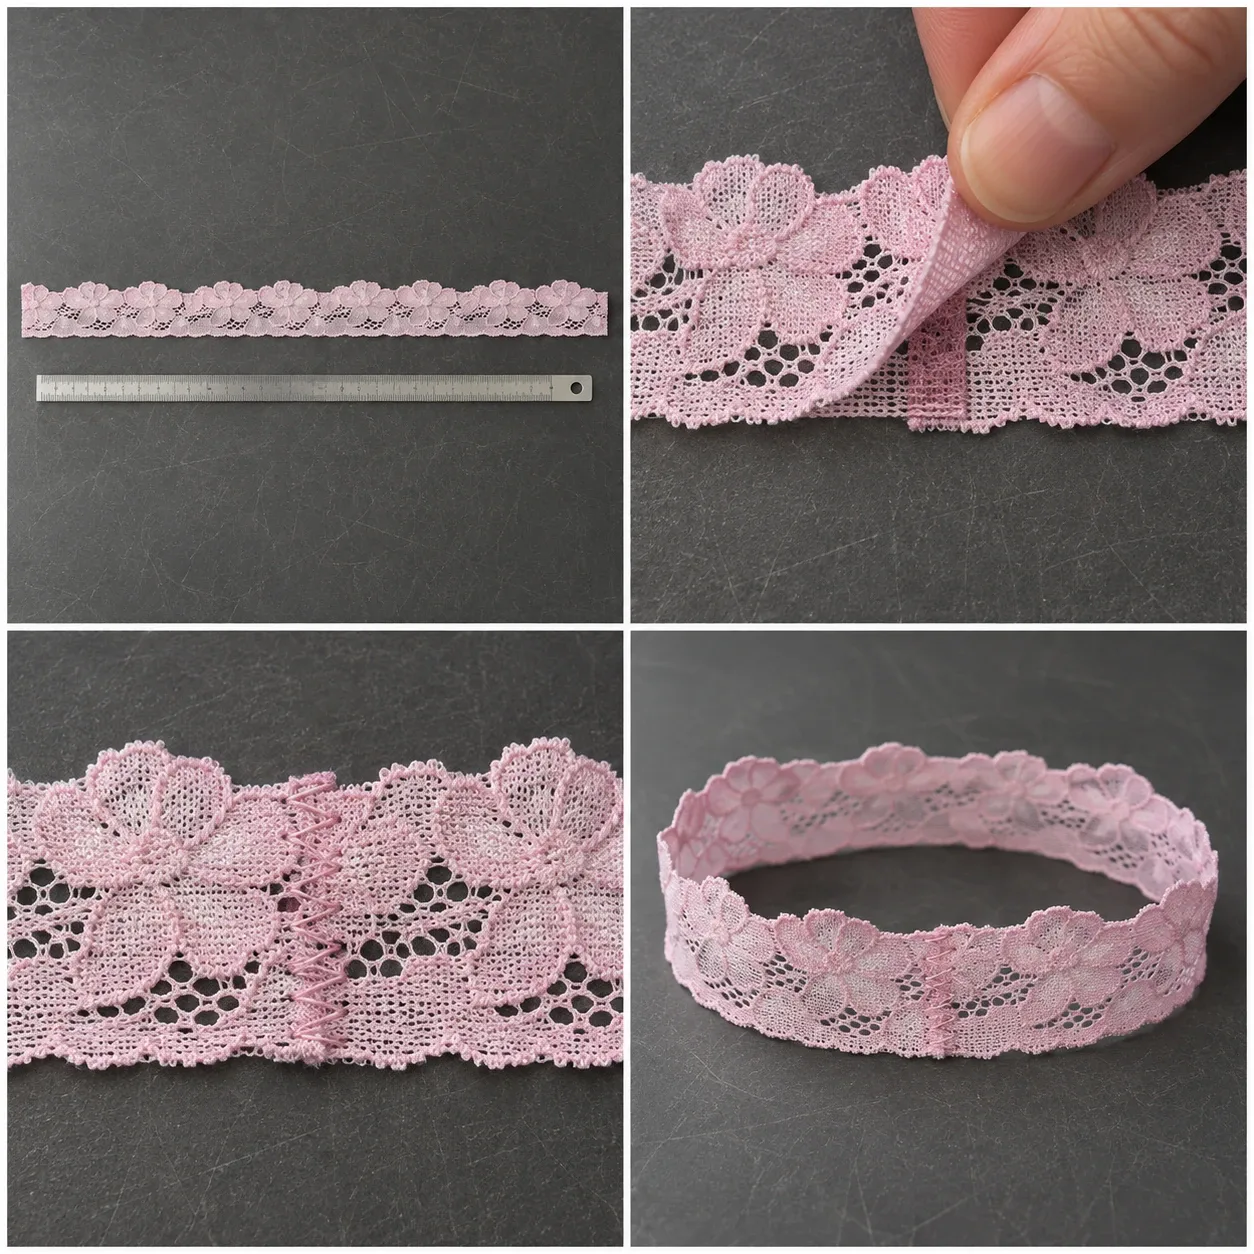
Read from the upper left. Measure between the cut ends, find the overlap, look at the stitches holding the layers together, then trace one complete circuit of the loop.
Mark corresponding points on the jersey, elastic and lace before sewing. If the sewing room distributes the elastic differently along the front and back curves, keep those marks and instructions with the approved sample. The next operator can match the pieces at the same points without guessing how hard the first operator pulled.
How much of the flower should show?
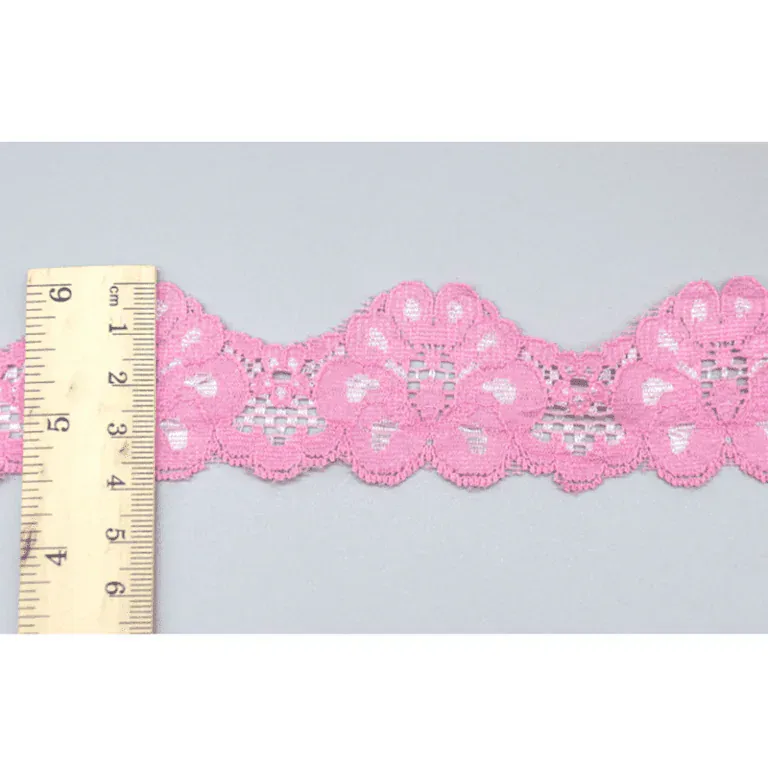
YiTuo catalogue photograph, YT-335. Both long edges rise to a petal tip and dip between flowers. The listed 4 cm is the trim width. Once sewn, measure the visible border from the finished jersey edge.
“Show 8 mm of lace” leaves a question on a scalloped edge. Does the 8 mm reach the tip of a petal or the dip between two petals? On the sketch, draw the finished jersey edge. Measure out from that line to a tip, then to the neighbouring dip, and label each distance. Those two measurements let you compare the positions of two sewn samples, even if both came from the same roll.
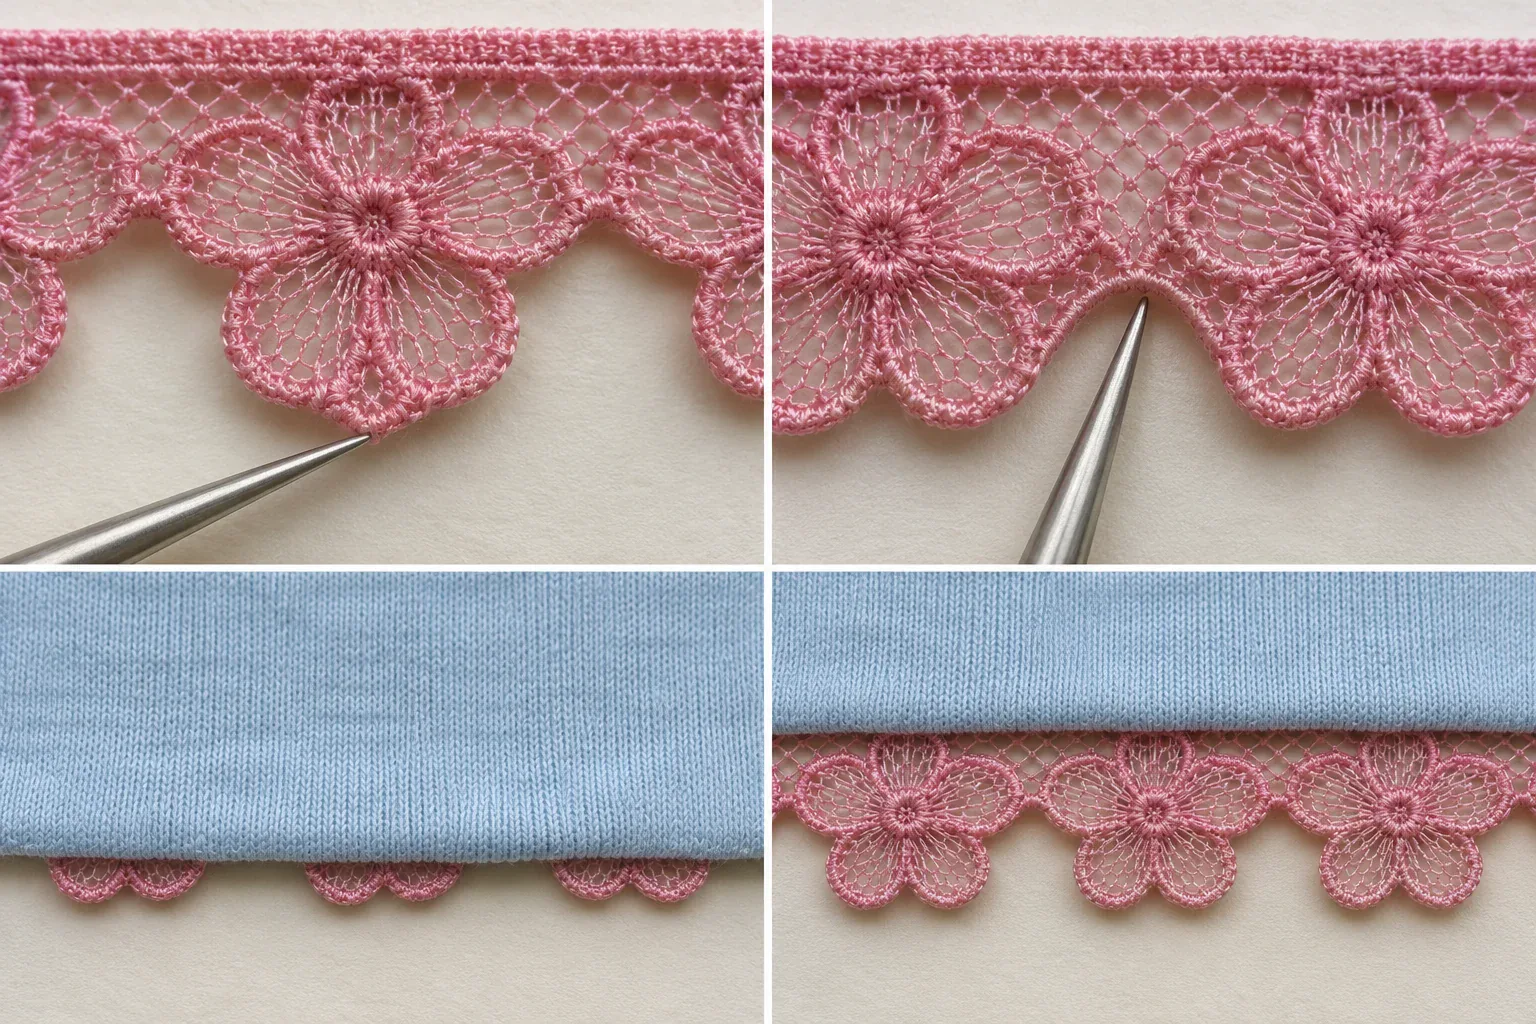
At the top, the pointer picks out a petal tip and the dip beside it. At bottom left, only the tips show below the blue fabric. Moving the lace out brings the flower centres and more of the petals into view at bottom right.
If a whole flower must show on the front of each leg, mark its centre on the sketch. Say whether the two legs need to match and whether a partial flower at the back join is acceptable. Ask the cutter to lay out a pair on the sample length. Any lace skipped to reach the next suitable flower can then be allowed for in the order.
Work out consumption for both legs, size by size
Use size M for the first P-21 sample. Before cutting S or L, check what changes along the leg curve. A larger opening may need more length, while a different curve may put the seam through a petal that shows in full on M. Put the cut figures and any flower placement rule beside the pattern revision for each size.
Cutting sheet | M development sample | S and L |
|---|---|---|
Pattern and trims | Pattern P03, YT-335 lace, E02 elastic | Enter each pattern revision and any trim change |
Lace for one leg | Record relaxed cut length, including the overlap | Enter the cut length for each size |
Elastic for one leg | Record the elastic cut length separately | Check against the elastic instructions for that size |
Pair of legs | Mark the two front flowers and both join positions | Check placement on each size that needs a sample |
For an order of 100 size M briefs, a hypothetical approved cut length of 520 mm per leg would require 104 metres of lace (100 × 2 × 0.520 m), before cutting losses. That cut length already includes the overlap. Add any allowance for matching flowers from the cutting layout, then total the other sizes using their own cut lengths. If the supplier quotes in yards, agree the quantity in yards on the order.
What to keep before placing the order
Look at the sewn edge on the sample garment. Does the front flower still show in full? Turn the garment over and feel where the ends overlap. Ask the garment team to check fit and movement on the agreed sizes and to check the edge after the care treatment specified for the style. Record the size and sample number with the decision.
If a back edge rolls inward, photograph the spot and mark it on the pattern. A useful note to the sewing room would be “The back leg rolls inward beside the join. Please make a second sample with the same lace and elastic, moving the lace join to the position marked in blue.” Keeping the other details the same makes the two samples easier to compare.
Before issuing the order, link the material line to the garment sample the buyer approved. Keep the marked sketch with that sample so the pattern maker can find the correct version if the cut length or flower placement is queried later.
For the size M trial, both legs together take 2 × 0.52 m = 1.04 m net, including both end overlaps. If the sewing team also wants one loose sample loop to turn over and inspect, add another 0.52 m. That brings the three cut pieces to 1.56 m net. Then add the measured skip for matching the front flowers and a separate cutting for the shade card. Ask how long a continuous sample the supplier can actually send.
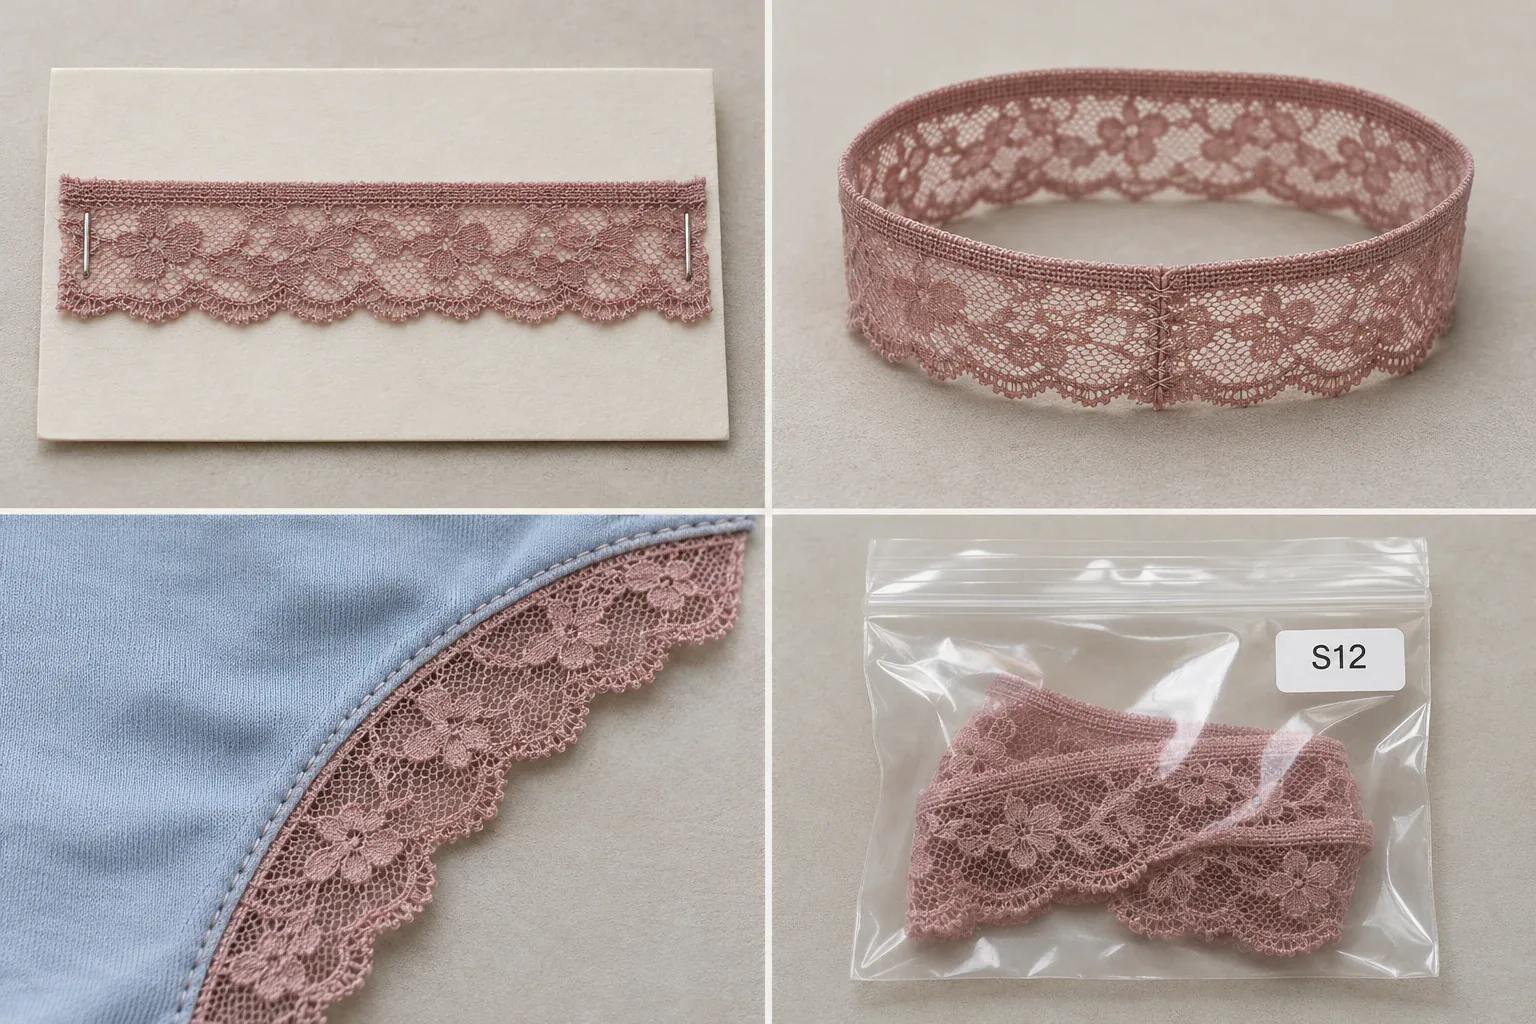
Sample handoff. The card identifies the trim, the loop shows the join, and the garment section shows the visible edge. The bag marked S12 holds an offcut for comparison with the next delivery.
Save an offcut from the length used for the approved sample. Put its reference and colour on the bag and enter the bag number on the purchase order alongside the agreed width, order quantity and unit. When the roll arrives, the receiving team can compare it with the same piece the sample room used.
A size M sample request ready to send
Please send a continuous sample of YT-335 in the pale pink circled in the photo, for the decorative edge over a separate elastic on our P-21 size M brief. One leg takes 0.52 m and the pair takes 1.04 m net, including the end overlaps. Please allow extra for matching the two front flowers in our layout and for a separate shade-card cutting. If we confirm a third piece for a separate sample loop, add another 0.52 m net. Please confirm the continuous length you can supply, the shade code and width, and mark the face and roll direction on the sample.
Attach the marked product photo and leg-opening sketch when you request a YiTuo sample. If you are comparing how suppliers describe stretch and recovery, see the stretch lace guide.
For the stretch test on this sewn edge, see comparing stretch and recovery. For purchase quantities split by reference and colour, see ordering by colour, width and quantity.
Discuss a real requirement
Turn the reading into a practical next step.
Send a short note, product reference, photograph, swatch or tech pack. Technical feasibility, sampling, documentation and production terms are confirmed after review.
Start an inquiry