
Introduction
Say two cuff trims can both stretch from 10 cm to 13 cm. Does the wearer have to pull harder on one of them? Once the cuff is off the hand and back at the wrist, does either stay loose? These are two separate buying questions. Ask the supplier for a pair of samples that you can mark and compare under the same conditions.
If the hand has to pass through a closed cuff, make two observations. How much effort does it take to open the cuff, and does it sit neatly again at the wrist? Compare the loose strips under the same conditions, then try the more promising one with the sleeve fabric and the join.
Start with what this piece needs to do
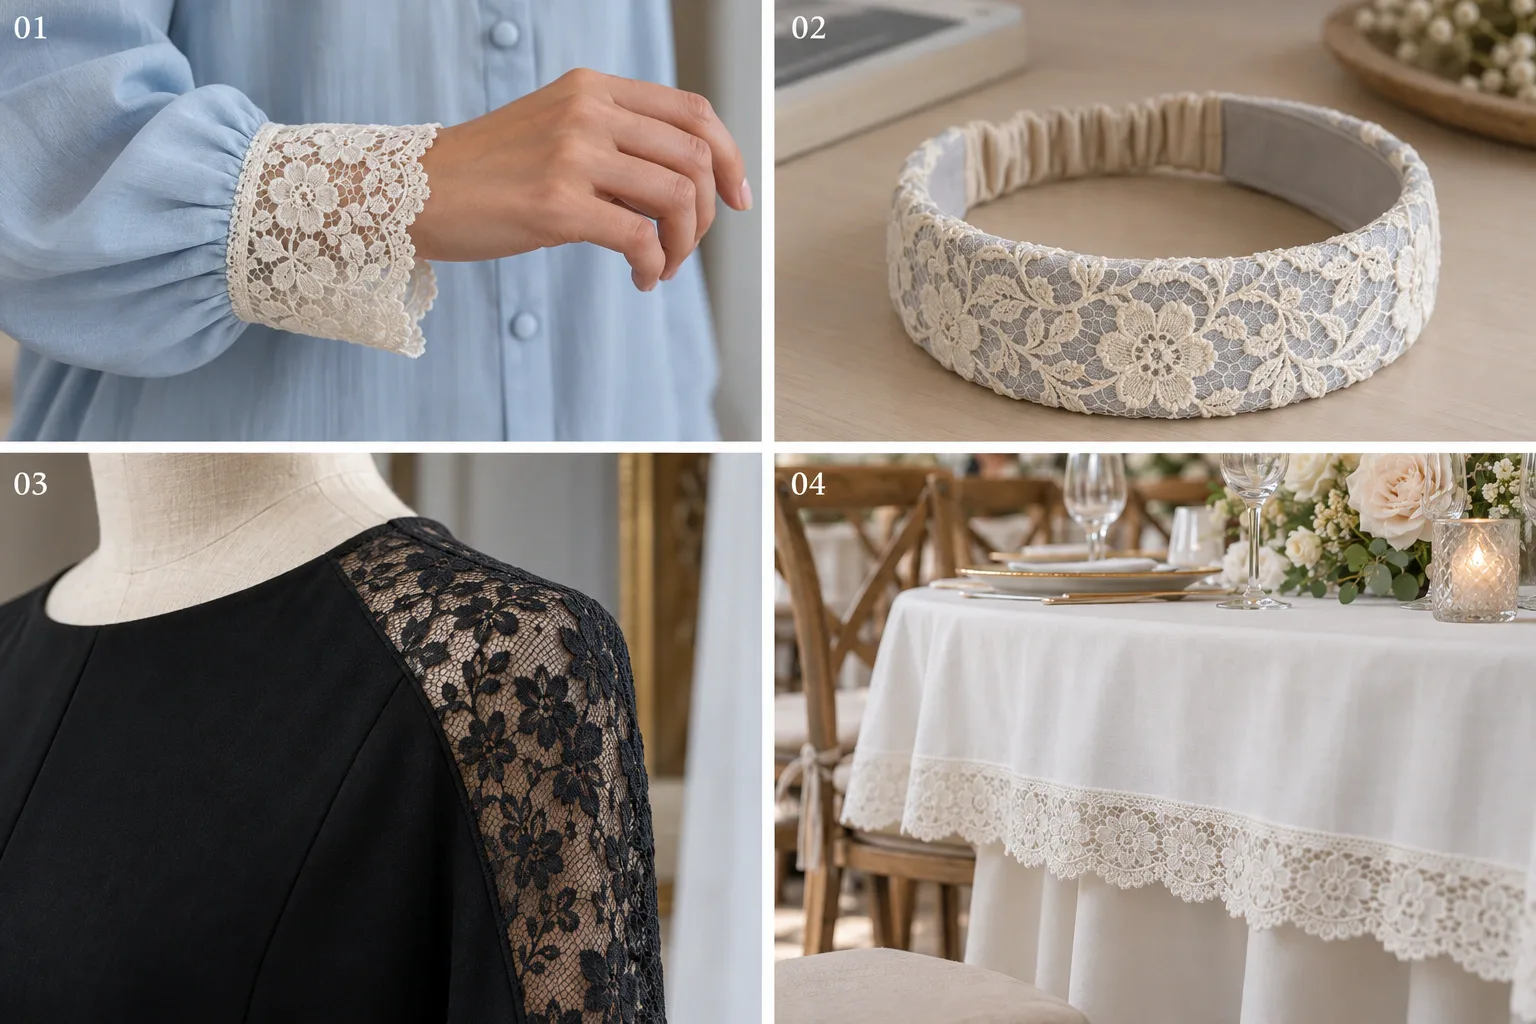
A cuff must pass over the hand. The headband also has elastic at the back, so check which component moves. A sleeve insert follows the arm, while a fixed table border is judged in its installed position.
Position | The useful question |
|---|---|
Closed cuff | Can the proposed cuff, including its seam, open as required and return to the intended shape? |
Lace on a fabric headband | Which part stretches? If the back elastic provides the fit, does the lace-covered front need to stretch at all? |
Trim on a costume sleeve | Does it follow the sleeve movement without distorting the decorative edge? |
Fixed wedding table border | Is stretch needed at all? Compare a non-stretch option when the aim is a steady outline. |
The same distinction applies to lingerie: identify whether the lace is decorative or part of the stretch function before choosing a sample.
Draw the direction before discussing “2-way” or “4-way”
On a strip of trim, draw one arrow along the roll and another across its width. Show which arrow follows the movement in your design. A band that extends along the roll may behave differently across its width; turning it also changes the position of its scallops and flowers.
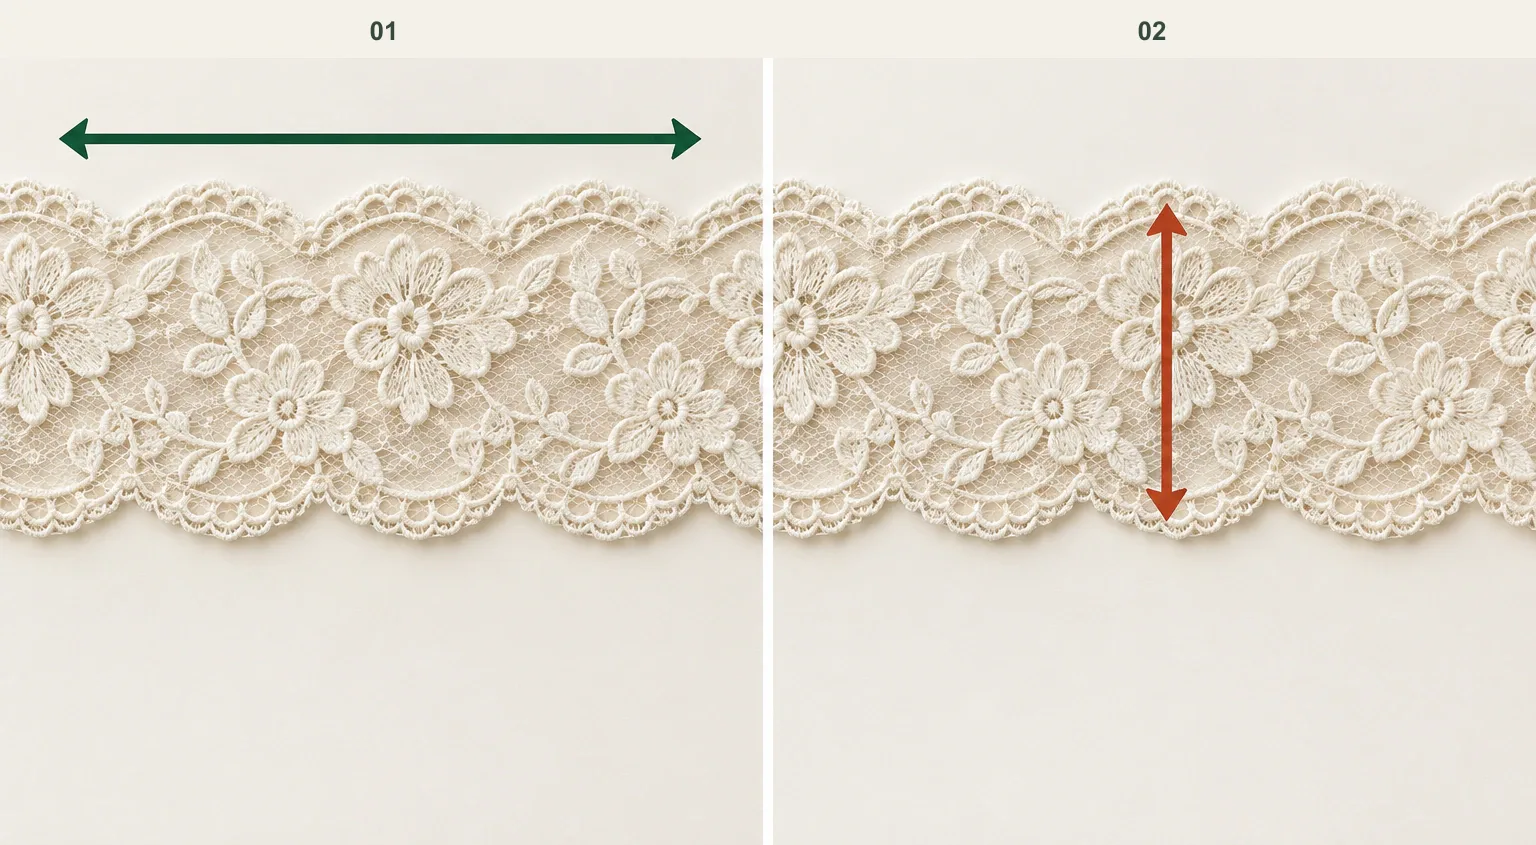
01 follows the roll length. 02 crosses the width. Mark the test direction on each cutting before the pieces leave the roll.
When a listing says “2-way stretch lace” or “4-way stretch lace,” ask the supplier to mark the actual directions on the selected sample and provide information for each direction you need. Narrow trim may not provide enough width for the same test arrangement used along its length; have the testing team choose a suitable arrangement rather than forcing the same measuring span onto both directions.
Keep the comparison tied to identifiable products
These two YiTuo catalogue references give you a narrower scroll pattern and a wider floral design to consider. Start by checking which fits the intended position. Their listed widths and compositions identify the candidates; stretch and recovery still need to be compared on the selected samples.
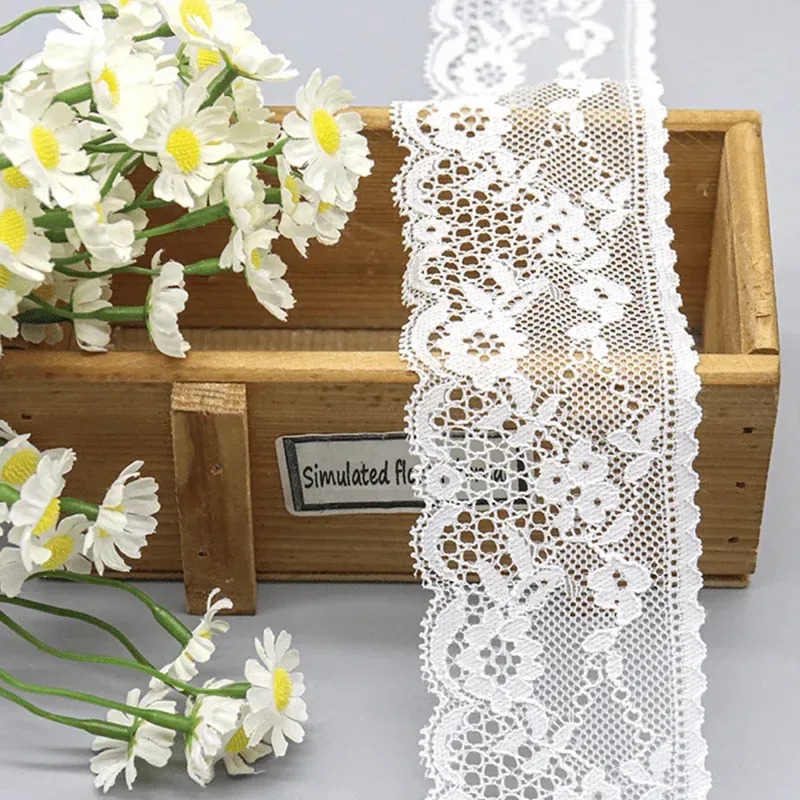
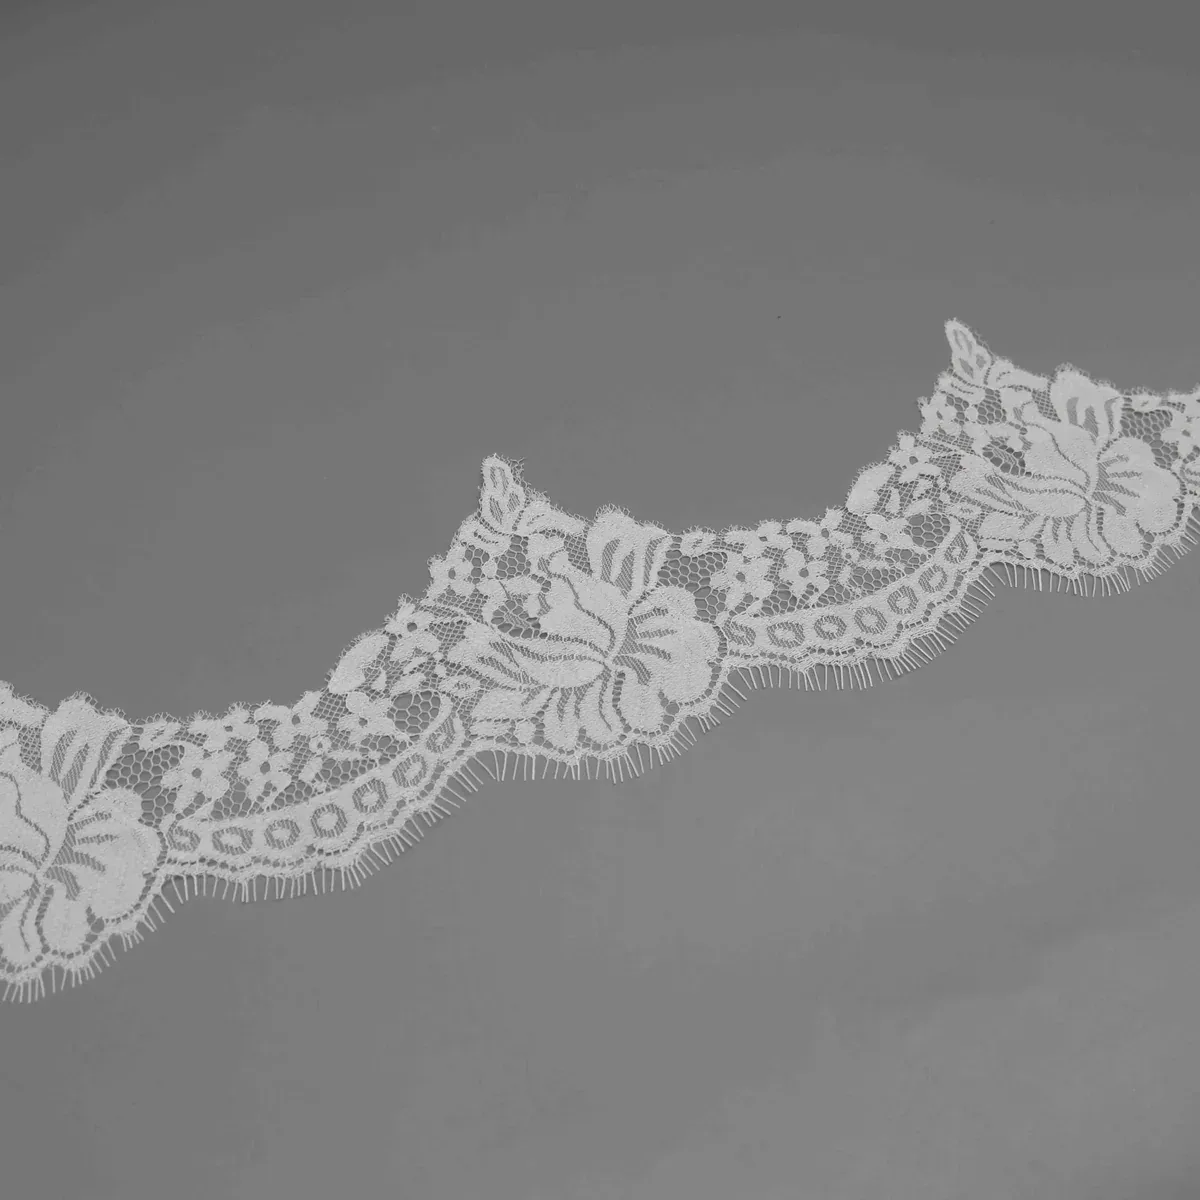
Unchanged YiTuo catalogue photographs. Left: YT-235T7. Right: JZY-81196-1. These are real design references; neither photograph shows a stretch-and-recovery test.
Candidate | Listed width and composition | The next sample question |
|---|---|---|
5.5 cm; 92% nylon, 8% spandex | In the required direction, what happens to the scroll pattern and shaped edge during extension and after rest? | |
11 cm; nylon-spandex blend, percentages not listed | How do the larger flowers and mesh change at the proposed extension? Confirm the composition percentages if required for the order. |
Neither listing supplies numerical recovery results with defined test conditions. Ask for those records if the purchase depends on them. The amount of spandex alone cannot tell you which candidate will return closer to its original shape.
Decide whether you are comparing force or extension
Pulling each piece until it “feels about right” is useful for an initial look, but it does not give comparable measurements. You may apply different forces or hold one sample longer. Choose the question first, then ask for records made under matching conditions.
Comparison | What stays the same | What you compare |
|---|---|---|
Same extension | Starting length and the chosen increase in length | The force each sample needs to reach that point. |
Same force | The applied force, using the agreed specimen setup | How far each sample extends. |
For a cuff that needs a particular opening, comparing force at that extension helps describe how the candidates resist opening. Comparing extension under a given force answers a different question. Keep the two results clearly named; a larger extension under one load is not proof of better recovery.
Record sample identity, width, direction, starting length, measurement setup, loading speed, hold time, cycles and rest time. Use the same agreed preparation and procedure. For the starting and post-rest readings, place and measure each sample as agreed; do not add a pull just to straighten it against the ruler. If the candidates differ in width, ask how the test pieces will be compared: pulling an entire 11 cm band and a 5.5 cm trim gives readings for those different pieces, not a simple ranking of material quality.
After release, measure what remains longer
The following numbers are a teaching example. Both samples start with 100 mm between the marks and are extended to 130 mm under the same specified procedure. After release and the same chosen rest time, A measures 102 mm and B measures 108 mm.
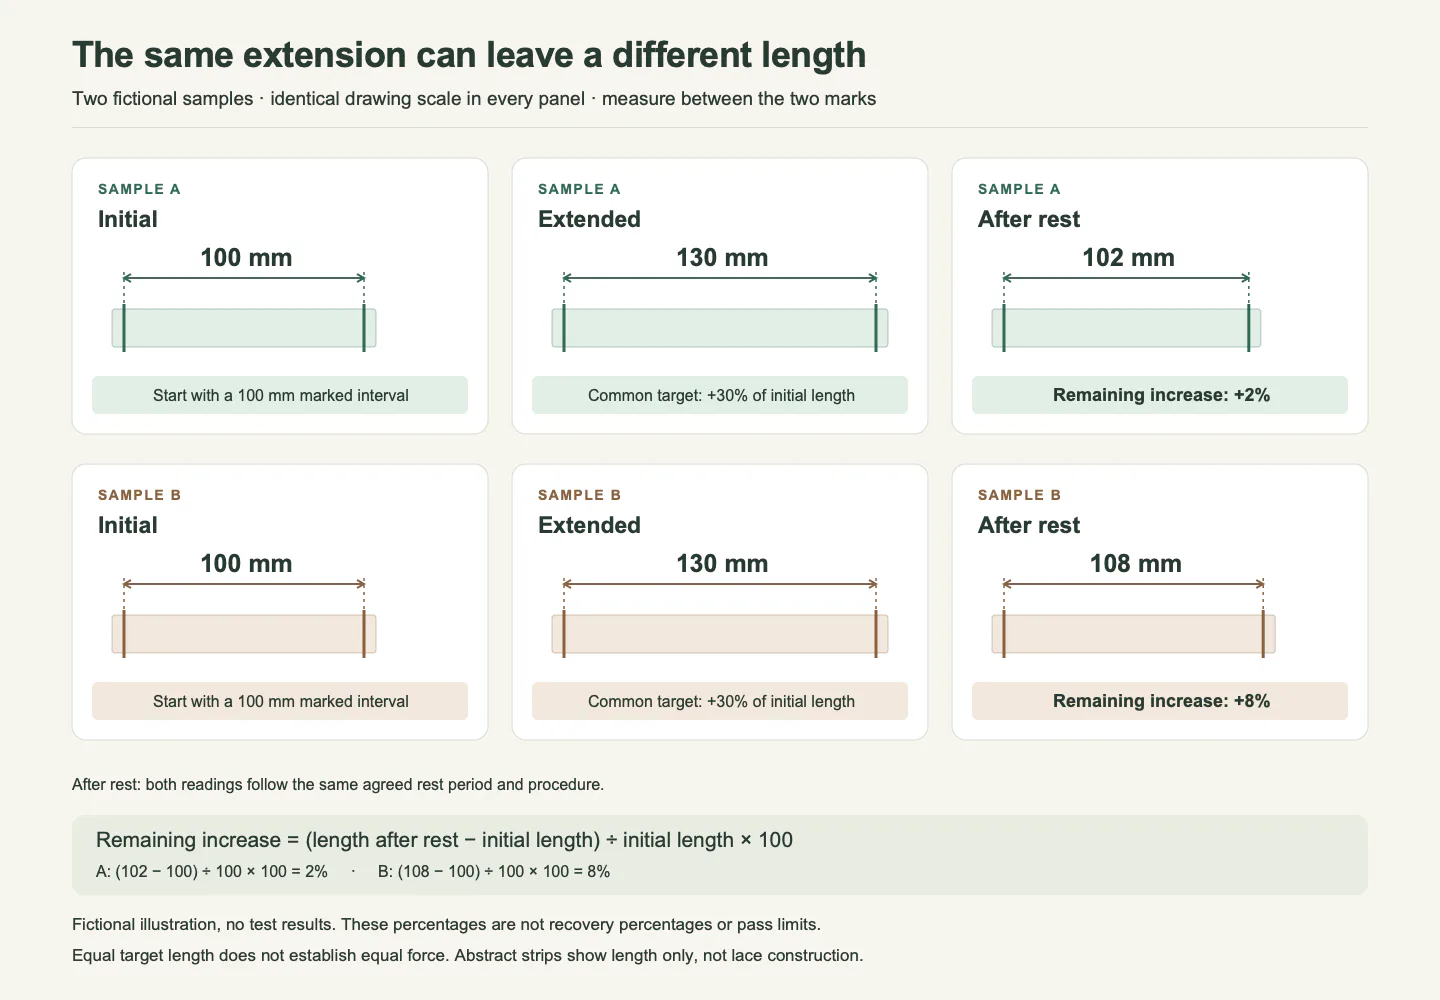
Invented values for explaining the calculation, not YiTuo product measurements. The resting interval and procedure must be specified in a real comparison.
After the same rest time | A | B |
|---|---|---|
Length between marks | 102 mm | 108 mm |
Length remaining above the original 100 mm | 2 mm | 8 mm |
Remaining increase relative to original length | 2 ÷ 100 = 2% | 8 ÷ 100 = 8% |
After the same rest, A was 2 mm longer than it started and B was 8 mm longer. If a loose wrist is the main concern, take A to the sewing room first. The 2% and 8% figures describe length left over relative to the original 100 mm. To find out which one takes less effort to pull on, compare the force needed to reach 130 mm.
Watch the flowers and edges, not just the ruler
Photograph the same marked area before loading, while extended, just after release and after the agreed rest. Keep the camera, light and background comparable. Look for flowers that remain elongated, openings that remain wider, and edges that curl or lose their intended outline.
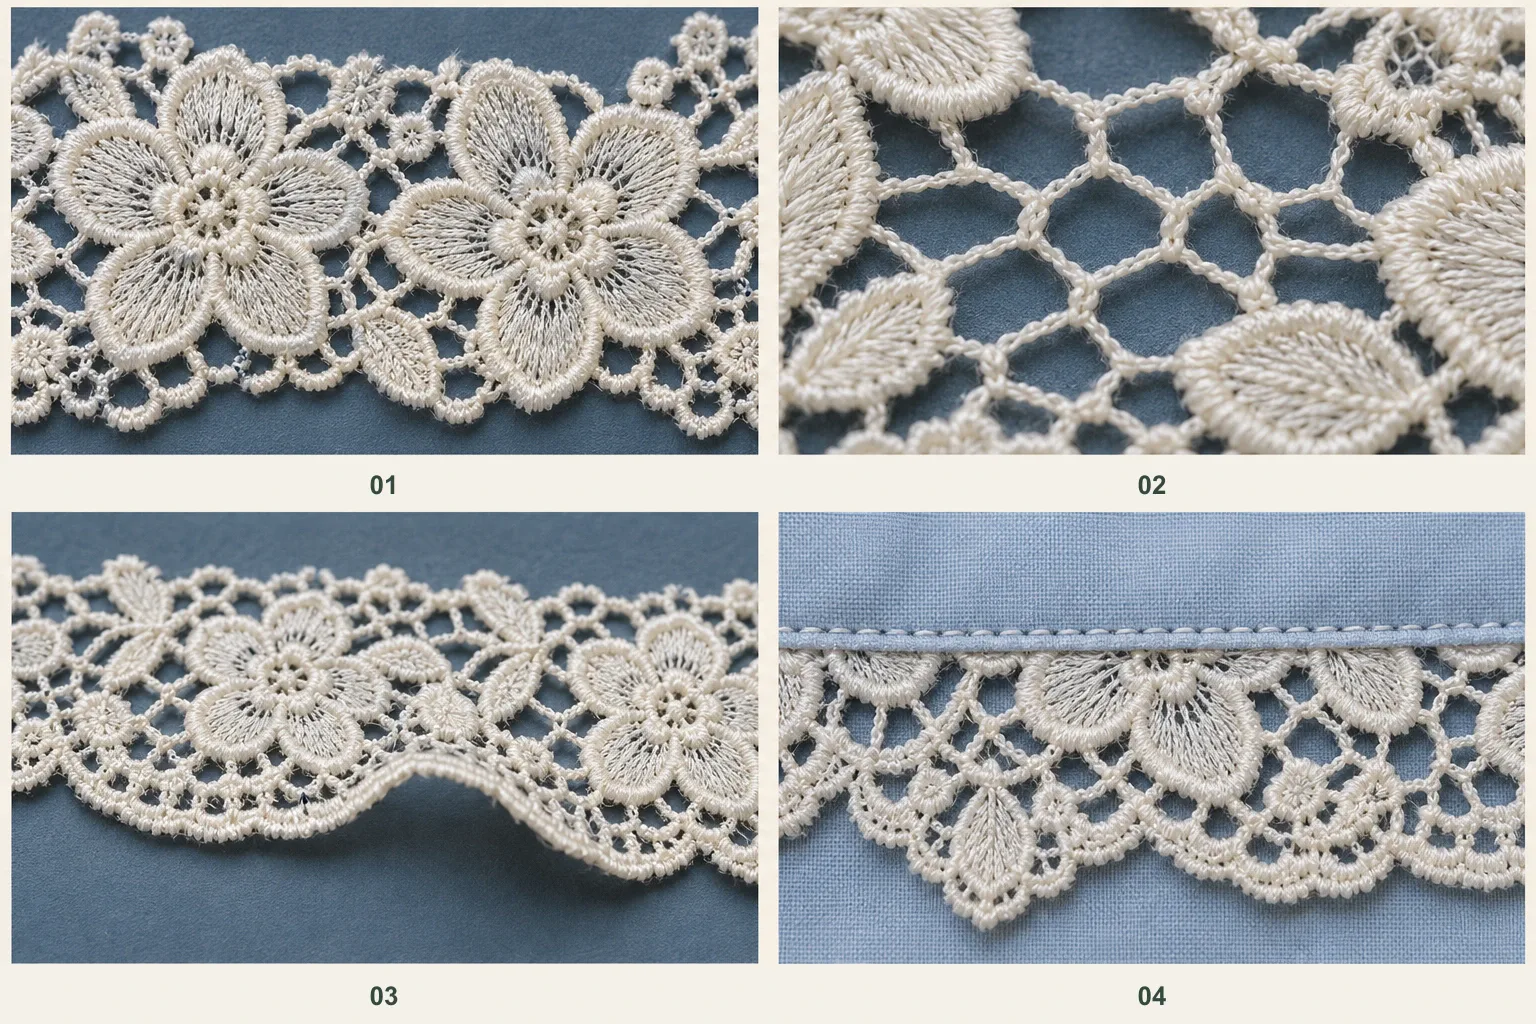
Pick a flower, a mesh opening and a scallop to examine at rest and under the agreed extension. Keep the same three landmarks when you check the sample again. On a sewn piece, include the stitch line shown at lower right. 01 Flower shape. 02 Mesh openings. 03 Edge outline. 04 Sewn join.
A larger opening in the pattern can make more of the background show through. Check the sample over the proposed base colour when that matters visually. Temporary changes during extension and changes still present after rest are different observations. Then try the chosen lace with its base fabric and seam: the loose strip cannot answer every question about the finished assembly.
If the result will become an order acceptance requirement, agree a suitable test method and limits with the laboratory or responsible technical team before testing. Keep the sample-screening observations and the formal report clearly identified.
Which sample goes to the sewing room?
Send A for the first cuff trial if the sleeve needs to sit close to the wrist and the two strips gave the readings above. Label the sample with its direction, the sleeve fabric and the proposed join. Have the sample maker keep those details the same when trying a second trim.
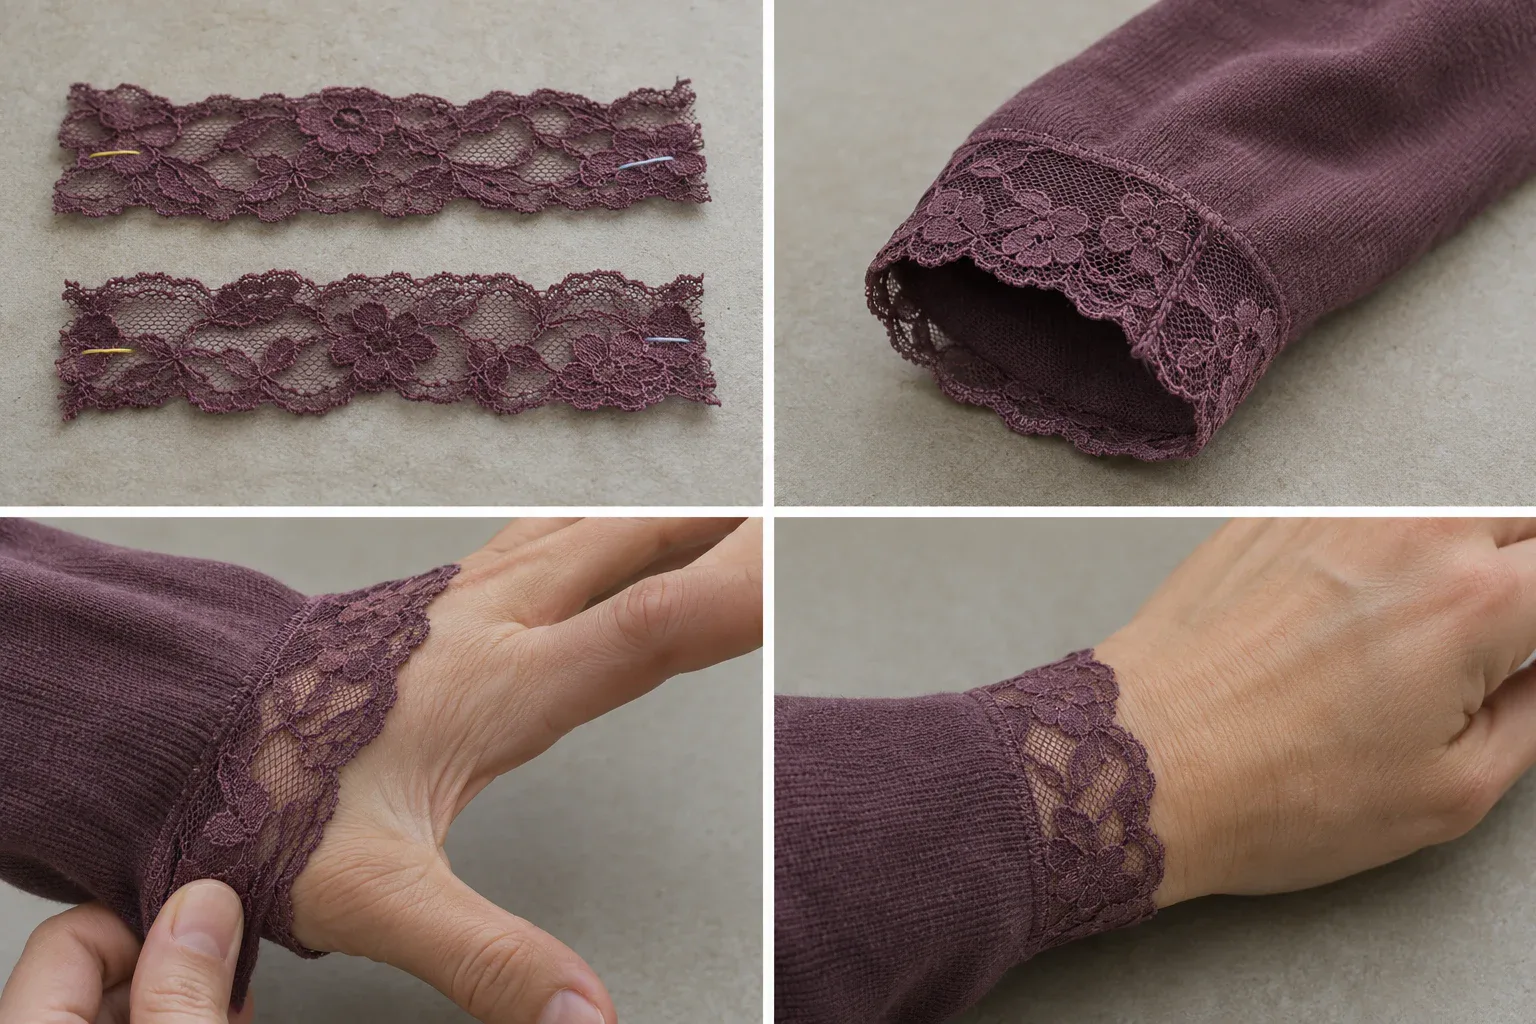
The loose strips let you return to the same two marks. Once the lace is sewn in, check the movement over the hand and the edge at rest separately. Use the trial to judge the actual cuff in the order.
Try the cuff over the hand and let it settle at the wrist. If the join catches or the cuff takes too much effort to open, keep it on trial and compare opening force and seam construction. If it passes over the hand, sits as intended and meets the agreed care checks, keep that sewn cuff as the purchase reference. Record the size tested.
Still choosing the material format? Read trim, band or fabric. For the part that will remain visible, use the guide to width, edges and pattern repeat.
Discuss a real requirement
Turn the reading into a practical next step.
Send a short note, product reference, photograph, swatch or tech pack. Technical feasibility, sampling, documentation and production terms are confirmed after review.
Start an inquiry