
Introduction
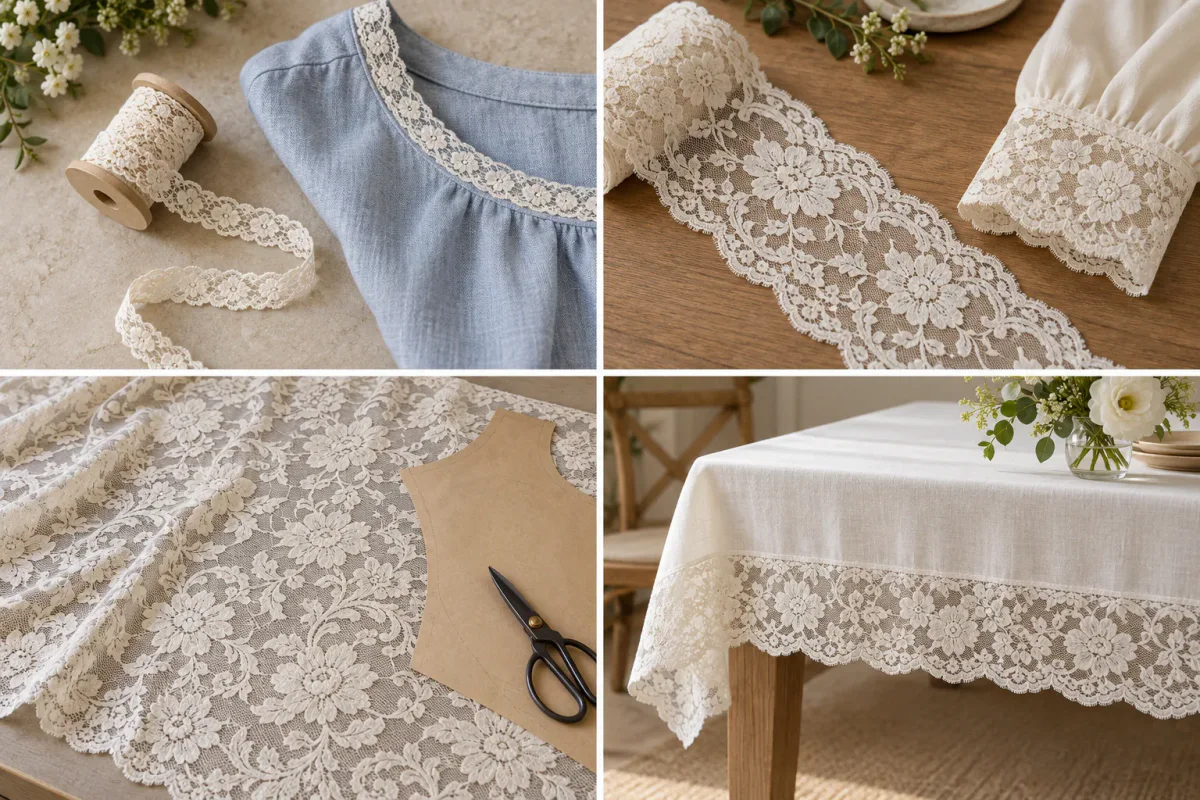
A blouse photograph comes in with the note “Please quote this lace.” The neckline has a fine outline, a row of flowers hangs below the cuff, and the shoulder is made from a shaped piece of lace. Which part did the buyer circle?
Follow the outline of the piece you need. If one edge of the lace will finish a neckline, start with edging sold by the length. If the lace itself forms the cuff, start with a band. If a paper pattern has to fit inside the lace, start with full-width fabric.
Which form should you ask to see?
What the design calls for | Ask for | What the sample must show |
|---|---|---|
A fine line following a neckline, pillowcase opening or sign | Narrow ready-made lace trim | Both long edges and a continuous length that can follow the actual curve or corner |
A row of flowers hanging below a cuff, or a band laid the length of a table | A wider ready-made lace band | The whole band from edge to edge, including the part that will be sewn under and one full pattern repeat |
A shaped sleeve insert, back panel or wide curtain | Full-width lace fabric, with stretch if the base needs to move | Both fabric edges, usable width and enough length to lay out the actual shape and motif |
“Wide” is relative. A band can be wide enough to make a whole cuff and still be far too narrow for a sleeve panel. Write the actual width beside the reference you want to sample.
Three catalogue references show the difference
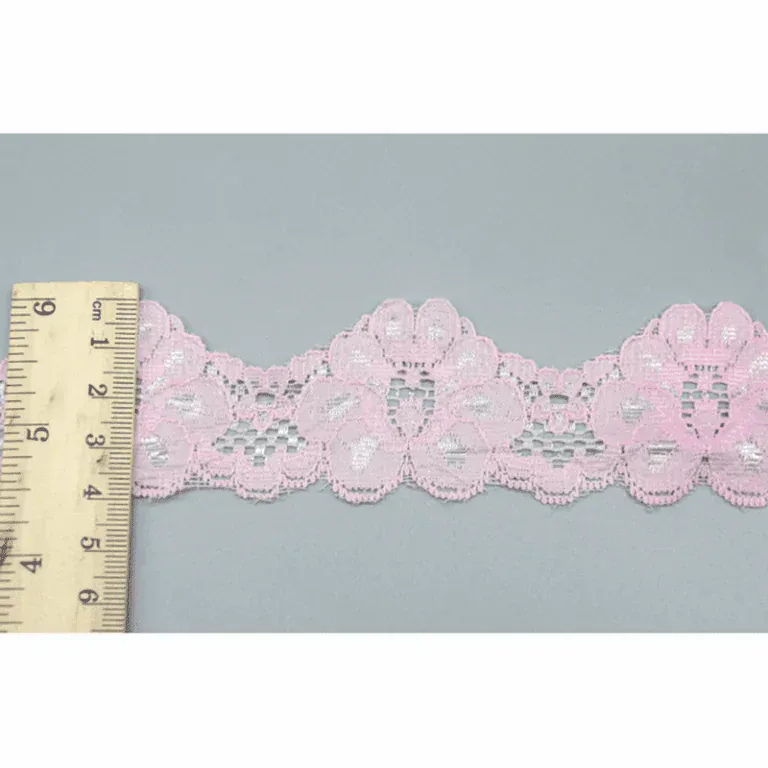
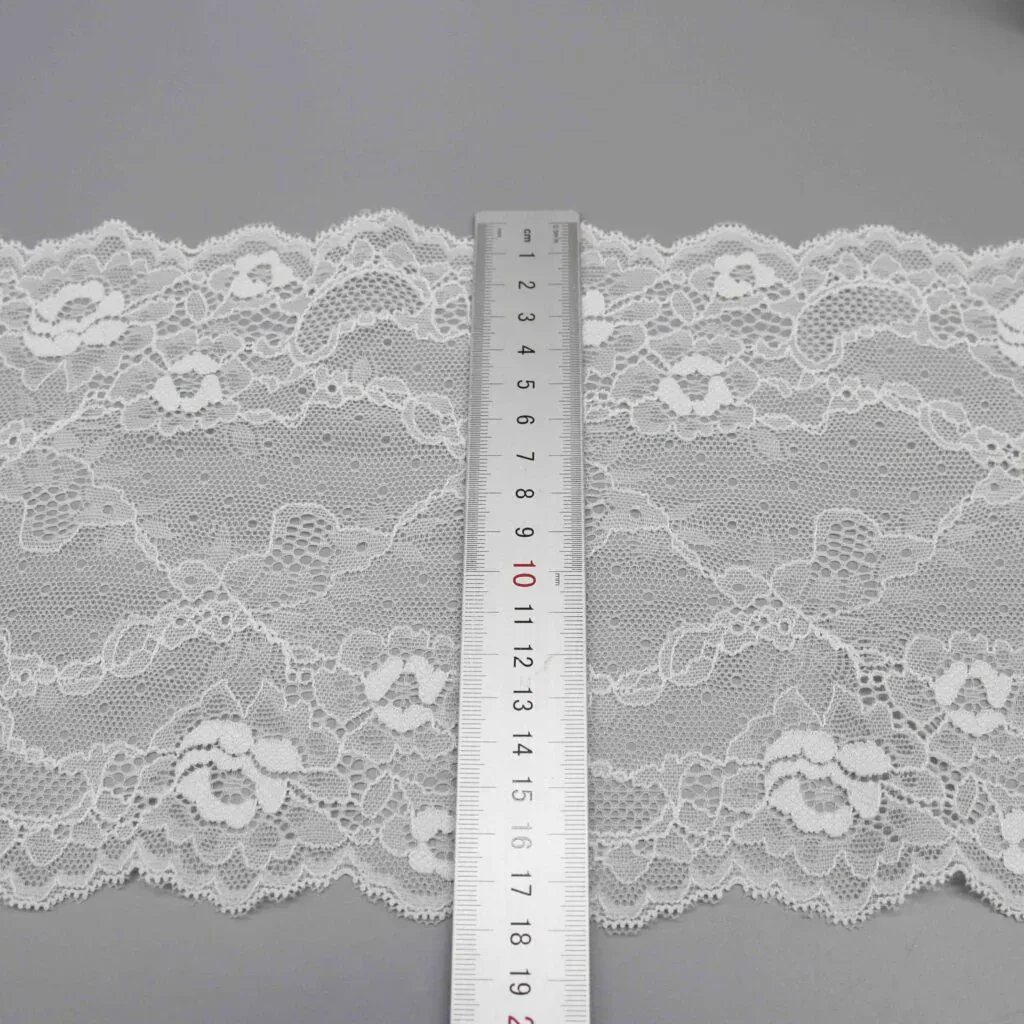
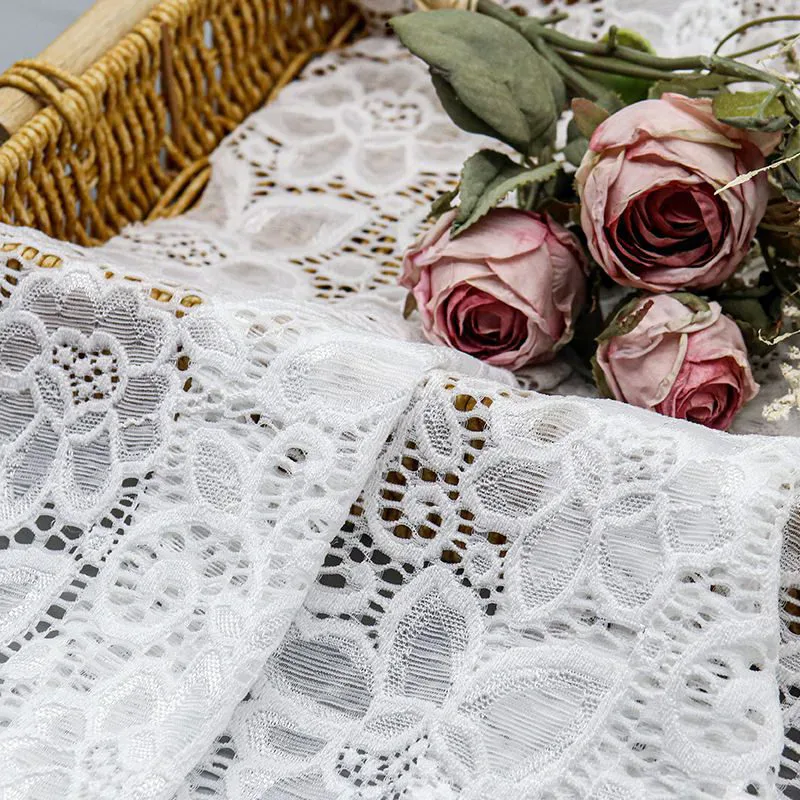
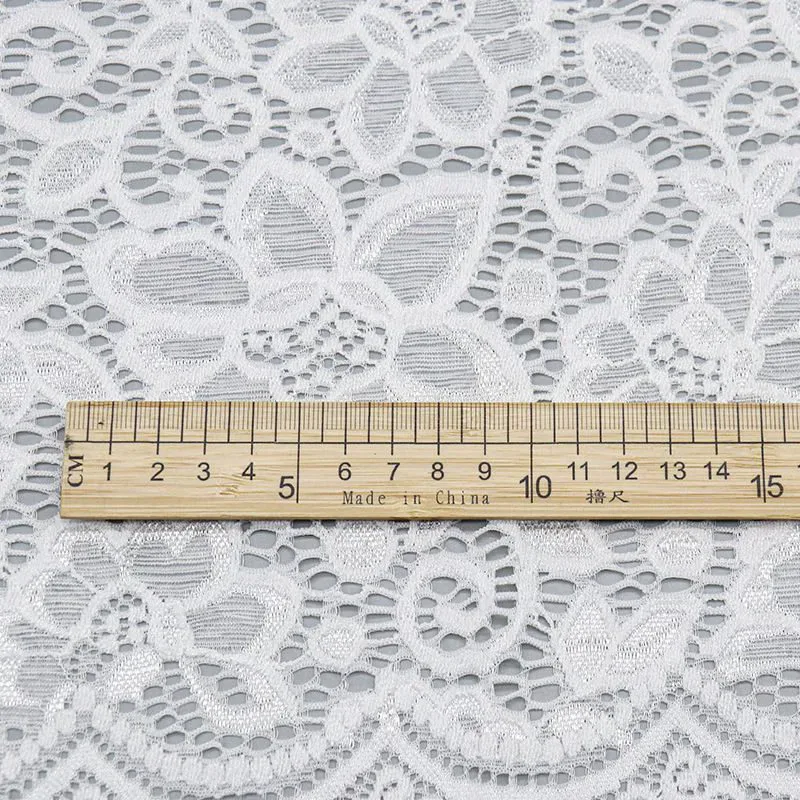
Original YiTuo product photographs, unchanged. Top: rulers across YT-335 and YT-251121-2. Bottom: SY763 fabric and its motif-scale detail. The listed 150 cm fabric width comes from the product specification; the detail ruler does not measure the full width. Open an image to inspect its original size.
Reference | Catalogue dimensions and composition | What to compare with your design |
|---|---|---|
4 cm; 92% nylon, 8% spandex | A small decorative border. Compare the shaped edges and the width left visible after attachment. | |
18 cm; 90% nylon, 10% spandex | A broader lace section. Check both scalloped edges and where the joining line would sit. | |
150 cm; 90% nylon, 10% spandex | A shaped panel or overlay. Check usable width, pattern direction and placement of the actual cutting shape. |
On a ruler photograph, read both edges and subtract if the first edge is off zero. On a scalloped band, note whether the ruler crosses a tip or a dip. The ruler beside SY763 is there to show the flower size. To check that a panel fits, ask for the usable width across the actual fabric.
A cuff with one whole row of roses
Take a deep blouse cuff with a rose scallop at the wrist. Suppose the drawing calls for 17 cm from the finished sleeve edge to the scallop tips and allows 1 cm to be covered by the sleeve. A band measuring 18 cm to the tips is worth sampling. The 4 cm trim cannot give this depth. A straight strip cut through the middle of the 150 cm fabric would leave a cut edge at the wrist.
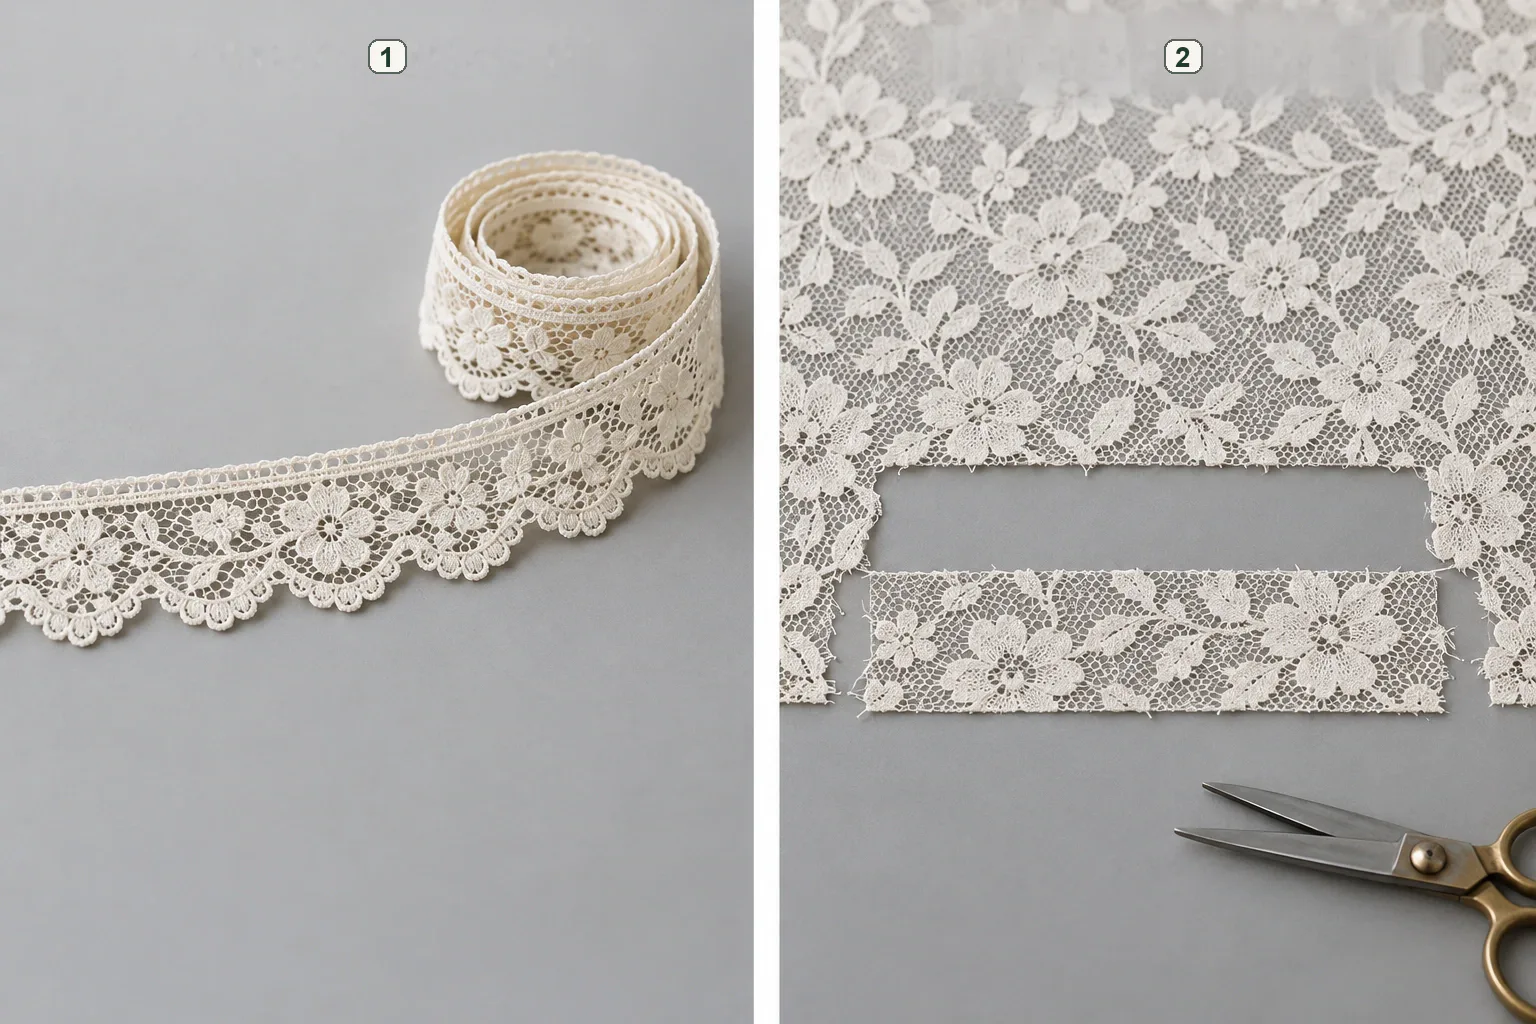
1. Ready-made trim. 2. Strip cut from fabric. The trim on the left comes off the roll with its scallops in place. Cutting a strip out of the middle of the fabric on the right creates a new edge. Ask how that cut edge will be finished before pricing the two options.
Pin the band to the actual sleeve with 1 cm covered. If the tips reach the 17 cm line and the whole row of roses clears the sleeve edge, sew the first cuff and check the flowers at its join. If the cloth hides the roses, ask for a band with the flower row nearer its free edge. A fabric with a finished border is also possible if it supplies enough uninterrupted border for both cuffs.
For a price comparison, cost one wearable pair. Include the actual length cut, the joins, any extra length needed to match the flowers and any work needed to finish an exposed cut edge.
Will this edge have to stretch?
A closed cuff has to pass over the hand. A buttoned cuff opens first. Try the chosen lace on the sleeve it will be sewn to and test that particular opening. On a table runner, lay the sample flat and check that the edge holds its line.
Mark the direction that needs to move on the sample. If two trims feel different in that direction, compare them using the stretch and recovery sample guide.
Where the lace sits on a garment
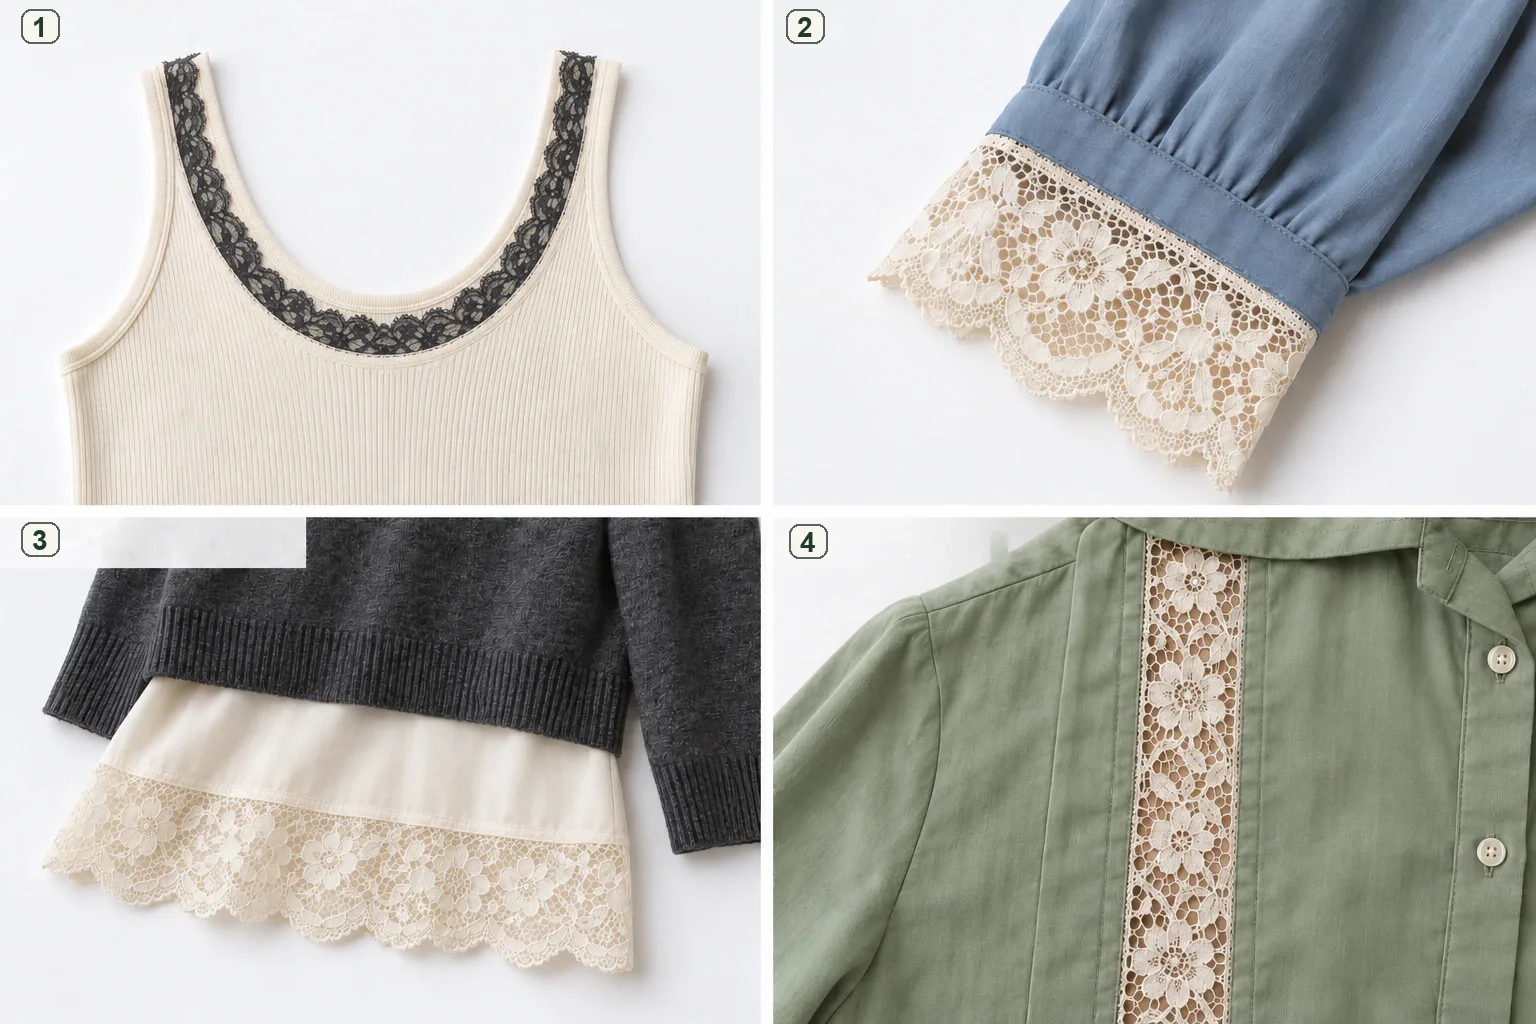
1. Neckline. 2. Cuff. 3. Layered hem. 4. Insertion. Follow the trim around the neckline and below the cuff. At the hem it sits under another layer. The vertical lace insert has fabric joined along both long edges.
01 A fine border around a neckline
Lay the edging around the actual neckline curve before approving it. Watch the free scallops at the tightest turn. If they lift or fold over each other, try a narrower strip or a band that follows the curve more easily.
02 A cuff that adds a visible band
In the cuff pictured here, the lace extends beyond the sleeve. Lay your strip in both positions if the drawing is unclear. Lace against a solid sleeve shows the colour beneath it, while the extension leaves the mesh open.
03 A lace edge visible below another layer
Pin the lace to the layer that will carry it, then put both layers together. Where the two hems meet, mark how much lace should show when worn.
04 An open strip between two fabric sections
A see-through stripe between two pieces of cloth needs a sewable long edge on each side. Pin it between two scraps and check whether both seam lines can hold the lace without covering the centre flowers.
Panels, matched sets and small accessories
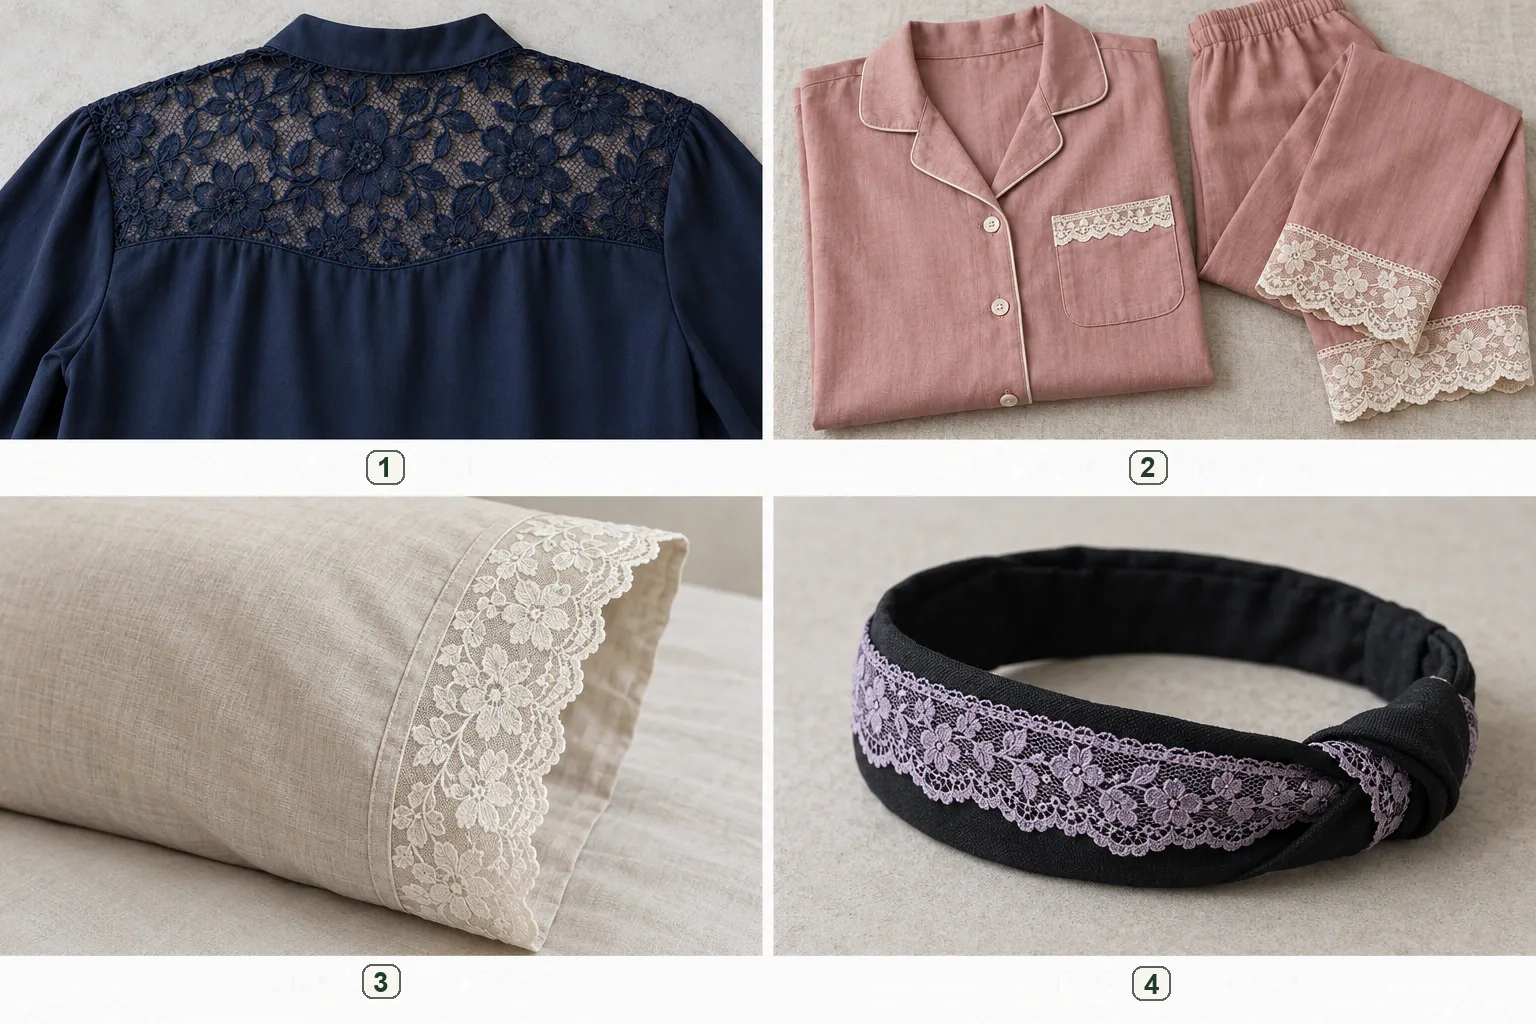
1. Lace panel. 2. Coordinated set. 3. Pillowcase edge. 4. Headband detail. The upper-left yoke needs a piece wide enough to cut to shape. The matching set uses a floral detail on separate pieces. At the pillowcase edge and on the headband, follow the length of the band.
05 A shaped panel at the shoulder or back
Set the shoulder or back pattern on the lace. If the outline runs outside either usable edge, look for wider fabric. Turn a directional flower the way it should appear on the garment before judging the fit.
06 A related detail across a matching set
For a narrow pocket edge and a wide trouser band, request both widths on the same sample card. Look at their colour and flower scale together on the chosen garment fabric.
07 A decorative border at a pillowcase opening
Place the border on the pillowcase fabric and turn one corner as it will be sewn. A flat corner gives a better basis for approval than a straight piece photographed on its own.
08 A lace detail on a fabric headband
Check which part of the headband stretches. If a separate elastic back already provides the movement, size the front lace for coverage and appearance on the headband.
A leg opening can also have separate elastic under the lace. The leg-opening case shows the layers, the overlap at the join and the petals left in view.
Which change would make the lace stand out?
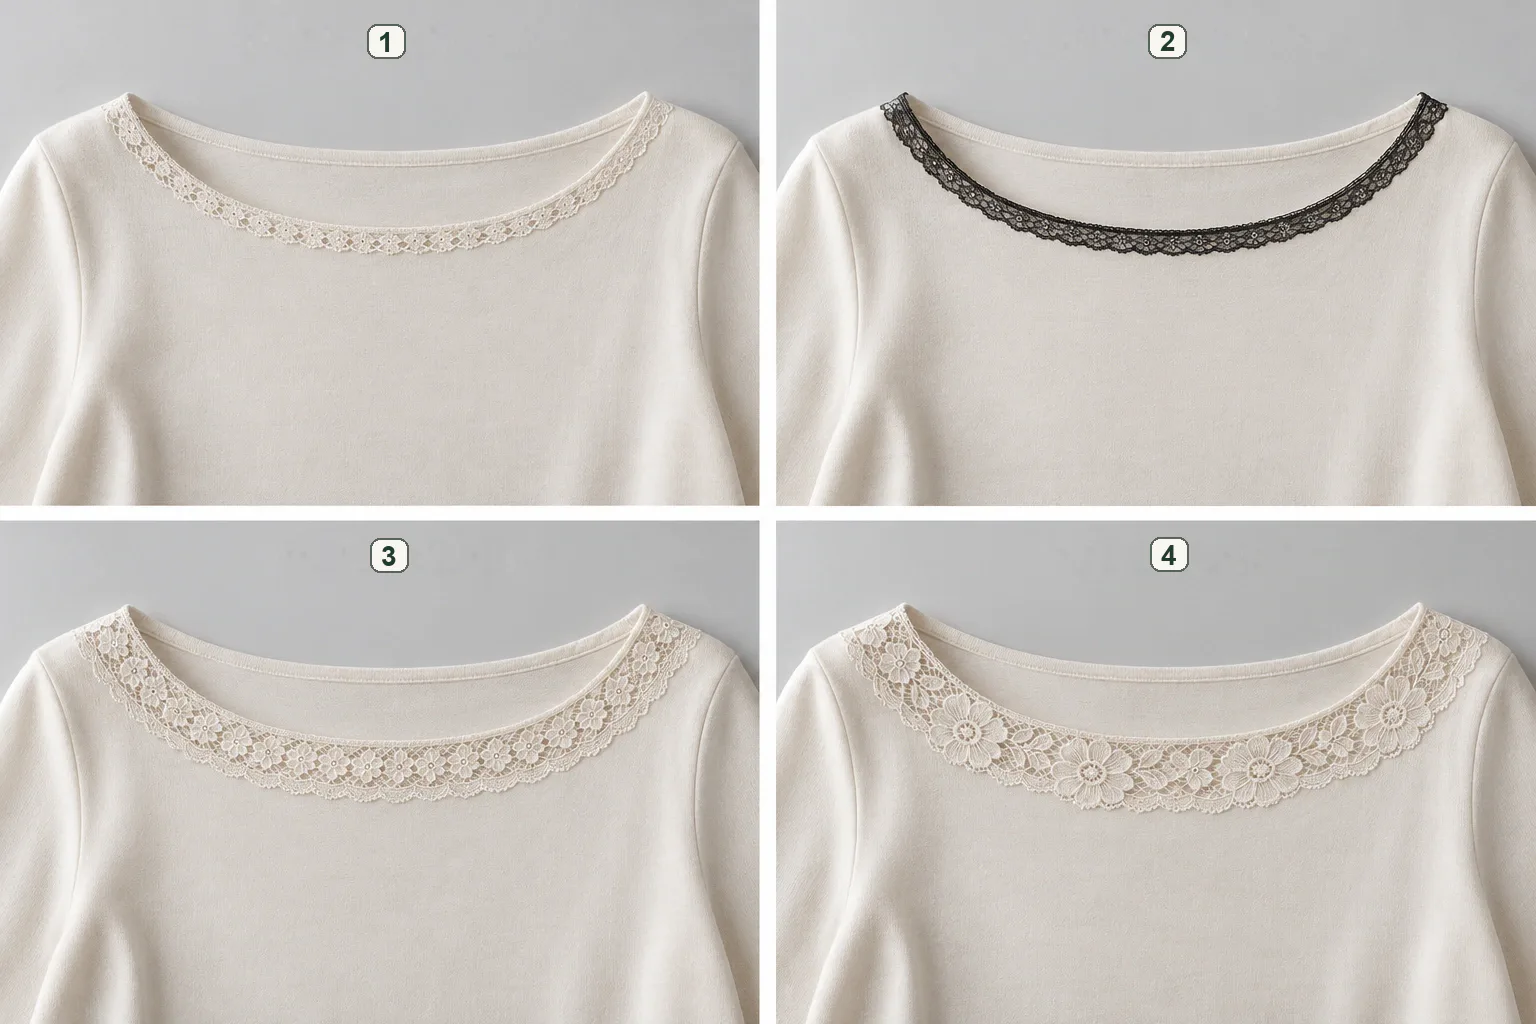
1. Narrow, tone-on-tone. 2. Narrow, contrasting. 3. Wide, tone-on-tone. 4. Larger motif. A dark narrow trim draws a line around the neckline. A wider tonal band or a larger flower takes up more of the front, even though the blouse shape stays similar.
Desired look | A useful direction to show the supplier |
|---|---|
A quiet detail | A narrow edge close to the base-fabric colour; send a piece of that fabric for colour discussion |
A clear outline | A contrasting narrow trim; mark the line you want it to follow |
A visible decorative band | A wider trim; indicate the depth you want to show after attachment |
The flowers as a focal point | A larger motif; show the position where a complete flower matters |
Lace for a wedding backdrop, table or chair
A backdrop, table and welcome display can share a lace theme while using different materials. Decide whether each needs a whole panel, a visible band or a fine border. In these settings, stable shape and the right pattern may matter more than stretch.
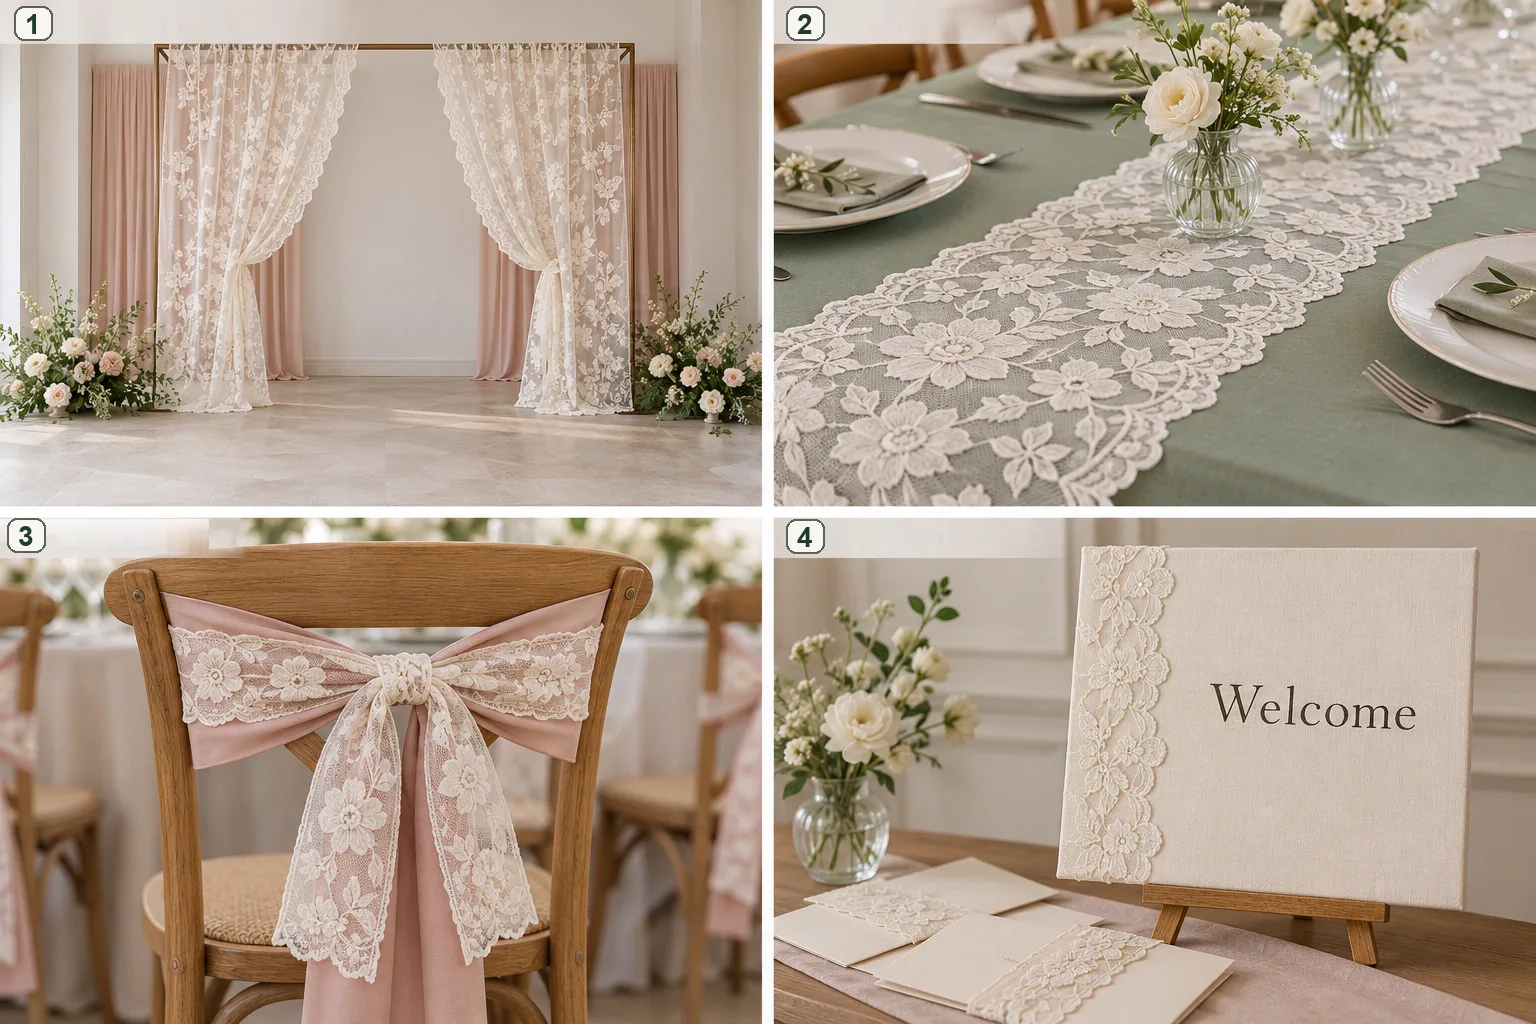
1. Ceremony backdrop. 2. Table runner. 3. Chair trim. 4. Welcome display. The backdrop and runner cover a surface. The chair decoration wraps around a backrest, while the welcome display uses lace in a much smaller area. Measure each position on its own.
09 Ceremony arches and photo backdrops
For a broad backdrop or side curtain, start with full-width fabric. Mark finished width, drop and acceptable seams on a front-view drawing. For a border along a frame, measure that route for trim. If the background needs hiding, include a separate backing in the order.
10 Reception tables and dessert displays
A runner decorates the tabletop; a border follows a tablecloth edge; a skirt covers the table front. For a runner, record table length, visible width and end drops, then compare finished pieces, wide bands and cut fabric. View the sample on the actual tablecloth colour.
11 Chair details need a full sample on the actual chair
An overlay on a fabric sash, a tied lace band and a fitted chair cap are different orders. Make a complete sample on the actual chair, including its knot or join and hanging ends. Confirm the attachment with the furniture provider, then order by chair type and piece count.
12 Welcome signs and coordinated gift details
Use related narrow trims on welcome boards, place cards and favour packaging. Mark whether the lace follows one edge or wraps around the item. Check corners, joins and flower placement on the actual surface with the intended attachment. List finished piece counts as well as trim length.
A flat panel and a gathered curtain need different quantities
Gathering puts more fabric into the same visible opening. Record the finished coverage and proposed fabric width separately, then use a trial hanging to settle the folds. Stretching a narrower piece across the opening changes its pattern and is not a substitute for allowing enough fabric.
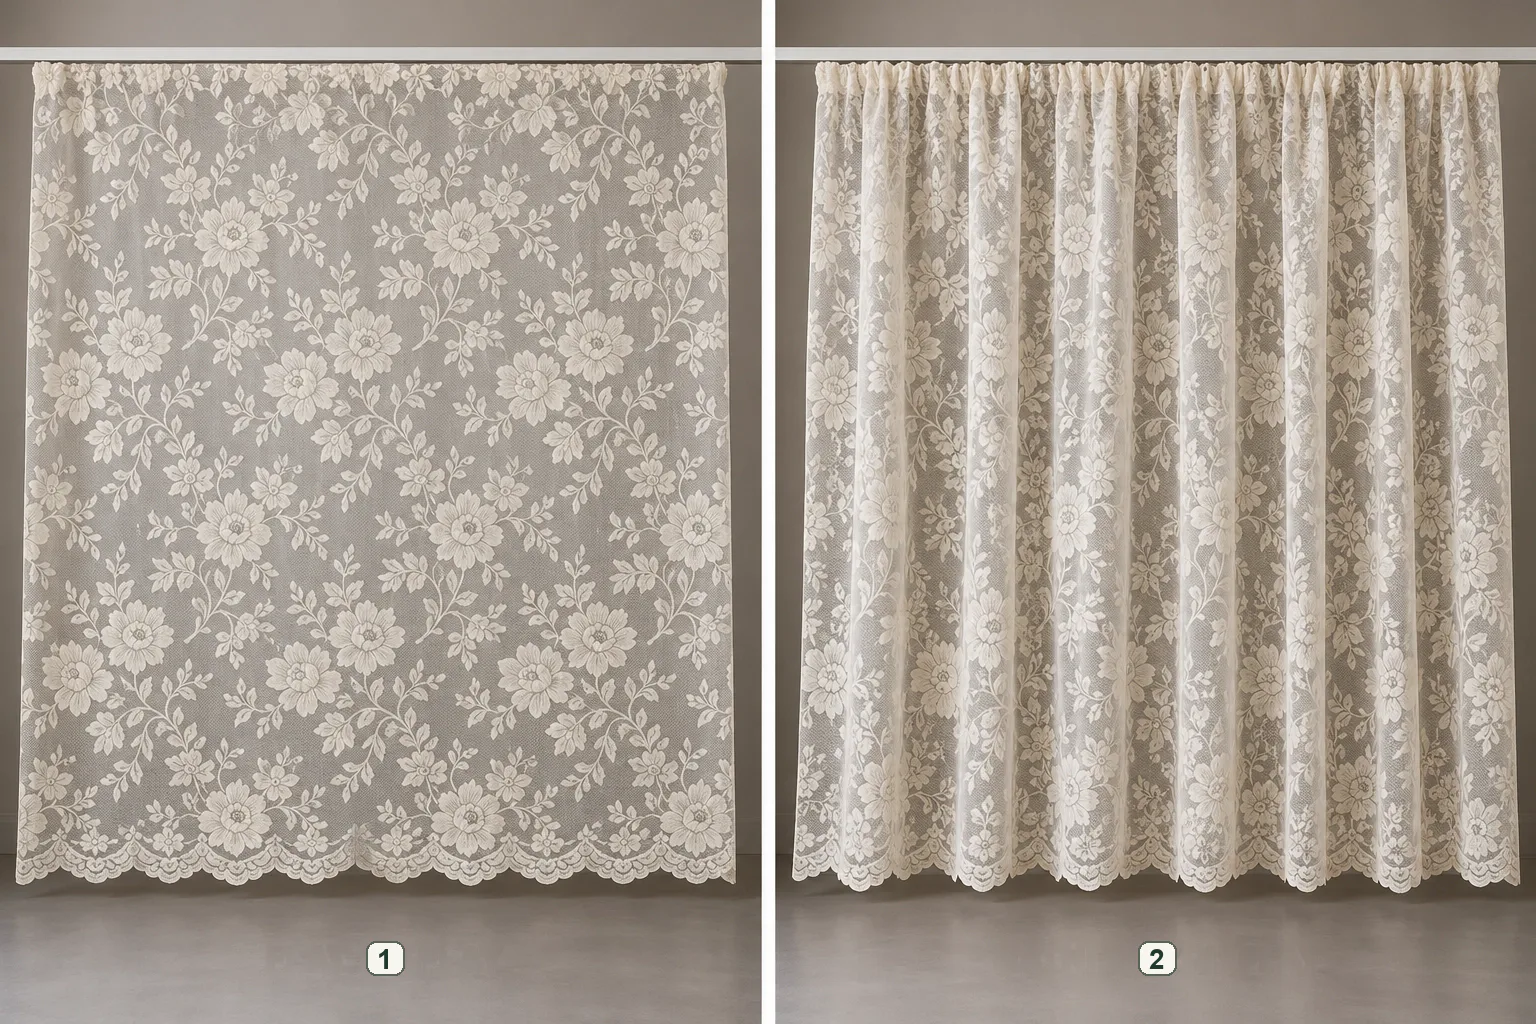
1. Flat panel. 2. Gathered panel. On the left, you can follow a flower across the flat panel. On the right, folds hide parts of adjacent flowers. Pin a length of the proposed material to a sample span and check the look before calculating how much to order.
For a fixed outline, compare a non-stretch candidate. Trial the proposed heading and backing for the planned display duration, checking length, motif shape and lighting. Confirm any material documents required by the venue and, for reusable pieces, the cleaning and storage method.
Work out a runner order from one finished sample
Suppose the approved band is 30 cm wide and has the two finished long edges wanted for the runner. Each of 12 tables is 1.80 m long. Allow a 20 cm drop and 2 cm for finishing at each end. Here the design allows any flower at the short ends.
Item | Calculation |
|---|---|
Finished length per runner | 1.80 + 0.20 × 2 = 2.20 m |
Cut length per runner | 2.20 + 0.02 × 2 = 2.24 m |
Pieces to make | 12 for use + 1 approval sample + 2 spares = 15 |
Total cut length | 15 × 2.24 = 33.60 m |
If supplied in usable continuous 20 m rolls | 8 pieces fit per roll; 2 rolls = 40 m cover the 15-piece plan |
For this layout, two uninterrupted 20 m rolls give sixteen possible cuts. Make the fifteen specified runners and the total length left across the rolls is 6.40 m. Ask where any joins fall before accepting the rolls. If buying ready-finished runners, put 2.20 m on the order as the finished length.
Turn the purchase list into an installation plan
Ask the venue where and how textiles may be attached before specifying hems, ties or curtain headings. Record the agreed arrangement, responsible person and handover time.
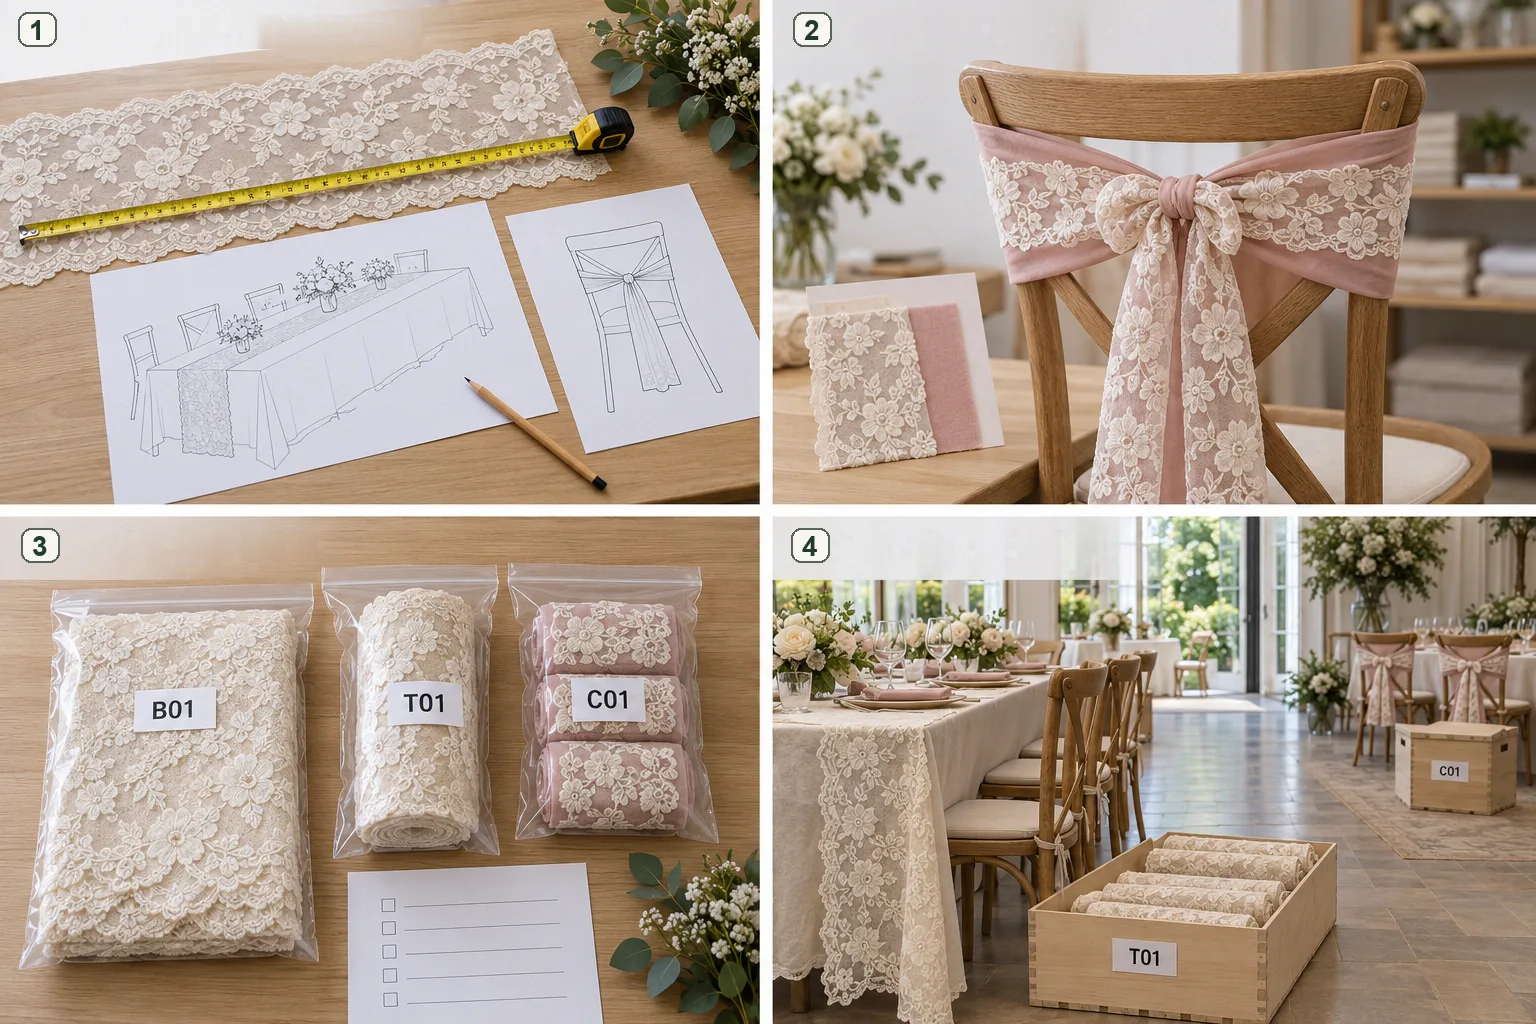
1. Measure the position. 2. Approve one full sample. 3. Label and pack. 4. Set out by zone. Measure the position and try one piece in place. Once approved, pack by location. B01 marks a backdrop piece, T01 a table piece and C01 a chair piece, so the installer can open the right bundle first.
Stage | What to record and hand over |
|---|---|
Before purchase | Dimensions, furniture, lighting, permitted attachments, required documents and access times. Name who decides on changes to outdoor setups. |
Before batch cutting | Approved sample, finished sizes, motif and seam positions, and attachment photos. Installer confirms supports and fixings. |
Before dispatch | Label by zone, reference, colour, dimensions and count. Pack lace, backing and accessories with matching component codes. |
During setup | Check the layout and supports; install by code. Check hanging ends and clear routes with the venue lead. Responsible installers handle structural and work-at-height decisions. |
Handover and removal | Photograph finished areas. Record replacements, contact person, removal time, returnable items and packing method. |
Work backwards from venue access: approve samples, produce, inspect, trial-assemble and pack before installation. Agree durations with suppliers and installers. If custom sampling cannot fit the schedule, compare available finished pieces or rentals that can be checked on the actual furniture.
What should the supplier look for?
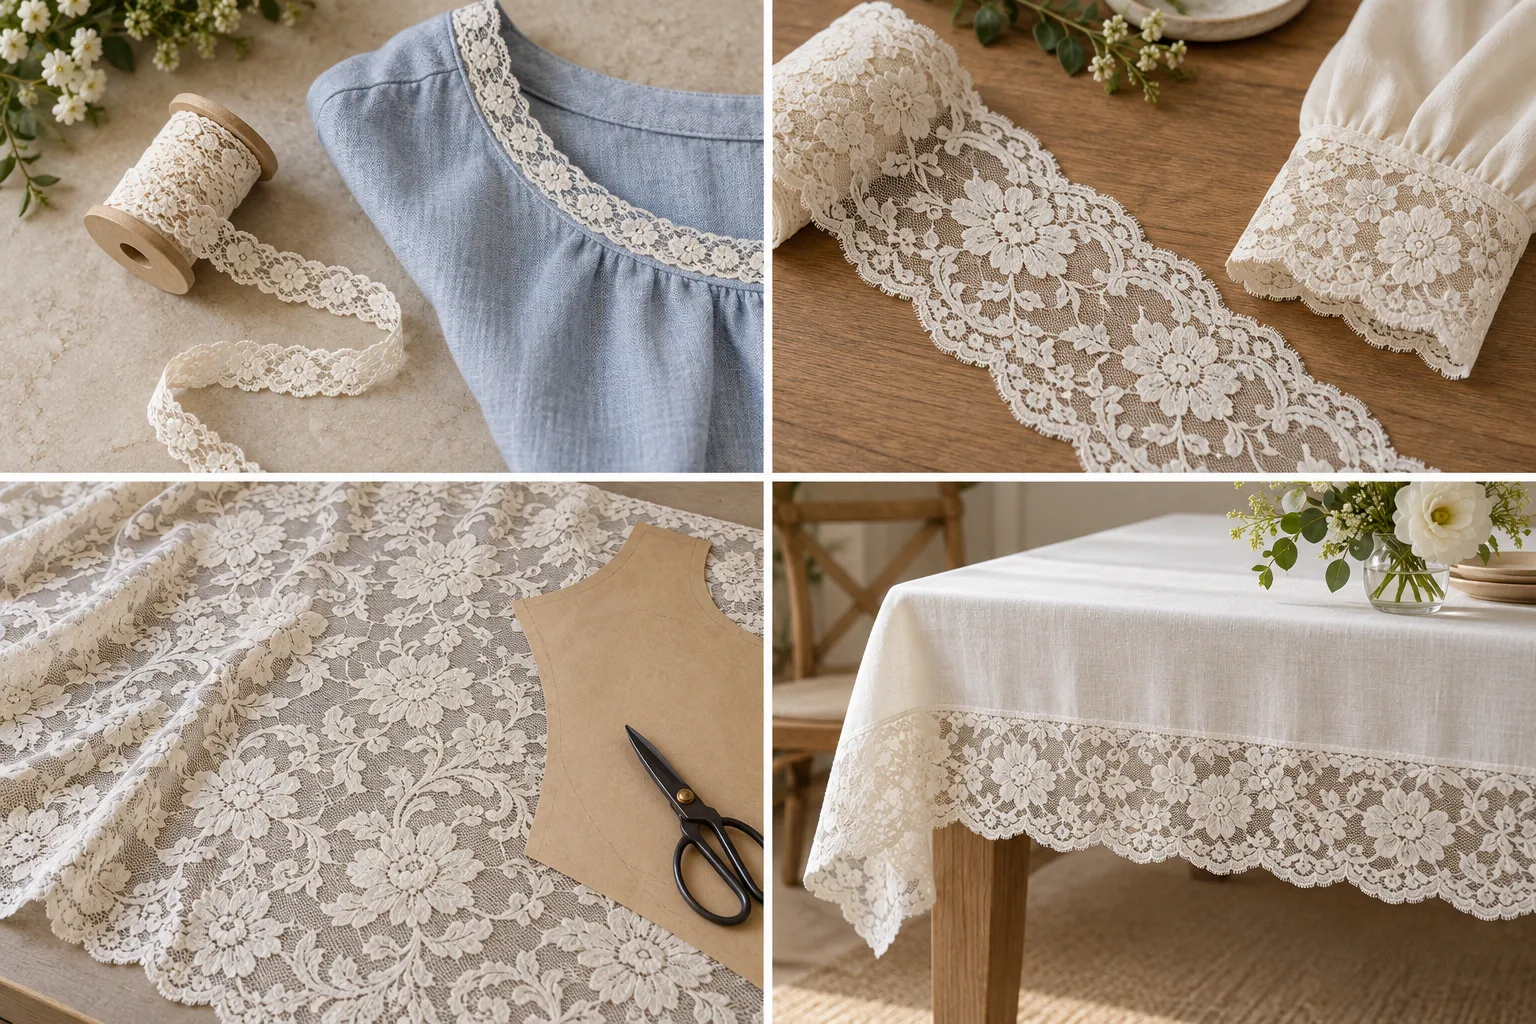
The neckline uses one finished edge. At the cuff, more of the band is on show. For a cut panel, the pattern piece has to fit inside the usable fabric width. The table border uses a continuous length from end to end.
Start with the piece your design needs: narrow trim, a wider band with finished edges, or fabric for cutting. Compare the stretch lace trim collection and nylon-spandex lace fabrics separately, and ask for the closest existing style.
If an existing style suits the drawing, request a current sample of that reference. If the width, edge or flower placement needs to change, ask whether another available style will work before discussing custom lace development. Have the supplier identify whether the sample is an existing product or a new proposal, so you know which option you are approving.
Compare the cost of the finished piece
Ask for the price unit, pack length, minimum order by colour, sample offer and lead time. One metre of narrow trim and one metre of full-width fabric are different purchases. Compare the usable pieces you expect to obtain, including any cutting, joining, edge treatment and motif-positioning allowance.
For repeat collections, confirm current stock, conditions for reordering the same reference and any custom-development requirement separately. An available sample does not tell you whether the same material will be available for the next order.
How much material should the sample room receive?
Take the curve, the pair of cuff patterns or the full sleeve pattern to the sampling table. A small flower cutting will identify a motif. To decide on a supply form, you also need the edges and enough material to lay the piece in its intended position.
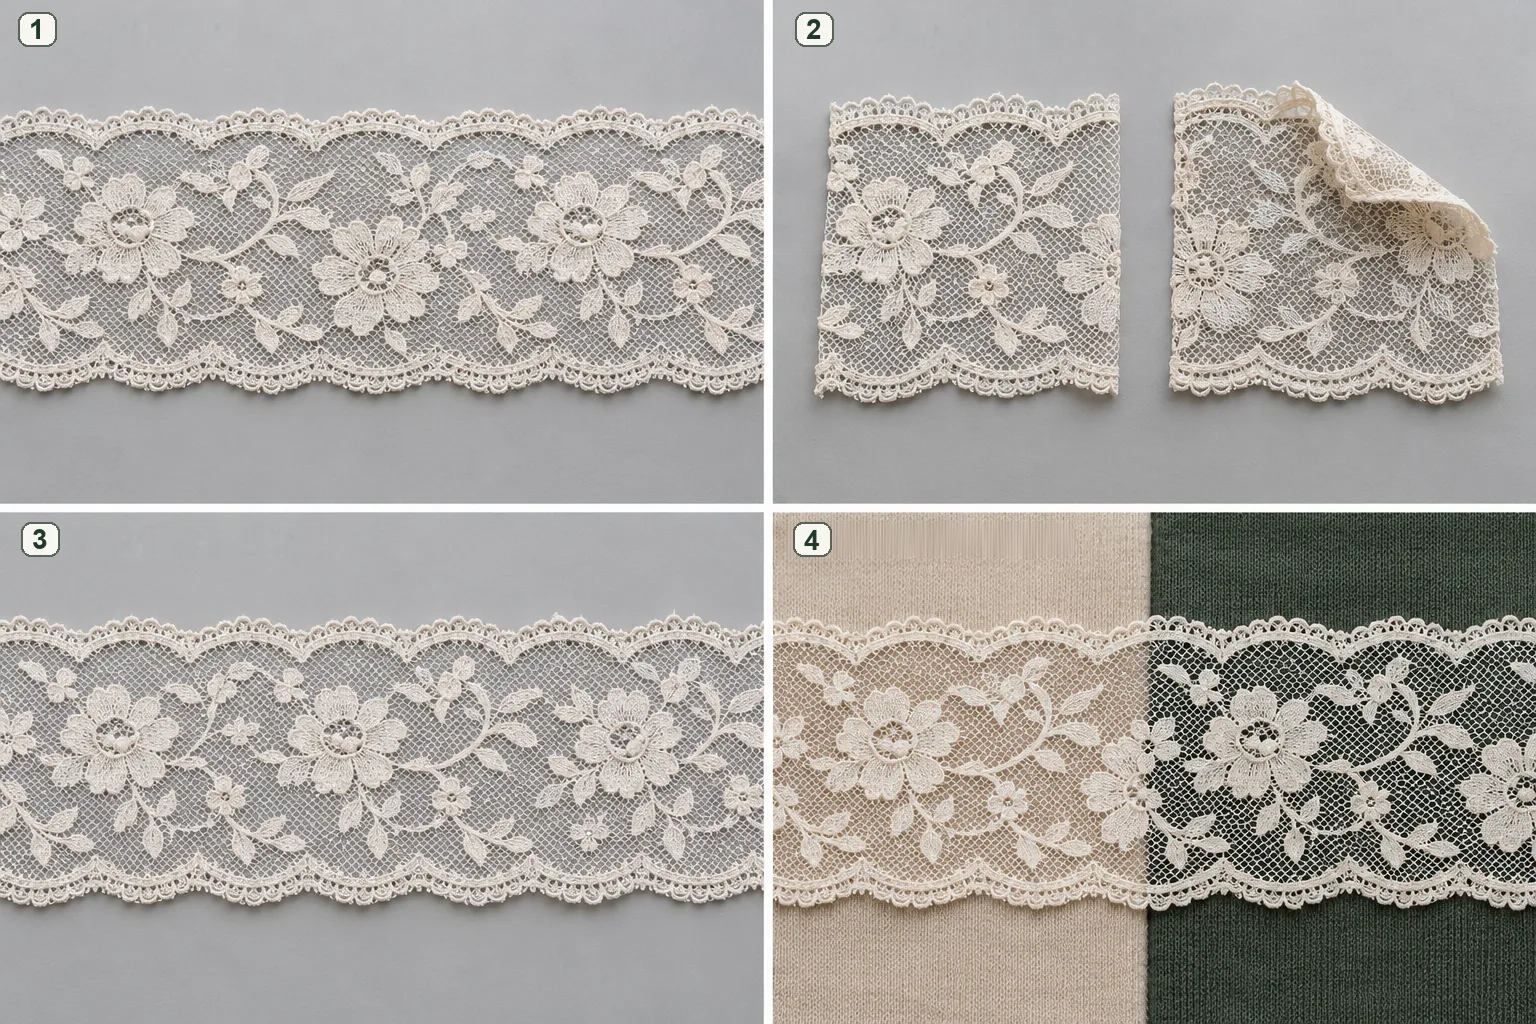
1. Full width. 2. Face and reverse. 3. Pattern repeat. 4. On the base fabric. Ask to see the full strip across its width, both faces, two matching motifs along the length and the lace on your chosen backing. Together these views show the edge, repeat and open areas that a tightly cropped flower misses.
If this is the open question | What to have in the sample room | Decision before ordering |
|---|---|---|
Will a fine edge follow the neckline? | A narrow strip with both edges intact, long enough for the actual neckline curve | Pin it round the tightest turn and keep the candidate that lies flat there. |
Will the rose band make two matching cuffs? | One continuous length covering both cut cuffs, their joins and any length needed to start each at the approved flower | Make the pair. If both show the intended row of roses, retain the band reference and the cut length used. |
Will a shaped panel fit? | A full-width length with the edges, enough for the pattern pieces in their required direction | Lay the pieces on the usable area. If either crosses the usable edge, ask for wider fabric or revise the layout. |
For the measurements to mark on the chosen strip, see width, scallops and repeat.
Discuss a real requirement
Turn the reading into a practical next step.
Send a short note, product reference, photograph, swatch or tech pack. Technical feasibility, sampling, documentation and production terms are confirmed after review.
Start an inquiry