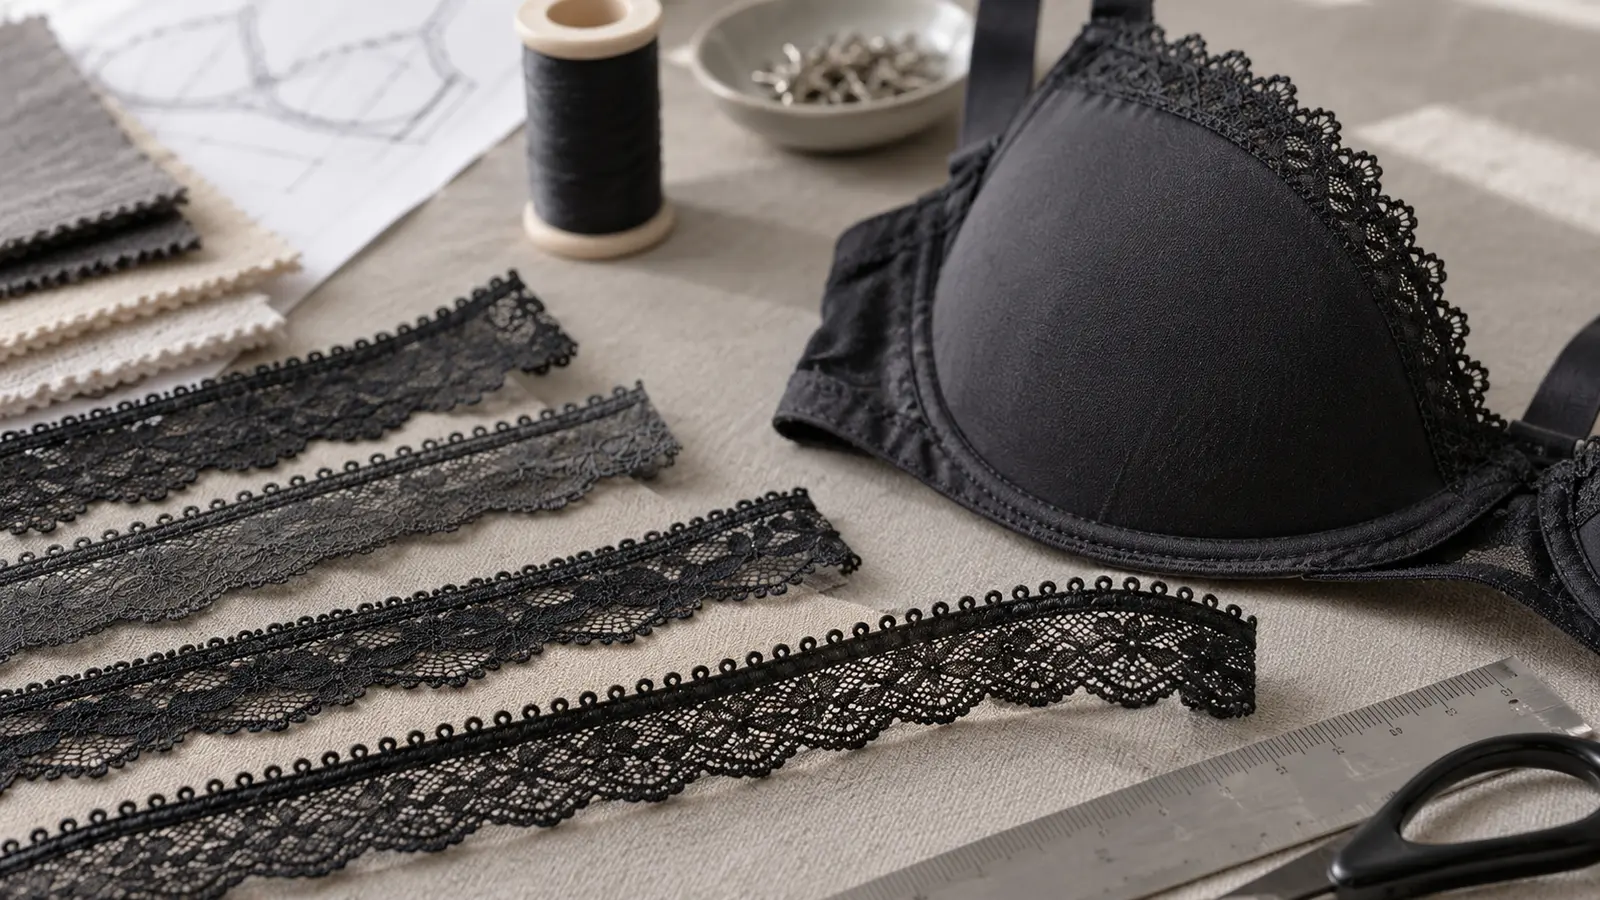
For bra development, the edge construction—not the decorative lace body—controls fit and recovery.
When a bra neckline gapes after two months of wear, the seam is rarely the problem. The lace edge stretched out and never came back.
That distinction matters because most tech packs treat narrow stretch lace as one line item — "15 mm stretch lace, black, 8,000 m" — and specify nothing about the edge itself. The edge is where the garment meets the body and where the load concentrates. It has its own elongation, its own recovery, and its own failure mode, and none of those are inherited from the lace body behind it.
Pick the edge first. Then pick the lace.
The edge carries the load, not the lace body
On a bra cup top, roughly the outer 3 to 5 mm of the trim absorbs the tension every time the wearer raises an arm. The ground mesh behind it barely moves.
This is why two trims with the same fiber content, same width, and same stated stretch can behave completely differently on the body. A picot edge with two spandex ends inlaid along the border holds its line. A scalloped edge with no reinforcement at the points elongates unevenly, and the scallops flatten into a wavy line that photographs badly on a hanger.
Ask your supplier one question before anything else: what runs along the finished edge? If the answer is only nylon, the edge will grow. If the answer includes a spandex or elastane inlay along the border, ask for the denier — a 20 D inlay behaves nothing like 40 D at the same width. Naming is inconsistent across suppliers, and all refer to the same fiber class, so specify denier rather than trade name.
Test it before you commit: clip a 100 mm section, mark it, stretch it to 30% by hand for a minute, release, and remeasure. If it does not return to within 3 mm, it will not survive 30 wash cycles at the neckline.
Four narrow stretch edges you can actually buy
Narrow stretch lace for bras arrives in four edge families, and the choice is dictated by where the trim sits, not by which one looks best on a sample card.
| Edge type | How it is formed | Best position | Main limitation |
|---|---|---|---|
| Picot | Small loops knitted along the border, low profile | Cup top, neckline under tight outerwear | Reads as plain; little decorative value on its own |
| Scalloped | Shaped points, typically 4 to 10 mm deep | Cup top, wing top on fashion bras | Points beyond 8 mm deep roll and flip without edge inlay |
| Eyelash | Loose fringe formed during knitting, then separated | Cup top and neckline on non-layered styles | Fringe snags and mats where it rubs a band or strap |
| Plush or folded | Soft-faced border, sometimes with a turned edge | Underband, cradle, any skin-contact load point | Bulkier; adds visible thickness under thin fabric |
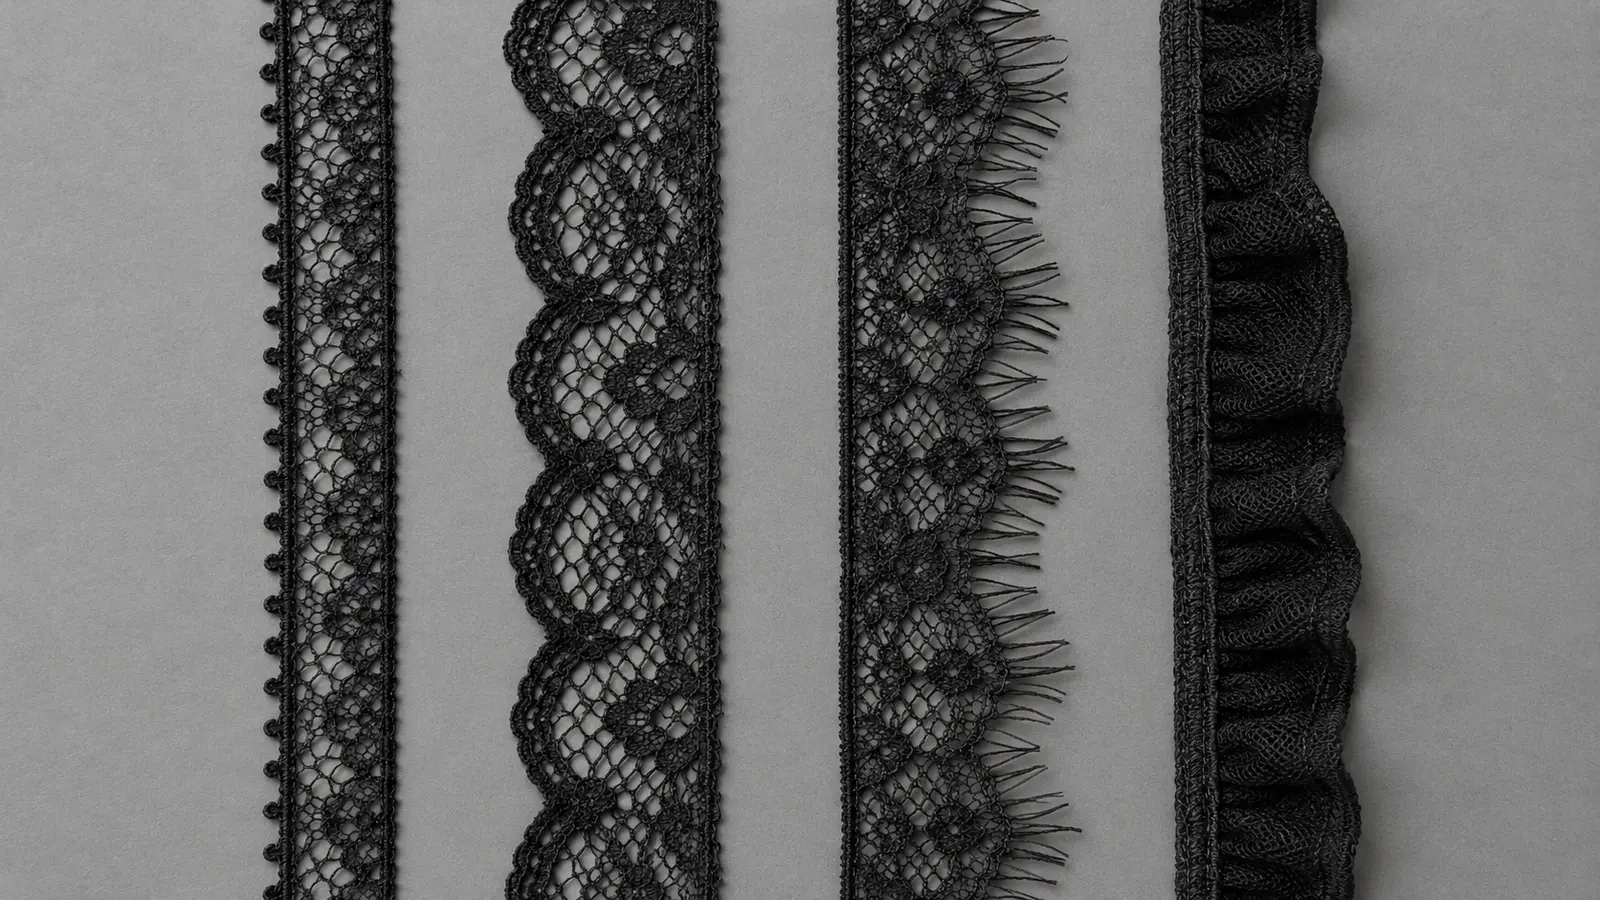
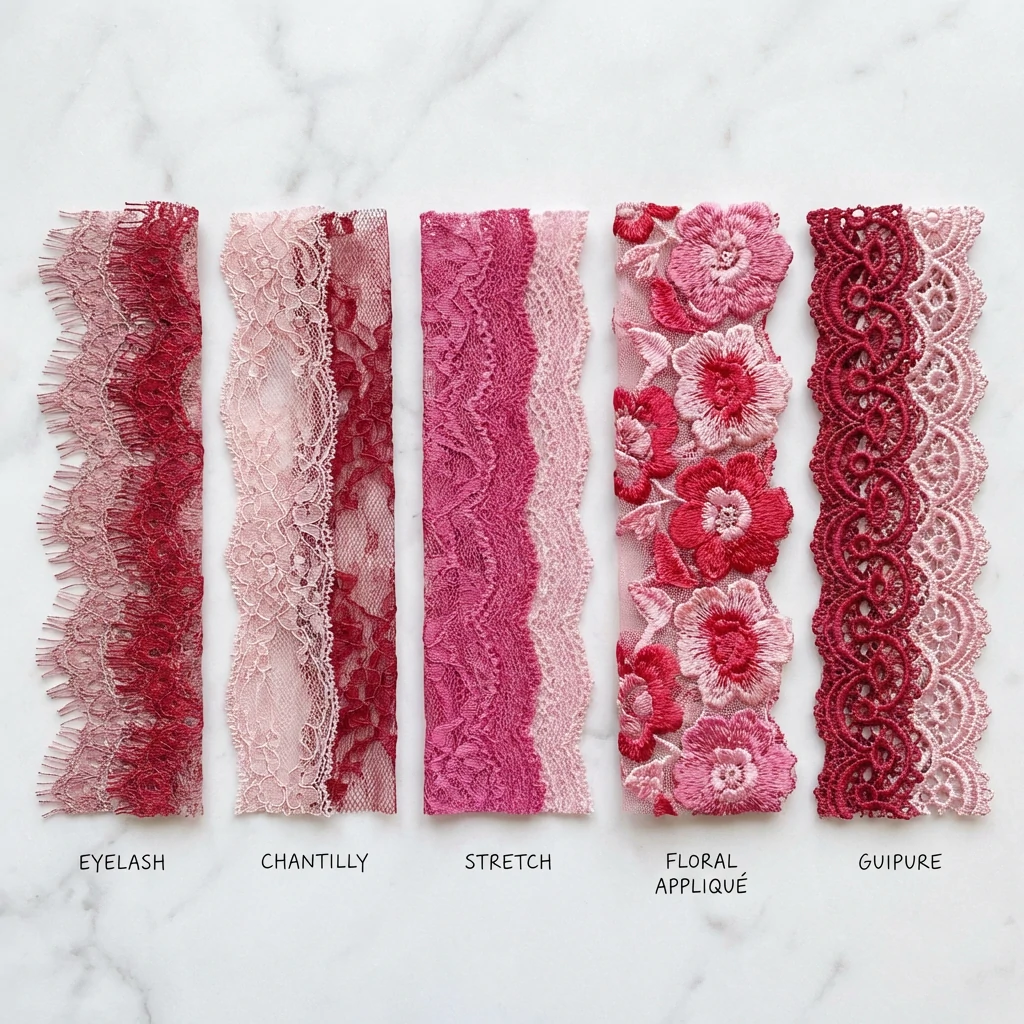
From left to right: a visual comparison of picot, scalloped, eyelash, and plush or folded edge families.
The eyelash option gets specified far too often. It is the softest-looking edge on a sample card and the first to look worn out in a customer photo, because the with no bound border. Reserve it for cup tops that face outward and never contact a band.
For an underband, the plush or folded edge is the only defensible choice. That is the position where lace sits under sustained tension against skin for 12 hours, and a decorative point there becomes an abrasion point.
Galloon or single edge changes your cost per usable metre
A galloon has two finished edges. A single-edge trim has one, with a cut or ground selvedge on the other side.
For narrow widths the galloon is usually the cheaper route, because a 30 mm galloon split down the centre yields two usable 15 mm edges from one knitting pass. Ask whether the supplier splits it in-house and whether the split edge is heat-sealed, ultrasonically cut, or simply slit. A slit edge will fray at the cup seam even when it is buried in a seam allowance.
Single-edge trims earn their premium in one case: when the unfinished side needs to disappear into a bonded or laminated cup, where a second decorative edge would add bulk under the mould. Otherwise, specify galloon and take the yield.
One caution on width. Narrow trims lose width during dyeing and heat setting, and a nominal 15 mm can arrive at 13.5 mm after finishing. Put the width tolerance in the order — ±0.5 mm is achievable on narrow raschel lace, ±1 mm is comfortable — and confirm it on dyed bulk rather than on greige. Choosing the nominal width itself follows the same logic as .
Specify recovery, not stretch
Elongation at break is the number most suppliers quote and the least useful one for a bra. Nobody wears a bra at break.
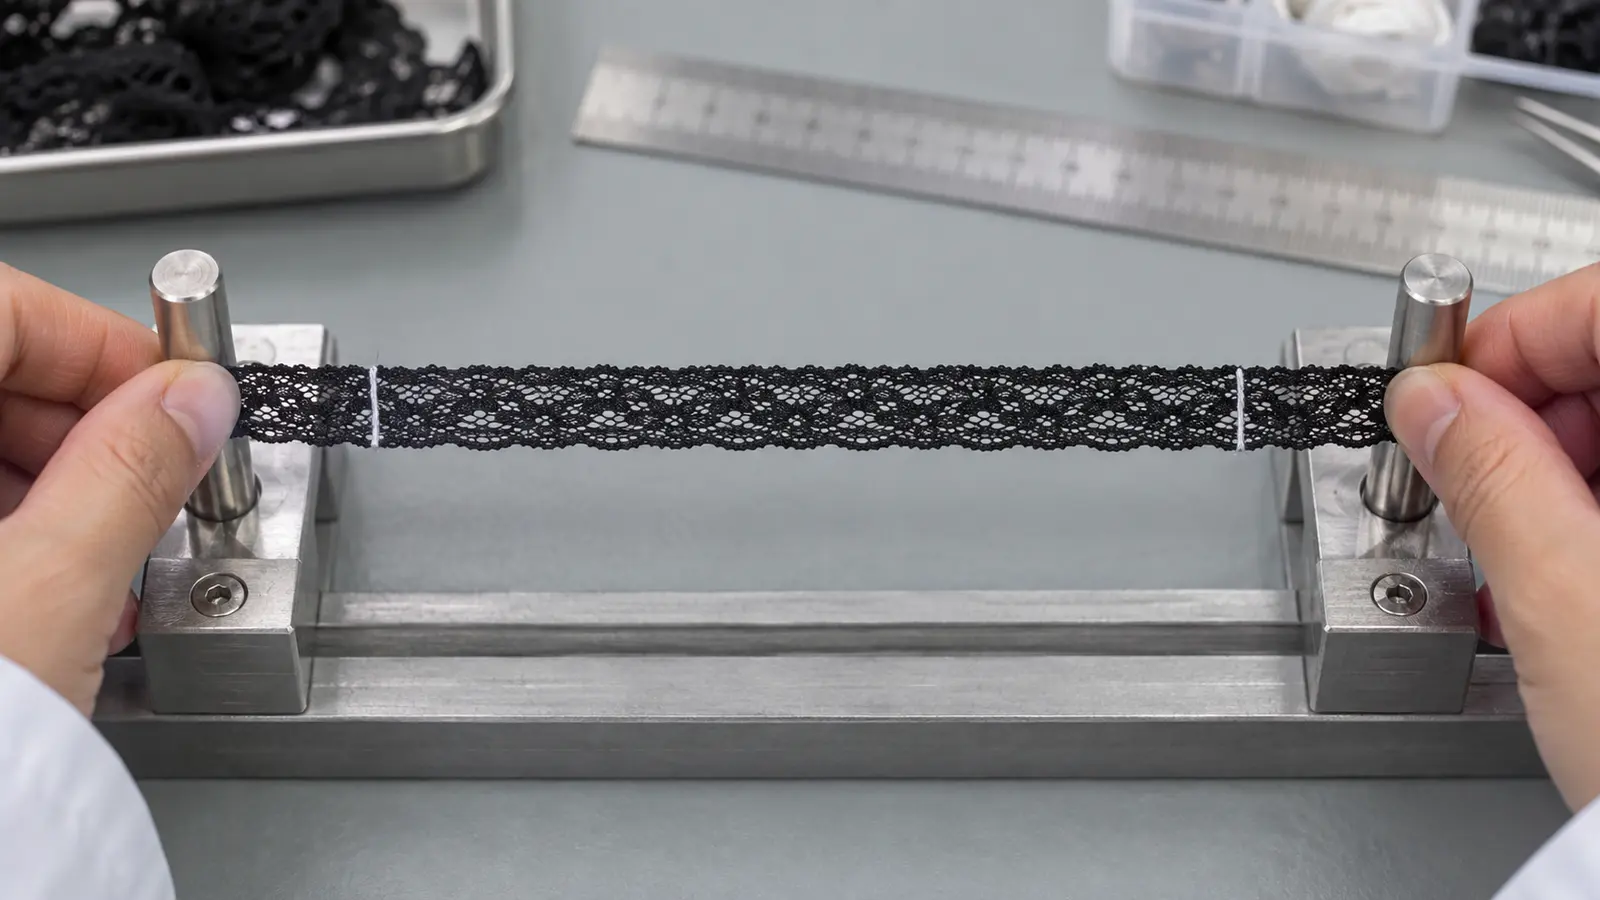
Mark a fixed gauge length, load the lace in its use direction, release it, and measure the residual growth rather than relying on hand-feel.
Two numbers decide whether the edge works:
-
Elongation at a working load — how far the edge extends at a force the body actually applies, not at rupture. Specify a force and an extension pair, for example percentage extension at 15 N, tested on the trim in its length direction.
-
Growth after cyclic loading — residual extension after the trim is held at 30% extension for an hour and then relaxed. Under 5% growth suits an underband. Under 8% is workable on a cup top.
A higher elongation figure feels like a better trim in the hand and is the most common sourcing error in this category. High elongation with weak recovery is exactly the combination that produces a gaping neckline, and the two numbers are independent. Insist on both, measured in the direction the trim is used.
Which direction stretches is not obvious, either. Some narrow trims are knitted to stretch along their length, which is what you want for edging a curved neckline. Others are strips cut from wide elastic galloon and stretch across the width, which is useless on a neckline and fine as a panel insert. Pull the sample lengthwise before assuming.
Match the edge to the zone
Each position on a bra applies a different load, so a single trim across the whole style is a compromise in at least one place.
-
Cup top and neckline — low modulus, high recovery. The edge must follow a curve without digging. Picot or a shallow scallop under 6 mm.
-
Underband and cradle — higher modulus, growth under 5%. Plush edge, spandex inlay along the border, and no decorative points.
-
Wings — stable in the length direction so the band does not migrate. If the wing lace stretches as easily as the cup lace, the band rides up.
-
Strap junctions and bridge — rigid or near-rigid. This is where a becomes a structural decision rather than an aesthetic one.
Skin contact deserves its own check. Nylon and spandex laces feel smooth flat on a table and can still abrade at the underband, so evaluate the sample on the back of the hand and at a flex point rather than on a fabric board — the same check that decides whether in any skin-contact application.
Where a narrow nylon spandex stretch lace fails on comfort at the band, a softer cotton-blend edge solves the feel but gives up recovery, so it only works on a non-supportive bralette. That trade is not negotiable through finishing.
Where these trims fail between sample and bulk
Three failures account for most rejected bra lace, and all three are visible on a dyed sample if you know to look.
White spandex showing through colour. Spandex takes acid dye weakly, so a black or navy trim can look perfect flat and reveal pale flecks along the edge when stretched. Stretch every dyed submit under strong light before approving it, which is also the moment to confirm the shade across the .
Latex core instead of spandex. Some low-cost stretch trims use a rubber-covered core. It degrades with body oils, heat, and chlorine, and it carries a sensitisation risk that most lingerie buyers will not accept. Ask for the elastic fibre type in writing rather than reading "elastic" on a spec sheet.
Straight stitching on a stretch edge. A straight lockstitch cracks the moment the edge extends. Narrow stretch lace needs a three-step zigzag, coverstitch, or flatlock with a ballpoint needle around 70/10, and the presser foot pressure reduced so the feed does not stretch the trim as it sews. Puckering at the cup seam is usually a .
What to approve before bulk
Send the factory a specification that names the edge, not just the trim.
| Field | What to state | Why it matters |
|---|---|---|
| Edge type and depth | Picot, scallop depth in mm, plush face | Determines roll and abrasion behaviour |
| Elastic fibre and denier | Spandex 20 D or 40 D, inlay position | Controls modulus at the border |
| Stretch direction | Along length or across width | Wrong direction is unusable on a curve |
| Extension at working load | Percentage at a stated force | Predicts fit, unlike break elongation |
| Growth after cycling | Maximum percentage residual | Predicts gaping after wash cycles |
| Finished width tolerance | ±0.5 to ±1 mm on dyed goods | Narrow trims shrink during heat setting |
| Wash and dry protocol | Cycles, temperature, drying method | Fringe matting and growth appear here |
Approve the trim sewn onto the actual cup fabric, not as a loose length. A trim that recovers well on its own can still be dragged out of shape by a heavier bonded cup, and that only shows up in a stitched assembly. The same discipline applies across all , where the sewn sample settles arguments the sample card cannot.
Frequently asked questions
What width counts as narrow stretch lace for bras?
Most bra applications use 10 to 25 mm, with cup tops clustering at 12 to 18 mm. Below 10 mm there is not enough body to hold a spandex inlay along the edge, which is why very narrow trims tend to grow.
Can I use the same stretch lace on the cup and the underband?
Only on unstructured bralettes. A supportive band needs higher modulus and tighter growth limits than a cup top, and a single trim that satisfies the band will feel stiff at the neckline.
How much stretch should a bra neckline trim have?
Ask for extension at a working load instead of a single percentage. As a starting point, a neckline edge should extend comfortably under light hand tension and return to within 3 mm per 100 mm after release.
Does eyelash lace work on bras at all?
On outward-facing cup tops, yes. Anywhere the fringe rubs a band, strap, or garment, it mats and loses definition well before the rest of the bra wears out.
Start with the zone, then the edge
The fastest way to improve narrow stretch lace sourcing is to stop specifying one trim per style and start specifying one edge per zone. A cup top and an underband are different mechanical problems, and a trim that solves both is usually solving neither well.
There is a commercial argument for this too. Splitting a style into two edge specifications looks like added complexity, but a galloon split into two usable edges often covers both positions from one knitting programme, so the SKU count rises while the development cost does not.



 WhatsApp Us